Showing posts with label Cake. Show all posts

Thursday, January 21, 2016

Triple Chocolate Mousse Cake

Guys, I am such a grown up.  Bri and I had a meeting last night with our REAL ESTATE AGENT.  We are officially starting our new home search and we couldn't be more pumped about becoming first time homeowners!!! No more of this renting silliness.  We are using words like invest and mortgage.  It's super crazy and I feel old.  

I am also a little fascinated by the fact that I am super excited to have an in unit washer and dryer.  I think this may actually be the determining factor on if you are an adult or not.  Do you get excited about having an in unit washer or dryer? If yes, then congrats, you are an adult.  Seriously, I couldn't be more pumped up about it.  I keep saying things like "I've made it!" and "I can't wait to leave things in the dryer and just grab them as needed."  I feel that this is both adorable and sad, but I am okay with it.

So, to celebrate the beginning of this house hunting journey and my path towards laundry-ease, I am sharing a recipe for Triple Chocolate Mousse Cake.  YUM! Plus, this cake has NO flour.  Just three layers of chocolatey goodness with a dense flourless dark chocolate cake-like base, chocolate mousse center, and white chocolate mousse top.  

This cake was a huge hit.  I brought it in for a staff potluck, and people told me that it was so good I should get paid to make it.  I should start charging people for the delicious things I make.  But, then I would think of it like a job instead of fun, so I am going to stick to making people happy with free treats.  

Today is also my half birthday and while I know that is not actually a thing, it is another small reason to celebrate so here you go:


Follow the link for the recipe at Tastebook since I barely changed anything.  Here are the few suggestions/things that I did to make this cake a success:

1. Find good quality chocolate.  It makes a difference.
2. CHILL.  Let things chill for a LONG time.  Then, putting the cake together works so much better.  
3. I found that my white chocolate layer didn't firm up like it should so in the future I would add a pinch more gelatin and let it cool even longer. 
4., Whenever the recipe said to whip something until soft peaks formed, I whipped until stiff-er peaks formed.  This makes the mousse more airy and light which I love.  


Tuesday, November 24, 2015

Caramel Apple Cake

Today is my last day of school this week!!! Plus, it's a test day!  I know...I'm a little evil.  I'm a math teacher and I'm excited about giving a test.  Actually, I'm really excited about this test because my students are going to do amazing on it and that is pretty awesome.

I'm also pumped because after school I am leaving for NYC with my family!  We are DRIVING there.  So, if we don't kill each other, by Wednesday night, we will be in NYC to meet up with my little brother and the University of Illinois Marching Band.  My brother is a proud member of this band and they are performing in the Macy's Day Parade on Thanksgiving!! How cool is that?

I'm excited to go to New York, see my New York family and see the Macy's Day Parade in person for the first time.  It is going to be so fun.

To celebrate, I'm sharing a cake!  This Caramel Apple Cake was inspired by the Brown Eyed Baker.  I made it for the ladies of my book club and they thought it was one of the best cakes they had ever had.  I made my cake with two layers of apple spice cake and then spread some "to die for" cinnamon, caramel cream cheese frosting over the whole thing.  Finally, I topped it off with some fresh slices of a granny smith apple.  YUM!  This dessert is super tasty and it is a great option for a Thanksgiving dessert that celebrates fall flavors.

Caramel Apple Cake

Ingredients:
4 cups flour
2 tsp baking soda
1 tsp baking powder
1 tsp salt
2 tsp cinnamon
1 tsp nutmeg
1 tsp cloves
1 1/2 cups unsalted butter, at room temperature
2 1/2 cups sugar
2 eggs
4 cups unsweetened, plain applesauce
Frosting:
12 oz light cream cheese
1 cup unsalted butter
3-4 cups powdered sugar
1 tsp cinnamon
2 tbsp caramel sauce
1-2 tsp heavy cream (optional)

Directions:
1. Preheat oven to 350 and line two 9 inch circular cake pans with parchment paper.  Grease generously.
2. In a medium sized bowl, whisk the flour, baking soda, baking powder, salt, cinnamon, nutmeg, and cloves together.
3. In a large bowl, beat the butter with the sugar for a few minutes.  Beat until it is light and fluffy.  Beat in both eggs until well combined.
4. Alternate adding the flour mixture with the applesauce mixture to the butter and sugar.  Start and end with the flour. Divide the batter into the two prepared pans. Bake for 55-60 minutes.  Let cool completely.
5. To make the frosting, beat the butter and cream cheese together until well combined.  Add in the powdered sugar, 1/2 cup at a time until you have a desired taste and consistency.  Add in the cinnamon and caramel sauce and beat well.  Add in the cream if needed.
6. Once your cake is totally cooled, you can spread a layer of frosting over the top of one layer and the place the other layer on top.  Frosting completely and top with some apple slices.

Enjoy :)

Saturday, July 18, 2015

Apple Cinnamon Coffee Cake

Happy Saturday everyone! Today is one of my besties birthdays so I gotta give her a shout-out: Happy Birthday Tamara! Tamara, is also one amazing chef and we became really good friends after discovering our mutual love and appreciation for cupcakes :).  She is pretty awesome and she is one of my bridesmaids!  I hope you have a great day, Tamara!

Today is also pretty exciting in that I am picking up my race day swag for the Rock and Roll Half Marathon.  I am going to be running that tomorrow and I am keeping my fingers crossed for a cool morning and no thunderstorms...Even though the weather is pretty awful right now, I am still very excited!  

Today, Bri and I are also going to see the new movie, Trainwreck.  After that is when we are gonna head over to the half marathon expo, and then we have to scurry back to get ready for dinner at Due Lire with my parents.  My birthday is coming up, so we are starting the celebration tonight with dinner.  I have never been to this restaurant, but I have heard amazing things and I will for sure report back.  

I figured that today was a great day to share this Apple Cinnamon Coffee Cake.  I made this a while back, but I was in a coffee cake mood this morning.  I mean, it's Saturday, I'm running 13.1 miles tomorrow, and my birthday is this week.  Is there a better way to celebrate than with a good, ol' coffee cake? 


Apple Cinnamon Coffee Cake

(adapted from Barbara Bakes)
Note: Please go check out her blog for some amazing photos and the recipe.  I changed a few things, so I will tell you about that, but she did a really lovely job with the dough and has some amazing photos of it! 

Ingredients:
2 cups flour
1 cup whole wheat flour
1/4 cup sugar
1 package of yeast (I used regular as opposed to quick rise)
1/2 tsp salt
1/2 tsp cinnamon
3/4 cup skim milk
1/4 cup unsalted butter, cold and cubed
2 eggs
Apple Filling
4 large apples (I used Granny Smith)
1/2 cup sugar
1 tsp cinnamon
1/4 cup lemon juice
3 tbsp unsalted butter
Streusel Topping
1/3 cup brown sugar
1/3 cup flour
1/4 cup old-fashioned oats
1/2 tsp cinnamon
pinch of salt
3 tbsp unsalted butter, melted
Icing
1 cup powdered sugar
1 tbsp skim milk

Directions:
1. In a large bowl, beat 1 cup flour, 1 cup whole wheat flour, sugar, yeast, salt, and cinnamon.
2. Place butter and milk into a microwave safe bowl and microwave for 1 minute.  Add warm milk to the flour mixture and mix until combined.
3. Lightly flour a clean surface and remove dough from the bowl to knead.  Knead for about 8-10 minutes or until dough is smooth and springy.  Place into a lightly greased bowl and place bowl in a warm location.  I turn on my oven to 100 degrees and then leave the bowl in there with the door open.  Let the dough rise until doubled in size.  This took a little over 1 hour.
4. While the dough is rising, peel and chop apples.  Place apples, sugar, cinnamon, and lemon juice in a bowl and toss to combine.  Pour mixture into a pan and add the butter.  Saute the mixture for about 10 minutes so that the apples start to soften.  Let cool.
5. To make the streusel topping, combine the brown sugar, flour, oats, cinnamon, and salt in a bowl.  Add the melted butter and combine until your mixture forms small clumps.  Set aside.
6. Prepare two 9 inch cake pans.  Place parchment paper in the bottoms of the pans and generously spray with non-stick spray.
7. Once the dough is ready, divide in half.  Take one half and divide that into two pieces.  One piece should be about 2/3 of the dough and the other should be about 1/3 of the dough.  Take the large piece and roll it out so that it fits into the bottom of a cake pan.  With the small piece, roll it out so that it looks like a long rope.  Use this to wrap around the edge of the pan.  You are basically creating a wall to go around the bottom of the pan.  Repeat this with the other half of the dough for the second pan.
8.  Divide the apple filling into each of the pans and then sprinkle the streusel over the tops.  Cover with plastic wrap and let rise until doubled.  This took about 1 hour.
9.  Preheat the oven to 350 and once the cakes are ready, bake for about 20 minutes.
10.  When you are ready to serve, mix the powdered sugar with the milk to create your icing and drizzle over the tops of the cakes.

Enjoy :)


Sunday, June 28, 2015

Happy Pride Parade Day! Celebrate with Rainbow Cake

With all the great news regarding marriage equality and with the Chicago Pride Parade today, I felt like I just had to make this cake.  I am so excited that this country finally decided to make this happen because everyone should have the right to marry someone they love.

This rainbow cake was so much fun to make and I have give a shout out to my bestie, Katie, for helping me put it together.  The first few layers didn't come out of the pan so well, but we trouble-shooted and the rest were great.  The frosted was phenomenal as well!  This cake is delicious and a great way to celebrate pride!

Rainbow Cake
(adapted from Divas Can Cook)

Ingredients:
1 cup unsalted butter, at room temperature
2 1/2 cups sugar
3 eggs
1 tbsp vanilla
1/4 cup heavy whipping cream
1 cup lowfat buttermilk
3 cups flour
1 tbsp baking powder
1/2 tsp salt
food coloring: red, yellow, green, blue, and purple (I found these colored gels at the grocery store, but you can also mix colors to create your colors)
Frosting:
2 cups unsalted butter, at room temperature
16 oz light cream cheese
4-5 cups powdered sugar
1 tbsp vanilla
2 tbsp heavy whipping cream

Directions:
1. In a large bowl, cream the butter and sugar until light and fluffy.  Then, add in the eggs and cream until well combined and mixture lightens in color.  Add in the vanilla, cream, and buttermilk and mix until just combined.
2. Sprinkle 1 1/2 cups of flour, the baking powder, and the salt over the mixture and mix until just combined.  Then, sprinkle another 1 1/2 cups of flour over the mixture and mix until just combined.
3. Preheat oven to 325 and prepare 6, 9 inch cake pans.  For the cake pans, grease them and cut a circular piece of parchment paper to line the bottom.

4. Divide the cake batter into 6 bowls.  Start with about 1 cup per bowl and then divide the rest up as evenly as you can.  Use your food coloring to dye each bowl of batter for the colors of the rainbow.

5. Spread each bowl into a prepared cake pan.  I only had 2 so I had to do 3 batches.  Bake for about 12 minutes so that the center of the cake sets.  Let cool in the fridge.  Continue this with all the layers.
6.  While baking, make the frosting:  Beat the butter with the cream cheese until well combined.  Beat in the whipping cream and vanilla.  Add in the powdered sugar 1 cup at a time until you have a desired taste and consistency.
7.  Place your first layer on a plate and spread a thin layer of frosting on top.  Place the second layer on top and repeat with the remaining layers and frosting.  Cover the whole cake with a thin layer of frosting and serve!


Enjoy :)


Thursday, May 14, 2015

Red Wine Chocolate Cake with Red Wine Chocolate Ganache

It's Thirsty Thursday and the Scandal finale is on tonight!  What better way to celebrate than with a recipe for Red Wine Chocolate Cake!  I found this recipe over at Food & Wine and I adapted it slightly.  It was the perfect way to celebrate a recent birthday and it was an amazingly decadent chocolate cake!  

In other news, I went to my second Cubs game of the season last night.  My brother is in town and it was so fun to hang out with him.  Plus, the cubs won!  It was a pretty chilly night for a game, but we still had a great time.  It was a little weird to be out late on a Wednesday and I'm a little sleepy today, but I'm sure I'll be fine! I guess I should also mention that tonight there is a pretty big basketball game involving a Chicago team...if you're into that...I just can't wait for Scandal :).  I'm sure my sport-loving fiance will keep me updated on the sporting world anyways! 


I hope that you all enjoy this recipe!  Get out a good bottle of red wine, try not to drink too much while you bake, and have fun! 

Red Wine Chocolate Cake with Red Wine Ganache
Ingredients:
Cake:
1 1/4 cups dry red wine (I used a Cabernet Sauvignon)

3/4 cup unsweetened cocoa powder
1 tsp baking soda
1/4 tsp baking powder
1/2 tsp cinnamon
1/2 tsp salt
1 cup unsalted butter, softened
1 3/4 cups sugar
2 eggs
1 tsp vanilla
Ganache:1 cup chocolate chips (I used a mix of dark and milk)
3 tbsp heavy whipping cream
2 tbsp red wine


Directions:
1. Preheat oven to 350 and grease a bundt cake pan.
2. In a medium bowl, whisk the flour, cocoa powder, baking soda, baking powder, cinnamon, and salt.
3. In a large bowl, beat butter and sugar until light and fluffy.  Beat in the eggs and vanilla until well combined.
4. Add in 1/3 of the flour mixture to the wet ingredients and mix until just combined.  Then, add in 1/2 of the wine and mix until combined.  Continue with another 1/3 of the flour, then the rest of the wine, and finally the rest of the flour until just combined.  Pour the batter into your prepared pan and place in oven for 45 minutes.
5. While the cake is baking, make the ganache: In a heat-proof bowl, place the chocolate with the cream.  Let the bowl sit over a pot of boiling water and stir once the chocolate starts to soften.  If your mixture doesn't come together, you can add a little more cream.  Once smooth, stir in the red wine and remove from heat.
6. When your cake is done, let cool for 15 minutes and then frost with the ganache.  Let cake cook completely and ganache set.

Enjoy :)

Thursday, April 16, 2015

Guest Blogger: Thirsty Thursdays by Zack

Today, I have a very special guest blogger!  I am pretty pumped about this.  It's my little brother!  When our spring breaks lined up this year, we spent some time hanging out.  I told him about how I really wanted to get my blog going again and he told me about how he wanted to be a bar tender.  I was like, hmmm....how can we combine both of these fun/fantastic ideas?  And here we are: Thirsty Thursdays by Zack!  The little bro is going to share with me drink ideas that he has and I am going to share them here! 

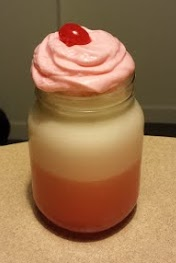
Z shared this recipe with me along with some cute photos.  He took this recipe from Cookin Bug, and jazzed it up into his own frozen version.  I give you: The Frozen Pineapple Almond Upside Down Cake! 

Frozen Pineapple Almond Upside Down Cake

Ingredients:
1 1/2 oz Cake Vodka
1 1/2 oz Amaretto
3 oz Pineapple Juice
1 Pineapple Slice
splash Grenadine
Strawberry Vodka Whipped Cream
1 Maraschino cherry

Directions:
1. Blend with ice: Cake Vodka, Amaretto, Pineapple Juice and Pineapple slice
2. Pour into glass
3. Add splash of grenadine
4. Stir gently to gradually combine grenadine with frozen drink
5. Top with whipped cream and a cherry

Enjoy :)

Saturday, July 5, 2014

Cranberry Coffee Cake

I am in a brunch mood! Today I am sharing a recipe that I made a while ago, but it is so good and can easily be adapted.  Plus, it is perfect for brunch!

It is only 8 in the morning, but I already ran 9 miles!  Today, I went on my first run with CARA (Chicago Area Runners Association).  Every Saturday, they have long runs where you get to the meeting place by 6 a.m. and run with a pace group.  I went with the 10:00 race group and it was a blast! It was so much better to run with other people and I am already done with my whole Saturday still in front of me! I met a ton of people, had some great conversations, and it was just a blast.  I will definitely continue getting my butt out of bed by 5 a.m. on a Saturday in order to do this.  Marathon training is a marathon in itself and it was so nice to have a group to run with.  Next week, we will be doing 10 miles!

So, that is why I am in a brunch mood and this coffee cake is just the best.  I found a recipe over at Hungry Couple and just adapted it slightly.  This recipe called for cranberries.  I won't lie, I made this during winter when it was cranberry season and then just forgot to post about it.  However, you can totally use fresh blueberries or strawberries now that those are so amazing!

Cranberry Coffee Cake


Ingredients:
Cake:
3 eggs
1 1/2 cups sugar
3/4 cup unsalted butter, softened
1 tbsp vanilla
1 tbsp orange zest
1 1/2 cups nonfat, plain greek yogurt
2 1/2 cups flour
2 tsp baking powder
1/4 tsp baking soda
1 tsp salt
2 cups cranberries
Crumb Topping:
1/2 cup brown sugar
1 1/2 cups flour
1/2 cup unsalted butter, melted
1/4 tsp salt

Directions:
1. Preheat oven to 350 and grease a tube pan.
2. In a medium bowl, make the crumb topping.  Mix all ingredients into the melted butter so that you have crumbs that look like wet sand.
3.  To make the cake, in a medium bowl, whisk the flour, baking powder, baking soda, and salt.
4. In a large bowl, beat the eggs with the sugar and butter until well combined.  Beat in the vanilla, orange zest, and greek yogurt.  Stir in the dry ingredients until just combined and then, gently, mix in the cranberries.  Pour the batter into your greased tube pan.
5. Take the topping and sprinkle on top of the batter until it covers the whole top.
6. Bake for 50-60 minutes or until cake has risen and is springy to the touch.

Enjoy :)


Tuesday, December 24, 2013

Black Forest Cake

Bri's birthday weekend was a lot of fun.  We spent Friday night together for dinner at Mary's Hamburgers and then rented Despicable Me 2 to watch afterwards.  It was a fun date-night!  On Saturday, we had dinner with his family at Caro Mio which was absolutely delicious and then had a fun night with friends.  And finally, the bday festivities continued on Sunday with dinner at Giordano's and then Black Forest Cake for dessert!

Bri loves the cherry-chocolate combination (not my favorite) and so it was the perfect dessert for his birthday.  Here's the thing though, although this is not my favorite, it was really good and so that is saying something.  It was a perfect cake and even looked pretty! Making desserts look attractive has never been my strong suit and I was really excited about how gorgeous this cake turned out.  This has been a great birthday celebration!

Black Forest Cake
(adapted from All Recipes)

Ingredients:
For the Cake:
2 1/8 cups flour
2 cups sugar
3/4 cup cocoa powder
1 1/2 tsp baking powder
3/4 tsp baking soda
3/4 tsp salt
3 eggs
1 cup skim milk
1/2 cup canola oil
1 tbsp vanilla
For the Cherry Filling:
30 oz pitted sour cherries
1 1/2 cups sugar
1/4 and 1/8 cup cornstarch
1 1/2 tsp vanilla
For the Frosting:
3 cups heavy whipping cream
1/3 cup powdered sugar

Directions:
1. Preheat oven to 350 and grease 2 9 inch cake pans
2. In a large bowl, whisk together flour, sugar, cocoa powder, baking powder, baking soda, and salt.  Beat in the eggs, milk, oil, and vanilla.  Divide batter equally into the two pans and bake for 35 minutes.  Let cool completely.
3. To make the cherry filling, drain cherries and reserve 3/4 cup of cherry juice.  In a small saucepan, combine the cherry juice, cherries, cornstarch, and sugar.  Cook over low heat, stirring constantly, until mixture thickens.  Stir in vanilla.  Let cool.
4. To make the frosting, beat the cream and sugar until stiff peaks form.
5. Assemble the cake: using floss or a long knife, cut each cake down the middle to form four skinny cakes.  Three layers are for the cake, one is for the crumb topping.  Place bottom layer on a plate and top with a layer of whipped cream.  Spoon about half the cherry mixture over the whipped cream.  Place second cake layer on top and then repeat with the whipped cream and the rest of the cherry mixture.  Leave out a few cherries for decorating and place final cake layer on top.  Cover the rest of the cake with the whipped cream frosting.  Use crumbs from the last cake layer to cover the sides of the cake.  Pipe frosting along the top and bottom.  Finally, decorate the top with more crumbs and remaining cherries.

Enjoy :)

Thursday, June 13, 2013

Gluten Free Treats

It's time for camp again and I love bringing in treats to share with my counselors.  We end up being like a little family by the end of camp since we spend so much time together and so it is nice to share treats with them once in a while.  Two of my counselors cannot eat gluten products and so I try to incorporate a gluten free treat whenever I can.  Today I am bringing in one of my favorites: Gluten Free Nutella Brownie Bites.  These brownies look just like the mini ones you get from the store, but they are homemade, gluten free, and even better!  I love Nutella and this is one awesome dessert.

I am pretty new to this Gluten Free thing and while I am decently good at cooking gluten free, I am still searching for those great Gluten Free baking ideas.  If you have any I would love if you would share them with me! 

Here are a few of the other things I've made that are Gluten Free:


What I really need is some gluten free cupcakes...I'll get right on it!


Wednesday, May 22, 2013

Whole Wheat Blueberry Coffee Cake

So I attempted this coffee cake and it turned out terribly! I am sharing this with you because people seem to think I am perfect at cooking and baking and this is just not true.  I have to practice and learn a lot and sometimes things just don't turn out right.

Bri and I are moving in together and I feel like this coffee cake is symbolic of how I need to think of myself.  I am not always going to be perfect, neither is he, but if we work on ourselves and focus on our relationship, we will end up with something pretty awesome anyways.

For example, this coffee cake looked awful.  It stuck to the pan, it was mushy in the middle, the blueberries sank. However, if you closed your eyes and took a bite, it was pretty darn fantastic.  Super tasty and all you have to do is ignore it's imperfections because its a blueberry coffee cake and those things are tasty.  Also, I slathered on browned butter vanilla glaze, which admittedly made it look worse, but also made it taste heavenly! Oh man, I could have eaten that glaze straight out of the bowl...all of it.

I know that Bri and I are going to have to always work hard and focus on the positives  but I have faith that we are going to do great! I already taught him how to make risotto and it turned out amazing!

Blueberry Coffee Cake with Browned Butter Vanilla Glaze
Before the oven...looked pretty good :)

Coffee Cake Recipe HERE (follow this exactly because mine turned out like crap)

Browned Butter Vanilla Glaze:
1/4 cup unsalted butter
1 cup powdered sugar
1 tsp vanilla

Directions:
1. Make the coffee cake and let cool.
2. To make the glaze, put butter in a small saucepan over medium heat and swirl continuously until butter is an amber color and smells fragrant.  Remove from heat and stir in powdered sugar and vanilla.  Drizzle over coffee cake.

Enjoy :)

Friday, May 17, 2013

Chocolate Cupcakes with Mocha Buttercream Frosting

It's time to celebrate! This weekend is all about graduation and I am enjoying every minute.

First, Bri and I have been in a long distance relationship all through college.  He has been in St. Louis and I've been up in Madison.  Last night, I flew from Madison to St. Louis because he is graduating today.  This also marks the END of our long distance!!! I am very excited to see what our future has in store!

After Bri's graduation  we are going to his favorite restaurant, The Fountain.  The food here is great, the drinks are fun and yummy, and the desserts are out-of-this-world amazing.  I'm pretty pumped.  Then, we have to pack up his apartment and drive back to Madison because I graduate tomorrow!

I am graduating with a degree in Secondary Math Education and I already have a job teaching high school math.  I am so excited and proud that this day has arrived.  Of course, I am also sad that things are going to change so much, but I am excited to see what life is going to be like now that I'm like a "real" grown-up.

So, lets celebrate! Today I have what is basically my favorite cupcake combo: Chocolate Cupcakes with Mocha Buttercream.  I adapted the cake recipe from Food and Wine and I used my yummy Mocha Frosting.  The cupcakes were perfect, the buttercream amazing, and I treated myself to one of these in honor of graduation.

Chocolate Cupcakes with Mocha Buttercream


Ingredients:
For the Cupcakes:
4 tbsp unsalted butter
1/4 cup canola oil
1/2 cup water
1 cup flour
1 cup sugar
1/4 cup plus 2 tbsp cocoa powder
3/4 tsp baking soda
1 egg
pinch of salt
1/4 cup creme fraiche
1 tsp vanilla
For the Frosting:
1 cup unsalted butter, softened
3-4 cups powdered sugar
3 tsp espresso powder
3 tsp vanilla

Directions:
1. Preheat oven to 350 and line a cupcake pan so that you can make 16 cupcakes.
2. In a medium bowl, whisk flour, sugar, baking soda, cocoa powder, and salt.
3. In a saucepan over low heat, melt butter with canola oil and water.  Pour mixture into the dry ingredients and beat until just combined.  Beat in egg until well combined.  Beat in vanilla.  Stir in creme fraiche until just combined.
4. Fill cupcake wells about 2/3 full.  Bake for 20-25 minutes or until an inserted toothpick comes out clean. Let cool before frosting.
5. To make the frosting, beat butter until light and fluffy.  Beat in sugar, 1/2 cup at a time until you have 3 cups.  Beat in espresso powder and vanilla.  Add more sugar for a desired consistency and taste.  Frost cupcakes!

Enjoy :)

Thursday, April 18, 2013

Chocolate Chip Banana Bars

Yesterday, I shared a great banana recipe! It was for my brothers birthday and he requested something with bananas and chocolate.  A few days before, I asked my friend, Patrick, what his favorite birthday treat would be, and he also said something with banana and chocolate! Isn't that strange?  Maybe those two having the same birthday makes them share some sort of banana-chocolate connection?  Anyways, I found a yummy recipe for Chocolate Chip Banana Cake Bars and whipped them up for Patrick's birthday! He was a huge fan :)

In other news, school went much better today.  I had a great day teaching, the students responded well, and according to an exit ticket, learning and understanding occurred! We learned polynomial division today and by the end students were able to divide polynomials, and began connecting the idea to finding roots of an equation.  It was a fun lesson and the students did really well.  I also got to see some solo and ensemble singing performances today for fine arts week.  It is really cool to be part of this because I have been able to see a lot of my students in a much different setting.  It is neat to see all the amazing talents they have outside of the math classroom.  One of my students sang a solo today that blew me away and yesterday I saw a student in a great jazz concert!  Fine arts week has also made me miss my singing and dancing and I hope that I can get involved in that sort of capacity at my next school...which I am still searching for! In the meantime, here are some yummy cake bars!

Chocolate Chip Banana Cake Bars (adapted from Taste of Home)

Ingredients:
1/2 cup unsalted butter, at room temperature
1 1/2 cups sugar
2 eggs
1 cup non-fat plain greek yogurt (I used Chobani)
1 tsp vanilla
2 cups flour
1 tsp baking soda
1/4 tsp salt
2 ripe bananas, mashed

Directions:
1. Preheat oven to 350 and lightly grease a 13 by 9 inch baking pan.
2. In a medium bowl, whisk flour, baking soda, and salt.
3. In a large bowl, beat butter and sugar until light and fluffy.  Beat in eggs, one at a time, until well combined.  Beat in yogurt and vanilla until well combined.  Slowly beat in the dry ingredients until just combined.  Stir in the mashed banana.
4. Pour into your prepared pan and bake for 25 minutes or until an inserted toothpick comes out clean.

Enjoy :)

Saturday, April 6, 2013

The American Club, Kohler, WI

My mom and I had an amazing time over spring break.  We went to the American Club in Kohler Wisconsin and had our very first massages!  We spent two days and two nights at the hotel and had great food and a really nice and relaxing time.  On the way there, we did some shopping at the outlet malls in Pleasant Prairie (teacher clothes!).  We also checked out the Shops at Woodlake for lunch at the Woodlake Market while we were there and I even found a great UW-Madison sweatshirt!
afternoon tea
welcome mimosas!
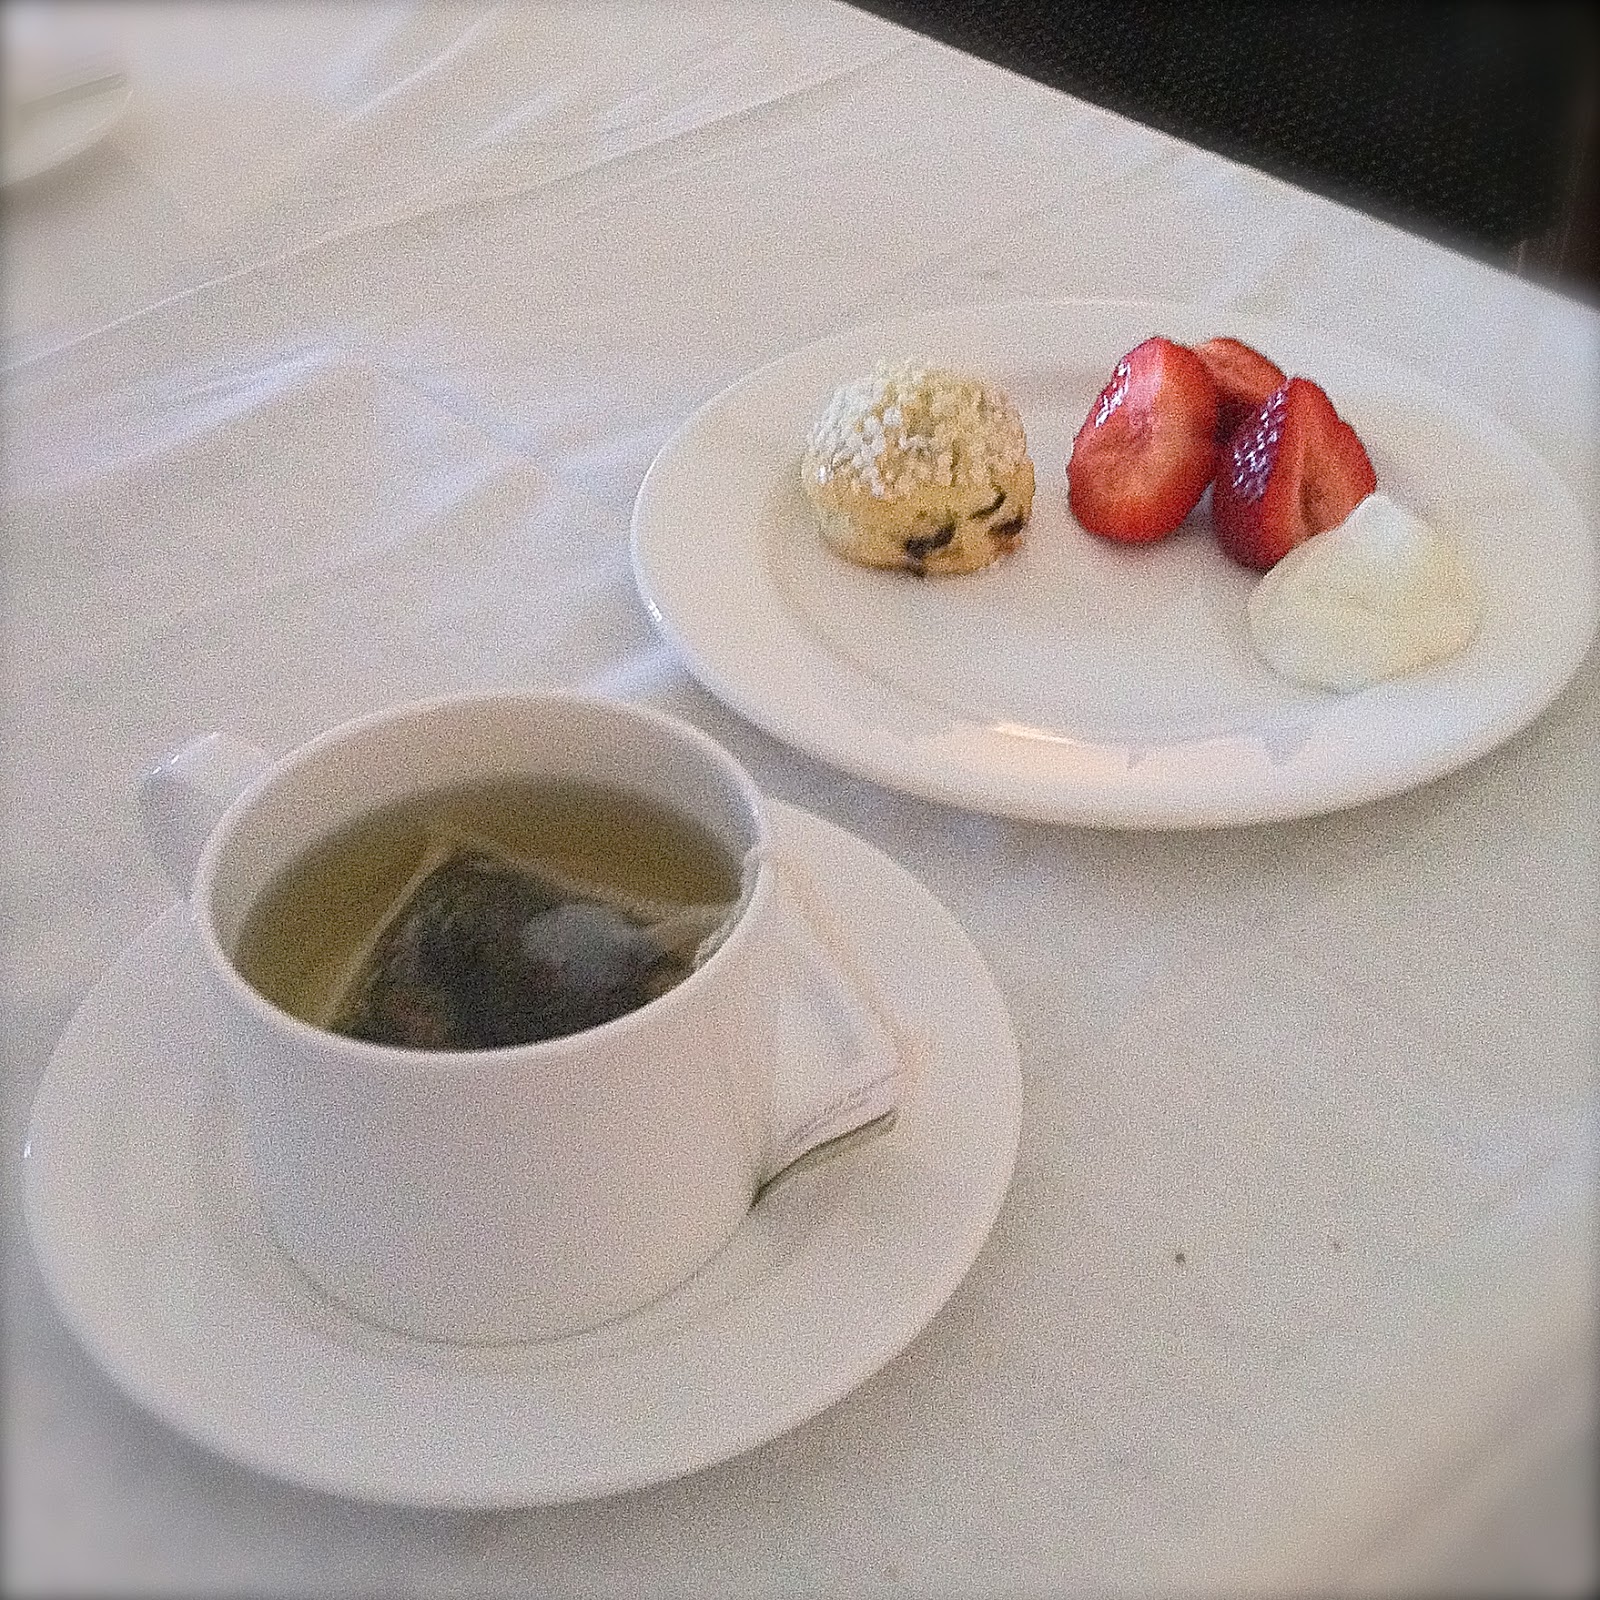
tea treats! 
appetizers and wine
The food was great! Our first night, after a lovely afternoon tea and some great appetizers with wine, we had Italian at Cucina.  My mom and I split a salmon dish and chicken dish and everything was delicious.  Then, we came back and hat a slice of Chocolate Cake at the Winery for dessert.  We obviously overdid it a little since we both had trouble sleeping that night!
dinner was so good...I forgot to take a picture!

THE chocolate cake
That was alright, since the next day, we had our massages.  It was fabulous.  I felt relaxed and amazing.  We went early, read books, and stayed after to chill and just relax.  I haven't spent that much time relaxing in ages and it was must needed.  Afterwards, we had our tea, appetizers, and then it was off to dinner at the Wisconsin Room.  My mom got the Pork and I had the Steak on special.  Both our meals were, again, fantastic, and we decided to skip dessert in hopes of sleeping better and being healthier.


However, the next morning, we made a stop at the Greenhouse for ice cream and lattes before it was time to head back home.


The entire trip was amazing and I would gladly head back in a heartbeat.  This was a great way to spend a few days over break and we did not have to travel far at all for a very fun time!


Wednesday, April 3, 2013

Magic Custard Cake

So I just had to give it a try.  That famous Magic Custard Cake that is all over the internet! I was super curious about if it would work and so I just had to make it!

But first, ability grouping.  Any teachers out there who use ability grouping?  I am a math teacher and I am not so sure how I feel about it.  I am giving it a try and we will see how it works out.  I am curious to see how it will work in a supported classroom.  If anyone has advice on this topic, I would love to hear it.  This is my latest teacher "lesson" that I am learning.  The other one: never give back a test at the beginning of class...bad move.  The kids were distracted for the rest of class.  As an experiment, I handed back the tests in the other class at the end...it was WAY better.  Guess I had to learn that one the hard way.

Second, and a bit of a warning, I am beyond exhausted and stressed out this week and that is mostly why I just had to share something "magical" like this Magic Custard Cake.  It is the first week back from Spring Break, I am giving two Team Tests, which means tons of grading, and I have my first teacher interview this Friday.  This means, travel, missing school, and having very little time to prepare for what is sort of a big deal.  Oy vey!  Somebody cut me another slice...or three...of that cake!

And third, I can't explain how important running is to me right now.  It is the only time of the day where I get to spend time feeling good and doing something completely by myself.  Today I ran 5 miles and I felt great.  The downside, after school, tutoring, running, and planning,  I have very little time at night to get some of these thoughts and recipes down in a blog post.  By the way, I brought this cake into school.  This has been a great way to ration my desserts (so that I don't eat three slices at once...) and all the teachers loved it! It does actually split into three amazing layers!  Everyone was amazed at how "sophisticated" it looked with all its layers.  They were impressed to find out how simple it actually ways!  Basically, this cake is amazing!

Magic Custard Cake (adapted from White On Rice Couple)


Ingredients:
1/2 cup unsalted butter
2 cups skim milk
4 eggs, separated
1 1/4 cups powdered sugar, plus more for sprinkling
1 tbsp water
1 cup flour
1 tsp vanilla

Directions:
1. Preheat oven to 325 and lightly grease a 9 inch round cake pan.
2. Melt the butter in the microwave and set aside to cool.
3. Warm the milk in the microwave for 30 seconds and set aside.
4. Place egg whites in a medium bowl and whip until they hold a stiff peak.
5. In another large bowl, beat egg yolks and sugar until pale yellow.  Beat in the water and butter until well combined, about two minutes.  Slowly beat in the flour until just combined.  Slowly beat in the milk and vanilla.  Beat slowly until well combined.
6. Fold in egg whites 1/3 at a time and fold until just combined.  Pour batter into your prepared cake pan.
7. Bake for 55 minutes or until golden in color.  Remove and let cool in the pan for 1 hour.  Dust with extra powdered sugar before serving.

Enjoy :)

Tuesday, March 26, 2013

Happy Passover! Flourless Chocolate Cake

Last night my family and I had a lovely Passover Seder.  We had a feast of delicious food and my mom even baked a flourless chocolate cake.  Everything was perfect and it really made me appreciate my family and being able to be together for this special holiday.

Passover celebrates our freedom from slavery in Egypt and I love how the entire ceremony presents objects that represent various things about the story.  If you don't know the story of Passover, just run out and watch the movie, The Prince of Egypt.  First of all, its a great movie, second, it does a great job of telling the story and third, it has awesome music.  I even watched this movie while I was in Hebrew school.
The Seder Plate 
Matzo Ball Soup!
During Passover, for eight days you are not supposed to eat any leavened bread.  So, I think I am going to attempt to be gluten free for the week and try out some gluten free cooking and baking.  We will see how it goes!
The Feast! Grilled Veggies, Boiled Potatoes,
Brisket, and Chicken!
Today I have that great cake my mom made.  It had an amazing chocolate flavor, was rich, moist, and simply amazing.  We topped it off with some powdered sugar and TruWhip (healthy cool whip) and it was perfect!

Flourless Chocolate Cake

Ingredients:
1 lb of chocolate (we used half bittersweet and half semi-sweet)
1 cup hazelnut liqueur
1 cup unsalted butter
1 1/2 tsp vanilla extract
7 eggs
1 cup sugar

Directions:
1. Preheat oven to 350 and line or lightly grease a 9 inch springform pan.
2. In a medium saucepan, over medium heat, stir the chocolate, liqueur and butter until melted and smooth.  Stir in the vanilla. Remove from heat.
3.  In a large bowl, beat eggs with the sugar on medium-high for 5 minutes or until pale yellow and fluffy.  Slowly pour in the chocolate mixture and beat on medium until just combined.
4. Pour the batter into your prepared pan and bake for 1 hour.  Cake should look crisp on the sides and an inserted toothpick should come out with a few crumbs.  Remove and let cool in pan for 1 hour.  Top with powdered sugar.

Enjoy :)

Thursday, January 31, 2013

Restaurant Week: Fresco

Another snow day?!?!

Seriously, one might start to wonder if I am actually in Wisconsin.  When I was a kid we never had this many snow days.  But, here I am for the third time, enjoying a lovely snow day.  I woke up and had breakfast before I found out about the day off so instead of sleeping in, I ran 5 miles, showered, and now I'm making cupcakes!

I also wanted to take this opportunity to tell you about another fantastic restaurant I tried for the first time.  This was my second Restaurant Week dinner and it was amazing! Max and I went to Fresco and for $30 dollars, we both had an amazing meal complete with appetizers, entrees, and desserts.  Plus, we got to sit above the Overture Center and look out on snowy, State Street.  It was pretty amazing.

We both had the same appetizers and entrees: the Wisconsin Apple Salad and the Seared Mahi Mahi with Cauliflower Risotto in an Almond Raspberry Vinaigrette.  It was all delicious.  For dessert, we ended up splitting the Homemade Kit Kat with Peanut Butter Mousse and the Carrot Cake Cupcake with Maple Buttercream Frosting.


It was an awesome meal followed by Modern Family and skyping my bestie Caryn who is all grown up and working a real job in DC! It was so nice to turn a boring weeknight into an amazing one.

Now, it's time for me to take my cupcakes out of the oven! They smell amazing and I can't wait to share the recipe with you later! Have a nice day!