Showing posts with label Pretzel. Show all posts

Tuesday, October 20, 2015

Veggie Sandwiches on Homemade Pretzel Rolls

Remember that time I made Homemade Pretzel Rolls?  Well, then I made some seriously awesome sandwiches with said rolls.  This is their story:

Bri and I love food.  Bri is a vegetarian.  I am trying to eat a little healthier and I've been trying out all sorts of fun veggie-filled recipes.  Then, I came across this recipe and I was like "OMG I HAVE TO MAKE SOMETHING LIKE THAT!"

So that's how these Veggie Sandwiches came to be.  I had one for lunch at school and made everyone a little jealous.  Now I am just drooling thinking about them.  

School has been pretty great lately.  My students did a fantastic job on their last quiz and I am excited by how well they are doing overall!  We are in the middle of a unit on solving systems of equations, inequalities, and matrices.  It's pretty fun.  My cheer-girls are also awesome.  They had their first pep rally on Friday and it was a total success.  They did this amazing cheer, dance, and stunt and it was so cool to see them looking so happy and doing such a great job.  I am coming up with a new dance for them and I am also working on incorporating some fun math activities for my students.  I'll keep you all posted! 

Veggie Sandwiches on Homemade Pretzel Rolls

Ingredients:
2 portabella mushrooms, sliced
2 red pepper, sliced
1 orange pepper, sliced
1 yellow pepper, sliced
1 red onion, sliced
4 tbsp extra virgin olive oil
2 tbsp brown sugar
2 tbsp balsamic vinegar
salt and pepper to taste
1/2 tsp paprika
1 garlic clove, minced
1 avocado, sliced
Goat Cheese Spread:
8 oz goat cheese
1 bulb of garlic
2 tbsp olive oil
1/4 cup fresh basil, chopped
1/4 cup fresh cilantro, chopped
salt and pepper
Red Pepper Sauce:
1/2 cup roasted red peppers
2 tbsp red wine vinegar
1/2 tbsp honey
2 garlic cloves, minced
1/4 cup olive oil
salt and pepper

Directions:
1. You need to roast the whole bulb of garlic for the goat cheese spread.  Cut off the base of the bulb so that the cloves are visible.  Place this on a piece of tinfoil and drizzle with olive oil.  Wrap in the tinfoil and place in the oven for 35 minutes at 400 degrees.  Once done, you should be able to squeeze the roasted garlic cloves right out of the bulb.
2. Make the roasted red pepper sauce: In a food processor, place all the ingredients except for the olive oil and salt/pepper.  Process until you have a smooth sauce then continue to process as you add in the olive oil.  Stir in the salt and pepper to your taste.  Set aside.
3. Wrap the sliced portabellas in tinfoil with the 1 minced garlic clove for the sandwiches and 2 tbsp of olive oil.  Place foil packet in a small pan over the stove and heat over warm until the mushrooms are cooked, about 5-10 minutes.  
4. Wrap the sliced peppers and onion in a packet of tinfoil: Place all the veggies on the tinfoil and then sprinkle with 2 tbsp of olive oil, the brown sugar, balsamic vinegar, some salt and pepper and paprika.  Wrap the veggies up and place in a pan over the stove.  Heat on warm until veggies become translucent, about 10-15 minutes.  
5.  Once veggies are done, remove from heat.
6. Make the goat cheese spread, once your garlic bulb is roasted, squeeze the cloves out into a food processor with the goat cheese, basil, cilantro, salt, and pepper.  Process with adding in the 2 tbsp of olive oil until you have a nice spread.  Use a spatula to get the goat cheese into a bowl.  (I ended up with a lot of extra of this stuff so place it in a container so you can put it in the fridge when you are done.)
7.  Assemble the sandwiches!  Spread some goat cheese on one piece of bun and some red pepper sauce on the other piece.  Place some peppers and mushrooms over the goat cheese and then top with a slice of avocado.

Enjoy :)

Tuesday, October 13, 2015

Homemade Pretzel Rolls

After you run a marathon, you get this special "eat whatever you want" pass.  This can be dangerous with me since I'll crave something weird and then I'll go an make it.  However, this year I didn't really crave anything that strange.  I have been super into pretzel things lately though.  I decided that I needed to make my own pretzel rolls and then I used them to make sandwiches for lunch or dinner.  They were pretty simple to make.  You just need a lot of time since you have to let the dough rise.  As a post-marathon snack.  These guys are great since they are filling and a little salty.  For a school lunch, they are also amazing since they are a little bigger than slider sized.  They made for the perfect sized sandwich when I don't have a ton of time to eat!  

Today I have to go back to school after a long weekend.  That is always a little tough.  However, I am excited to see my students and get back into a routine.  I am also trying to get myself moving again so that I can work through some of my soreness.  So, I am up early and I am going to walk on the treadmill in my building.  I'm hoping that once I start I'll feel better.  

I am also planning on heading over the LA Fitness sometime this week for a morning class.  I haven't been there in a really long time and I feel guilty about having this gym membership that I haven't been using.  So, I am going to pack a shower bag and try out a morning workout at the gym.  

Then, since I'm getting my workouts done in the morning, I will have more time to make these awesome rolls again in the afternoon! 

Homemade Pretzel Rolls
(adapted from Mel's Kitchen)

Ingredients:
1 tbsp active yeast
2 tbsp canola oil
2 cups skim milk
1 1/2 cups water
2 tsp kosher salt
6 1/2-8 cups unbleached, all purpose flour
3 quarts water
1 tbsp sugar
1/4 cup baking soda
salt for sprinkling

Directions:
1. Heat the milk and water in the microwave for about a minute.  They should be warm.  Then, in a large bowl, combine the yeast, canola oil, milk, water, and salt.
2. Using a mixer, a spoon, or your hands.  Start to add in 6 cups of flour.  Mix until you have a dough-like consistency.  Add flour as needed so that it is not too sticky.  Once your dough comes together, knead for about 5 minutes. The dough should form a ball and be slightly springy.
3. Grease a separate, large bowl and place the dough in.  Cover with a towel and pace in a draft-free area for about 2 hours or until it has doubled in size. 
4. Punch down the risen dough and start to peel off pieces to make small balls.  You should end up with 16 balls of dough.  Gently roll each ball and let sit on a baking tray or the counter for about 20 minutes.  
5. While the dough balls are resting, pour the 3 quarts of water, sugar and baking soda into a large pot.  Bring to a boil on the stove.  
6. Take 4 balls of dough at a time, pinch one side of the dough to gather it into a ball-like shape and place in the boiling water.  Let them boil on each side for 30 seconds - 1minute each.  Place each finished piece of dough on a lightly greased or parchment covered baking pan.  Repeat this process with all the dough pieces.
7. Preheat the oven to 425.
8.  Using  a very sharp knife, slice a few slits into each ball of dough.  Sprinkle some coarse salt over each one.
9.  Bake the rolls for about 20 minutes.  Let cool and enjoy! 


Friday, June 26, 2015

Spinach Pesto Eggplant Burger with Mozzarella

So camp has started, but there has been a ton of rain this week.  This means that camp doesn't really feel like camp yet.  We had a nice day yesterday at a water park, but today it is all rainy again!  I am running out of ideas for fun/interesting indoor games!  At least the kids are having fun since it is the first week and therefore exciting/new.  I just hope that this soggy summer gets a little more sunny! 

Camp means that I have a ton more time to cook!  I love this! I came up with this fun Veggie Burger recipe after making some Spinach Pesto.  Bri is a vegetarian and we just went out to dinner at Smoque so I felt like I had to make it up to him with this amazing veggie sandwich! 

Spinach Pesto Eggplant Burger with Mozzarella

Ingredients:
4-5 pretzel buns
1 medium eggplant
8-10 tbsp spinach pesto
fresh mozzarella, sliced
salt and pepper
olive oil

Directions:
1. Heat a pan over medium heat and add 1 tbsp of olive oil.  Place eggplant slice in the pan and cook for about 3-4 minutes on one side.  Flip, pour a little more olive oil in the pan and season with salt and pepper.  Continue to cook for another 3-4 minutes.  If you need to, continue to cook both sides until eggplant starts to soften.  


2. Toast the bun in the toaster and then place on a place.  Spread 1-2 tbsp of the pesto on one side and place mozzarella slices on the other.  Place eggplant slice on top of mozzarella and then put the side with the pesto on top.  

Enjoy :)

Tuesday, June 2, 2015

Healthy Brownie Batter Dip

It's finals time again! I can't believe we are at this point in the year.  I have been so busy the past few weeks finishing everything up with school and helping my students prepare for finals.  And now, I just have to grade their tests and summer is here!  Currently, I am sitting in a study hall with my buddy, Ms. Keenan, and we are just waiting for the period to end so that our finals can finally start.

I am pretty pumped about summer and I am already getting ready by meeting with site directors, organizing camp groups, and writing parent letters.  Last night I "had" to go to Portillo's to have a camp dinner/meeting.  The food was delish and it was so fun to get to know the site directors better and hear about their ideas for the summer.  It made me feel so excited!  

I have also been cooking and baking more because of my super-positive attitude.  For example, I made this:

Brownie Batter
This is "healthy" brownie batter.  I have heard that black beans can be a substitute in brownies or other desserts and I must admit, I was pretty skeptical about if it would actually taste good.  I am here to attest that black beans totally work and this brownie batter was just amazing.  I was inspired by Sweet As Sugar Cookie's recipe and I adapted it a little based on what I wanted/had on hand.  This is a great treat to spread on fruit, eat with pretzels, or just dig into with a spoon!

Healthy Brownie Batter Dip

Ingredients:
1 can black beans, drained and rinsed
2-3 tsp vanilla
5 tbsp cocoa powder
1/2 cup light brown sugar
1/2 cup peanut butter

Directions:
1. Place all ingredients in a food processor and pulse until mixture becomes completely smooth.  Add in toppings if you want.

Enjoy :)

Tuesday, April 28, 2015

Whole Wheat Pretzel Bites

I'm gonna get a little math teacher-y today.  I decided to do a project with my students in my Geometry classes.  So far, it has been going pretty well and I am excited to see what the students do with their groups today!  Here is the project: Students are working on their own or in groups to design a container for a product.  They have picked a product and picked out a container design.  Now, they have to make sure the volume of the container is between 100 and 150 cubic inches and they have to calculate the surface area to figure out how much it will cost to put their container together.  Students also have to write a short paragraph explaining their product and they will physically build the container out of card-stock by Friday.  It is really neat to see them problem solving using the concepts of surface area and volume.  With the new Common Core standards, I wanted to include something in this curriculum at the end of the year to really get students using their math skills to problem solve.  I want them to feel like they have become mathematicians.  I can't wait to see what they come up with! 

I also have a delicious snack/appetizer recipe for today.  I am a little obsessed with pretzels.  I am also obsessed with brussel sprouts and anything buffalo, but that is another story.  Today is about pretzels.  I love snacking on pretzel thins, eating a sandwich on a pretzel roll, and at UW-Madison football games the soft pretzels are crazy good.  I believe that sometimes there is nothing better than a good soft pretzel.  So, I made some.  

Pretzel Bites
(adapted from Epicurious)


Ingredients:
1 cup warm water
1 envelope active dry yeast
3 cups flour (I used 2 cups of all-purpose and 1 cup of whole wheat)
1 tbsp kosher salt
2 tbsp light brown sugar
4 tbsp unsalted butter, softened
8 cups water
1/2 cup baking soda
kosher salt

Directions:
1. Measure out 1 cup of water and microwave until it is warm, but not hot.  Add in the yeast and let sit for 10 minutes.
2. In a large bowl, mix the flour, salt, and brown sugar.  Add in the butter and the yeast mixture and stir with a wooden spoon until the dough comes together.  
3. Knead for about 8 to 10 minutes or until you dough is elastic and bounces back when you poke it.  Place the dough in a lightly greased bowl and let sit for 2-3 hours.  I turn my oven on to 100 and place the dough inside with the door open.  The heat helps it rise.  Once it is doubled in size you are ready for the next step.
4.  Cut the dough into 4 equal pieces and roll each one out so that you have a long, thin rope.  Cut the rope into 1 inch pieces.  
5. Preheat oven to 450 degrees and grease 2 baking sheets.  
6. Pour the 8 cups of water into a pot with the baking soda and heat on high on the stove until it boils.  Drop your pretzel bites in the baking soda mixture (about 8 at a time) for 30 seconds - 1 minute and then place on the well greased baking sheets.  Sprinkle with kosher salt.
7. Bake for about 10 minutes or until the pretzels have started to brown.  Let cool and serve with whatever toppings you like! 

Enjoy :)


Saturday, April 18, 2015

Monster Cookie Layer Bars

We just had parent-teacher conferences this past week and I can't believe that this means there are only 6 weeks until finals!!! My second year of teaching has just flown by!  Along with that, I have been having a great year with my co-teacher in Geometry and my Algebra Advance students are pretty awesome.  I can't believe they started off as freshmen and now they are like "grown up" sophomores!  This year has been so much smoother than my first one and I have been working hard to incorporate new lessons that are more investigative and model based.  I love that I feel confident enough to try new things and evaluate if they are successful.  I even brought in a GIANT gummy bear to show my students and talk about similarity ratios between the little gummy bears and the big guy.  Today, I am even presenting one of these lessons to a group of teachers!

Along with school ending, I am also getting ready for camp to begin! This is crazy!  I am so excited that summer is right around the corner.

To celebrate this excitement, I am going to share with you all a recipe for one yummy treat.  I love the idea of Monster Cookies because it means you can basically throw whatever you are craving into a cookie.  This recipe, which I adapted from The Girl Who Ate Everything, takes that idea to a whole new level.  Instead of all that work to drop cookies onto a cookie sheet, lets just dump it all into a pan and go with layers! I love combining salty with sweet so I went with some chocolatey things and pretzels and peanut butter.  You can use whatever toppings your little heart desires!

Monster Cookie Layer Bars

Ingredients:
1 1/2 cups graham cracker crumbs
1/2 cup unsalted butter
1 14 oz can of sweetened condensed milk (I used light)
3/4 cup old-fashioned oats
1 1/2 cups of the toppings you want

Directions:
1. Preheat oven to 350 and line a 9 by 13 inch pan with foil or parchment paper.  Spray the foil of parchment paper with nonstick cooking spray.
2. In a microwave safe bowl, melt the butter.  Mix the butter and graham cracker crumbs together and press evenly into the bottom of your pan.
3. Pour the sweetened condensed milk over the graham cracker crust and then sprinkle the oats and your toppings over the top.  Gently press this down into the sweetened condensed milk layer.
4. Bake for 20 minutes.  Let cool for 20 minutes and then use the foil to take the layers out of the pan to cool completely.

Enjoy :)

Wednesday, June 19, 2013

Graze Restaurant, Madison, WI

Phew! Just finished a quick 4.5 mile morning run and now I am here to tell you about a fantastic new restaurant I discovered in my last week in Madison.

My last week was super fun because Bri and I went to a million new places and did a bunch of the things that I've always wanted to do, but never got around to.  For example, we took a walk in the Arboretum together, went to the terrace to watch a hockey game and share a pitcher, and tried a ton of new restaurants.
Another little family out for a stroll
in the Arboretum

Graze, is known for being one of the best restaurants in Madison.  Their chef is constantly switching up the menu to incorporate fresh, local ingredients that they buy at the farmer's market just outside their front door on the weekends.  They are located on the square and have a wall of windows so that you can look out at the beautiful capitol as you enjoy some crazy good food.  You can go there for lunch, brunch, or dinner.  We went their for dinner.

Appetizer: Hot Pretzel with 3 Mustards and Cheese 
Drinks :)
We started out sitting at the bar while we waited for our table and we each enjoyed a drink and split a hot pretzel with mustard and cheese as our appetizer.  So far, we were pretty darn impressed.  The mustards were yummy and the cheese (of course from WI) was amazing.  The pretzel was one of the best I have ever had!  Then, we sat down and ordered our dinner.  I ordered the Tofu Bibimbap (tons of fresh veggies and rice with tofu in a spicy sauce and topped with a fried egg) and Bri ordered their Homemade Veggie Burger (a beet based burger).  Everything was delicious. I loved my meal and Bri thought it was one of the best veggie burgers he had ever had (and this is impressive considering how many he has tried).  For dessert, because we had to get dessert, we split their freshly baked Chocolate Chip Cookies with Milk.  It was an adorable and comforting end to the meal.  We will definitely be hitting up this restaurant in the future!  If you are ever in Madison, put Graze on your list of Must-Eat-Restaurants.  
Tofu Bibimbap 
Veggie Burger
Dessert!


Monday, April 22, 2013

Salted Caramel Chocolate Chip Mini Cheesecakes with Pretzel Crust

When Tamara and I were planning a dinner for Courtney's birthday, Tamara came up with an amazing sounding cheesecake idea: Chocolate Chip Cheesecake Cupcakes with Pretzel Crust and Salted Caramel Glaze.  Yea, she's a genius.

I can't wait to share this recipe, but I am also excited to share my Half Marathon Training! I finally made it up to the double digits and Saturday was my 10 mile run! It went really well and I got to run on a beautiful day through the Madison Arboretum.  It was awesome.  This week I have some shorter runs planned for during the week and then on Saturday, I am running in the Madison Crazylegs Race! I can't wait! I've wanted to run this race all through my college career, but I have always been busy.  Finally, my senior year, I am crossing this one off my bucket list!

Speaking of bucket lists, I got another item checked off when my parents came to town Friday for the UW Marching Band Concert.  We went out for dinner at Roast, saw the concert, and then headed to the Ivory Room for a fun night of dueling pianos.  The bucket list item: my mom and I took a shot together! It was super cute.  We had a really fun time and it was awesome to have them here in Madison.

The rest of the weekend was jam packed with running, DTS Sister Bonding Sleepover, DTS Activation, and lesson planning.  I also spent some time coming up with new recipes and I can't wait to tell you about them!  I hope that everyone has a lovely day and enjoys this amazing recipe for Salted Caramel Chocolate Chip Mini Cheesecakes with Pretzel Crust!

Salted Caramel Chocolate Chip Mini Cheesecakes with Pretzel Crust
(Cheesecake Recipe adapted from King Arthur Flour and Caramel Sauce adapted from Cooking Channel)

Ingredients:
For the Crust:
1 1/4 cups crushed pretzels
4 tbsp powdered sugar
1/8 tsp salt
5 tbsp unsalted butter, melted
For the Cheesecake:
16 oz light cream cheese
1 cup sugar
1/4 cup heavy cream
3 eggs
3 tsp vanilla
1 cup mini chocolate chips
For the Salted Caramel Sauce:
1 cup sugar
1/4 cup water
3/4 cup heavy cream
3 tbsp unsalted butter
1 tsp sea salt

Directions:
1. Preheat oven to 375 and place 16 cupcake liners in a cupcake pan.
2. In a medium bowl, mix the crushed pretzels, powdered sugar, and salt.  Pour melted butter over the mixture and stir to combine.  Place 2 tbsp of pretzel mixture into each cupcake liner and, using a small glass, press the crust into the pan.  Bake for 10 minutes.  Let cool.
3. Lower the oven temperature to 325.  In a large bowl, beat the cream cheese until smooth.  Beat in the sugar until well combined.  Beat in the cream, eggs, and vanilla until well combined.  Beat on high for a few minutes until light and fluffy.  Stir in the chocolate chips.  Pour batter into cupcake wells until it is almost to the top.  Bake for 30 minutes or until cheesecakes are no longer wobbly.  Let cool for an hour and then place in fridge for 1 hour.
4.  To make the caramel sauce, heat the sugar with the water in a medium pot over medium heat until completely dissolved.  Increase the heat and bring to a boil.  Continue to cook, without stirring, until your mixture is a deep amber color.  Remove from heat and whisk in the butter and cream.  Mixture will bubble violently.  Whisk until well combined and whisk in the salt.  Let cool completely.  Mixture will thicken as it cools.  Drizzle over cooled cheesecakes.  You can store the extra caramel sauce in the fridge.

Enjoy :)

Sunday, April 14, 2013

Pretzel M&M Cookies

Happy Sunday! I have had a lovely weekend.  Bri came up to visit me and we have had so much fun!

Friday was a scary day for me.  I had an observation from a school in IL that is considering hiring me! It's all very exciting, but I was so nervous! When it was over, I was extra excited to relax and de-stress with a fun weekend.  So, I did!

Bri and I went out for dinner to the Tipsy Cow on Friday and then out for the night with a ton of friends.  The Tipsy Cow was fantastic! I had a great Mediterranean sandwich with cheese curds on the side and Bri had their grilled cheese, tomato soup, and beer battered french fries.  It was all very tasty and it was nice to treat myself to some great comfort food.  Then, we had a great time out and I continued my quest to learn the card game, Ucher.  I think I'm getting the hang of it!

Saturday was a great day to be lazy.  I didn't want to do anything so I didn't.  Well, after I got in my 8 mile run.  Then, I showered and we watched episodes of How I Met Your Mother and had lunch with a bunch of DTS for parents day.  My parents didn't come up, but I got to see my friend Lauren's family and the food was awesome! After more episodes of How I Met Your Mother and a nap, we met up with friends at Great Dane for a drink and then dinner at Flattop Grill.  The food was yummy, but their service was rather slow and we ended up getting a few free meals because they felt so bad.  Next, Bri and I came back to campus and met up with Max at Forever Yogurt for dessert...yum! Our adventure continued as we met up with Russ, Lauren, and Max (other Max) at The Plaza.  I like this bar because it is fairly chill.  We got a booth and spent time just catching up.  Other Max was in town because he had just been visiting University of Chicago and might be going there for law school!  How cute is that?  Bri and Max might end up there together!

Now it is Sunday, and while I had a lovely weekend, I know that I now need to get some work done.  After my Jillian Michael's Workout, I am planning on a shower, lesson planning for the week, filling out some more job applications, and then baking! Yep, I am going to bake something today.  Not sure what yet, so if you have a suggestion I'd love to hear it! I have been so stressed the past few weeks that I just haven't had much energy for cooking or baking, but I miss it and I know that it will make me feel good to get back in the game.  Check out this awesome cookie recipe and I can't wait to share what I end up creating today!

Pretzel M&M Cookies


Ingredients:
3 cups flour
1 tsp cornstarch
3/4 tsp baking soda
3/4 tsp salt
pinch of cinnamon
1 cup unsalted butter, softened
3/4 cup sugar
1 cup brown sugar
1 egg
1 egg white
1 tbsp vanilla
12 oz pretzel M&Ms

Directions:
1. Preheat oven to 350 and line a baking sheet with parchment paper.
2. In a medium bowl, whisk flour, baking soda, salt, cornstarch, and cinnamon.
3. In a large bowl, beat butter with sugar and brown sugar until light and fluffy.  Beat in eggs, one at a time, until well combined.  Beat in vanilla.  Beat in dry ingredients until just combined and stir in M&Ms.
4. Drop cookie dough onto the prepared sheet and bake for 10-12 minutes.  This recipe makes about 60 cookies that are about 2 tbsp in size.

Enjoy :)

Sunday, October 14, 2012

Cookie Dough Dip

This weekend was so great!

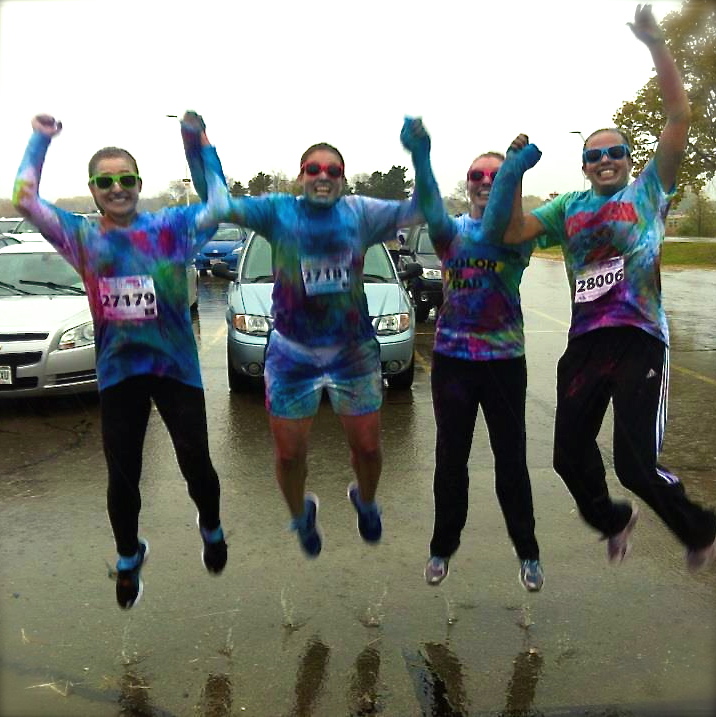
I participated in the Color Run Saturday morning and it was a blast!  I started out in a squeaky clean white shirt and then I ended up like this:


I then proceeded to shower as fast as I could while still attempting to get all the color off of me so that I could drive to Chicago and get all dressed up to go downtown for my friend Anna's birthday.  It was a blast!

It was a whirlwind of a weekend, but overall it was a great time! Now, it's back to lesson planning and getting very little sleep, but I am excited.  Tomorrow I am trying out a demonstration on Geometer's Sketchpad.  I am a little nervous because typically technology and I do not get along so well.  However, I am excited because if all goes well, it should be a pretty neat demonstration.

Also, after this super short, fairly random post, I have a cute recipe for a cookie dough dip that I shared with my Education Psychology class.  It was crazy yummy and we dipped graham crackers, animal crackers, and pretzels in this mouthwateringly good dip.  Also, it is a great dessert to make if you are like me and have practically no spare time, but still love to create fun food things.  Cooking and baking is what is keeping me sane right now, and this recipe is definitely one that I will make again as it is so easy to whip up and so yummy to devour!

Cookie Dough Dip (adapted from How Sweet It Is)


Ingredients:
1 cup unsalted butter
2/3 cup brown sugar
1 8 oz low-fat cream cheese
1 cup non-fat plain greek yogurt
1 cup powdered sugar
2 tsp vanilla
1 1/2 cups semi-sweet chocolate chips

Directions:
1. In a medium bowl, melt butter in the microwave and then stir in the brown sugar until well combined.  Whisk in the vanilla.  Set aside to cool.
2. In a large bowl, beat the cream cheese and greek yogurt together.  Beat in the powdered sugar.  Next, beat in the butter and brown sugar mixture.  Stir in the chocolate chips.
3. Serve with an assortment of yummy things to dip in this crazy-good dip (animal crackers, graham crackers, pretzels, fruit, your fingers...etc).

Enjoy :)

Wednesday, June 20, 2012

Graduation Party

Like most people, I have jumped on the pintrest bandwagon and I am seriously hooked.  You can follow my pintrest boars here if you are interested.  I love finding fun recipes, cute crafts, teaching ideas, and other fun finds.  A few weeks before my brothers graduation party I saw some adorable candies that you can make for graduation.


First these adorable graduation hat candies.  All you need: reese's, Ghiradelli chocolate squares, M&Ms (we picked out the red ones), twizzlers for the string, and frosting to get everything to stay together. 


Next, we made a sweet/salty treat with circle pretzels, hershey kisses and M&Ms.  We got special navy blue and orange M&Ms to represent my brothers college.  All you do: place pretzels on a baking sheet with kisses inside each circle.  Stick in the oven at 350 for about 3 minutes.  Remove and, using the M&Ms, press each kiss down into the circle.  Let the chocolate chill until hardened. You get an adorable snack that represents your graduates future school!


 And of course, we had a great cake!


Saturday, May 19, 2012

Soft Pretzels

Yesterday Bri and I drove to Iowa and our Iowa Adventure commenced! We are visiting his brother at Grinnell and so far it has been really fun! We got the grand college tour, had lunch at a cute deli in downtown Grinnell and then hung out and watched the tv show Suits before driving to Ames for dinner at Hickory Park.  Hickory Park is known for smoking their own meat and I've gotta say, it was not the best place to take my vegetarian boyfriend.  However, the food was pretty great and the dessert selection, something Bri gets excited about, was to die for.  Seriously, I had never seen so many different sundae combinations in my life! I had their Coffee-Fudge sundae, of course.  Everyone else also got sundaes and everything was delicious.  It was a really fun way to start our Iowa experience!

I am also going to take this weekend to update you all on some of the recipes I have been trying out.  A few days ago, I was craving these guys: Soft Pretzels.  I was going to my little brother's baseball game with my family at night and I decided that Soft Pretzels was a perfect little baseball game treat! I whipped up a batch and was pretty pleased with how they turned out.  Also, I used whole wheat flour and tried both salted and cinnamon sugar combinations.  I ended up liking the salted better, as did most of the crowd, and everyone was happy that I brought them pretzels to the game.  Unfortunately, my fun pretzels did nothing to help my brothers team win, but it was still very fun!

Soft Pretzels (adapted from Yammie's Noshery)


Ingredients:
2 cups skim milk
1 1/2 tsp active dried yeast
6 tbsp brown sugar
4 tbsp butter, melted
4 1/2 cups whole wheat flour
2 tsp fine salt
1/3 cup baking soda
3 cups warm water
sea salt
cinnamon sugar

Directions:
1.  Warm the milk in the microwave for 1 1/2 minutes.  Stir in the yeast and let it sit for 3 minutes. Mix in the butter and sugar.  Mix in the flour, 1 cup at a time, and then mix in the salt.  Knead the dough for 10 minutes. Place the dough in a greased bowl and cover it with greased plastic wrap.  Let the dough sit in a warm, moist place for about 1 hour.  The dough should double in size. Preheat the oven to 450 and cut the dough into 12-24 pieces. (I did about 24 small pretzels).  
2. To form the pretzel, roll each piece of dough out to be as thin as you can and shape the pretzel the way you want.  
3. Combine the baking soda and warm water in a medium bowl.  Dip each pretzel in the baking soda water and place on a greased baking sheet. Sprinkle each pretzel with sea salt or cinnamon sugar. For a stronger cinnamon sugar taste, bake the pretzels first and then dip in butter and then cinnamon sugar. Bake the pretzels for about 7-10 minutes, until golden brown.
Enjoy :)
 

Tuesday, April 17, 2012

Pretzel M&M Blondies

Tonight I am all about preparing for tomorrow. Tomorrow is a big day in my life! I am lead-teaching the honors algebra class and I am being observed for the first time by both my university supervisor and my cooperating teacher (the main teacher of the class).  I am a little nervous, but I am mostly excited.  Also, tomorrow is a DTS study night so I am getting all prepped for that.  That means baking something delicious.  What is truly convenient about this is that baking helps me de-stress and feel good and Glee is on tonight, something that also puts me in an awesome mood!

I am totally going to rock tomorrow!
Tower of Delish!


I can't wait to teach my lesson.  I designed the lesson plan a while ago, and as of now, it is all set to go.  I am teaching a lesson on simplifying radicals (things with square roots).  The lesson in the book is pretty simple and I used the teacher-edition to help me get ideas.  I think I have a pretty solid plan.  The key ingredients: confidence and an exit slip.  I am going to start with a warm-up, check homework, go over homework (there shouldn't be too many questions), and then jump right in!  The kids are going to do some problems in groups and share their ideas for solving the problems.  We will go over strategies and definitions as a class and then I will hand out the exit slip.  An exit slip is an awesome teacher tool (not to mention all-the-rage in teacher education right now) and so I am using it to both get/give feedback for my class and get a good report from my supervisor (because he loves exit slips!).  An exit slip is a good way to give the kids practice and then see how they understood the lesson.  Then, you give them feedback on their work and hand it back to them the next day.  This way, they get to see if they understood the material and receive ideas for improvement if needed. My cooperating teacher loves them, but also expressed the frustration she has with them. Exit slips are awesome, but when you have 100 or more students, they can be unrealistic.  So, lesson learned: use them sparingly and use them on lessons and in classes where it is more difficult to gage student engagement during class.  After the exit slip, the class will have some time to work on homework.  I have a really good feeling about tomorrow and I can't wait to teach!!!

My life in a photo...
For tomorrow's study night, I made blondies with pretzel M&Ms in them! MMM! I am obsessed with pretzel M&Ms.  M&Ms were always one of my favorite candies, but when they came out with the pretzel variety, I was sold: they are no longer one of my favorites, they are my one and only favorite! So, why not throw them into blondies?  Check it out:

Pretzel M&M Blondies (adapted from Bakeaholic Mama)

Ingredients:
2 cups flour
1/2 tsp baking soda
1/2 tsp salt
3/4 cup unsalted butter, melted
1 cup packed brown sugar
1/2 cup sugar
1 tbsp vanilla
1 egg
1 egg yolk
2 cups Pretzel M&Ms

Directions:
1. Preheat oven to 325 degrees and grease a 9x13 inch baking dish.
2. In a medium bowl, whisk flour, salt, and baking soda.
3. In a large bowl, beat melted butter with both sugars until well combined.  Add in the egg, egg yolk, and vanilla and beat to combine.  Slowly add in the flour mixture until just combined.  Stir in the M&Ms.

4. Spread batter into the prepared baking dish and bake for 25-28 minutes or until edges begin to brown and an inserted toothpick comes out clean.  Cool completely.
Enjoy :)

Sunday, December 11, 2011

Dodgeball...take 2

My second experience with Dodgeball was not much of an improvement from the first...we were destroyed.  Turns out the key to a good dodgeball team is: have lots of big strong boys and be able to throw a ball.  I can do neither of these things and so I was not much of an asset to my team.  BUT! We had a blast and we got free snacks from the grocery store so I think it was a winning experience.

Now I have some time to kill (which never happens!).  On Thursday, our Educational Psychology teacher is bring us pie to celebrate the last day of class.  She also announced that anyone who wants to bring something can...and so I have embarked on the search for the perfect pie to bring.  Also, I love this class and so I really want to bring something good.  Ed Psych has been a ton of fun because we are learning about adolescent psychology.  This is basically: why are teens so messed up and crazy most of the time?  Who doesn't enjoy talking about that?  It also gives us all a chance to reflect back on those glorious teen years of middle and high school and how awkward we were (or still are :)). 

I want to do something decently easy, as finals are coming up and I don't have a ton of time, and something not too expensive as the holidays are coming up.  My friend Tamara has been asking me to make my chocolate chip cookies, but add in pretzel pieces to get that salty kick going.  I decided to use that idea...in pie form!  I found this adorable pie post from Tidy Mom for Chocolate Covered Pretzel Pie.  I fell in love.

Chocolate Covered Pretzel Pie

Ingredients:
2 cups broken pretzels
3/4 cup light brown sugar, divided and lightly packed
1 stick unsalted butter, melted
1/4 cup cornstarch
3 tablespoons unsweetened cocoa
Pinch of salt
2 1/2 cups 2% milk
4 egg yolks
3 ounces bittersweet chocolate, chopped
4 ounces semi sweet chocolate, chopped
1-1/4 cups + 2 tablespoons heavy whipping cream, divided
1 teaspoon vanilla extract
2 tablespoons confectioners sugar

Directions:
1. Heat oven to 350 degrees. Combine smashed pretzels, 1/4 cup brown sugar, and butter. Press mixture firmly into bottom and up sides of a 9-inch pie pan. Bake crust 10 to 15 minutes; cool.  Crust should be golden.
2. In a medium saucepan whisk together 1/2 cup lightly packed brown sugar, cornstarch, cocoa, salt, and milk. Place over medium heat and stir until sugar is just dissolved, about 2 minutes. Whisk in egg yolks. Cook, stirring constantly, until custard thickens and just boils, about 5 minutes. Remove from heat and stir in bittersweet chocolate and vanilla. Place pan in a bowl of ice and water and stir occasionally until custard cools.
3. While custard cools, make a chocolate ganache to cover pie crust. Place chopped semi sweet chocolate in medium bowl. Heat 1/4 cup + 2 tablespoons of heavy whipping cream in microwave about 30-40 seconds (just until boils). Pour warm cream over chocolate and stir until melted. Pour over cooled pie crust, using rubber spatula to help spread chocolate up the sides and over entire bottom of crust. Place in refrigerator or freezer until set.


4. Pour custard into cooled crust with hardened ganache and press plastic wrap directly onto surface. Chill until firm, 4 hours or up to a day. (I let it chill overnight.)
5. Whip cream and confectioners’ sugar until soft peaks form, spread over pie and garnish with extra pretzels and chocolate shavings.

Enjoy :)