So this is my "binomial" post. Sorry if you were looking for more of the "baker" side.
I am having a lot of fun in math class right now. I know, I know...it is May. Teaching in May is usually just the worst. Kids are checked out, teachers are exhausted, the curriculum is winding down and you have to stay motivated so that kids might stay motivated in time for finals. I have 19 days (17 until finals) and I couldn't be more excited for summer.
However, we are doing a computer programming unit right now with bootstrapworld.org. This site is FREE! It connects programming to mathematical concepts and students work through the units to create their own computer game. It is really freaking cool.
My students are totally being rockstars with this. They are working in groups, writing their own code, and being super creative with their games. It is awesome.
I created my own game as an example, but I think it is actually pretty great. Seriously, anyone interested in publishing this? I call it OctoPI because, you know, math. The Pi moves up and down with arrow keys and if you press the spacebar, you shoot out an OctoPi! You want to catch the green star and avoid the red circle. CHECK IT OUT HERE! It is not perfect and I am going to work on making the movement more complex, but it's pretty adorable.
Just math teacher/wannabe baker teaching and cooking my way through life one student/cupcake at a time!
Showing posts with label Pi. Show all posts
Monday, May 16, 2016
Monday, March 14, 2016
Happy Pi Day!
I am such a nerd and this day is the best!
I made mys "famous" inception cookies for all of my students today. I know this isn't pie, but hear me out. Pi is the distance around 1/2 of the unit circle:
So, I made the inception cookies because you end up cutting them in half and therefore you have a Pi's worth of the circle. Isn't that cool??? I know, I'm a dork.
My students are raving about the cookies and it makes me so happy to share them with them. I love to bake and it's so great when I get to share that part of me with my kiddos.
In class today, we watched Sir Cumference and the Dragon of Pi and then the students ate their cookies while working on Circle Challenges. It is a nice change of pace and it is a great way to celebrate pi!
Tonight, Bri and I are planning on cooking dinner and, of course, making some sort of pie for dessert!
I made mys "famous" inception cookies for all of my students today. I know this isn't pie, but hear me out. Pi is the distance around 1/2 of the unit circle:
So, I made the inception cookies because you end up cutting them in half and therefore you have a Pi's worth of the circle. Isn't that cool??? I know, I'm a dork.
My students are raving about the cookies and it makes me so happy to share them with them. I love to bake and it's so great when I get to share that part of me with my kiddos.
In class today, we watched Sir Cumference and the Dragon of Pi and then the students ate their cookies while working on Circle Challenges. It is a nice change of pace and it is a great way to celebrate pi!
Tonight, Bri and I are planning on cooking dinner and, of course, making some sort of pie for dessert!
Thursday, November 12, 2015
Uncommon Goods
I'm so excited for a bunch of reasons.
1. Today is my last day for this week!
2. I'm hosting book club this weekend.
3. Uncommon Goods reached out to me and offered to send me some of their products!
They are the coolest. Seriously. I can't even decide on what I want from their site since there are so many amazing products. I'm obviously a big fan of food and math so I was considering this adorable pie dish.
So here is their story: Uncommon Goods is all about creating amazing handmade, recycled and organic products. They are invested in creating a positive workplace that gives back. And, they are constantly promoting environmentally friendly and socially responsible practices. Basically, they rock. Their employees love to work there and they are pretty much totally internet based so that they can cut down on paper products such as catalogs. Plus, their products are super freaking cute!
I can't believe how many amazing products have caught my eye. With the holidays right around the corner I think that some great pages to check out are: Kitchen and Bar, Home and Office, and Gifts for Family. In addition to all of this, they also have some amazing art pieces that are totally affordable. This site is going to be a great place to get a jump start on my holiday shopping. Plus, I have been trying to spruce up our apartment lately and I have already found a bunch of options that I think will be great for our place! So, whether you are a fellow chef, wine lover, or have an online shopping addiction, you need to know about this site! Head on over and let me know what you think!
Saturday, March 14, 2015
Happy Pi Day! 3.141592653...
Happy Pi Day everyone! Today is an especially epic Pi day as it is March 14th of 2015! Since Pi starts with 3.1415 this is the first time this has happened in 100 years and I am pretty excited about it! For school, I brought in oreo pie and chocolate chip cookie pie for my students and a ton of my kiddos brought in their own circular treats to share. It was pretty great!
It also happens to be the St. Patricks Day celebration in Chicago and my friend Lauren's bday celebration. Can today get any more epic?
The answer is yes. Here is an epically delicious pie for you all! This is like a "better than sex" pie and it was truly AH-mazing. I hope you all have a fantastic Pi/St. Pattys/Whatever day and enjoy your weekend!
The Epically AH-mazing Pi Day Pie
Crust:
1 1/4 cup flour
1/2 tbsp sugar
1/4 tsp salt
1/2 cup cold, unsalted butter
1 tsp white vinegar
2-3 tbsp cold water
Filling:
Your favorite hot fudge
1 1/2 cups dark chocolate chips
8 oz light cream cheese
1 cup heavy whipping cream
Your favorite caramel sauce (I recommend salted caramel)
2 cups cool whip topping
Mini PB cups, M&Ms...and whatever other toppings you want!
Directions:
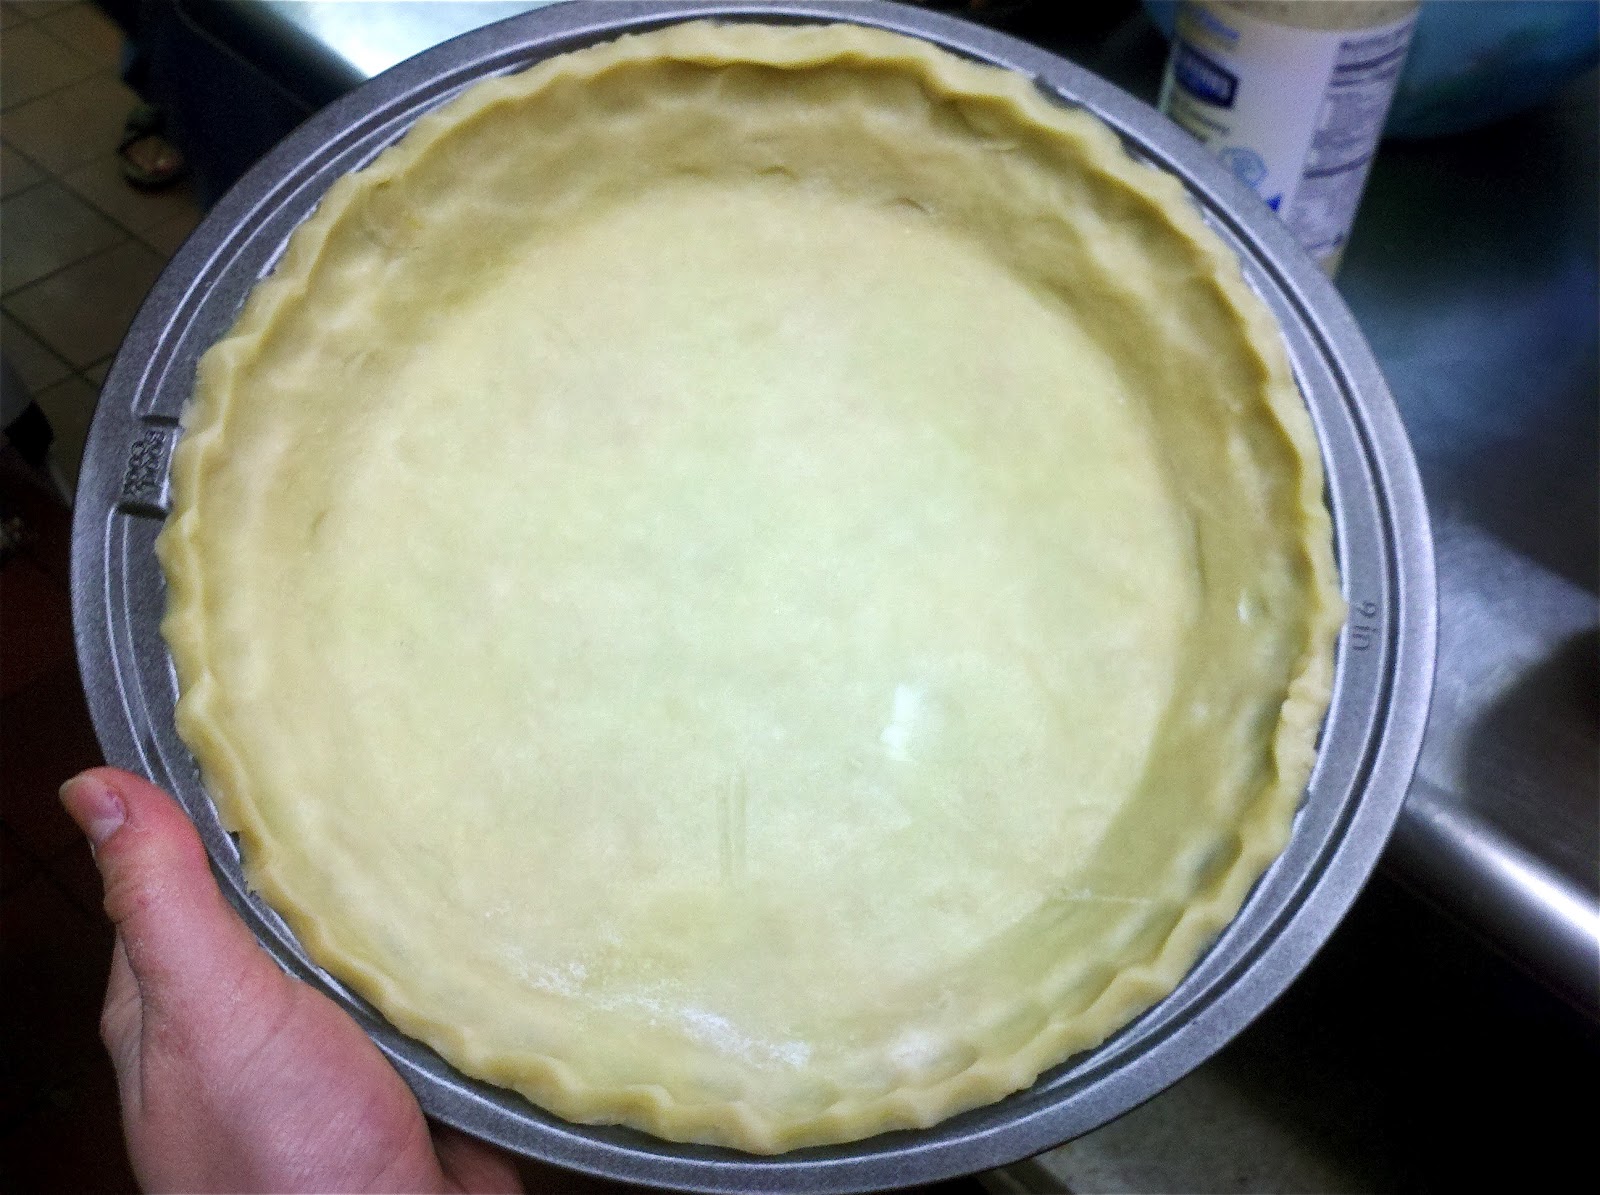
1. Make the crust: place flour, sugar, and salt in a food processor and pulse a few times to combine. Cut cold butter into cubes and place in food processor with vinegar. Pulse until you have a sand like combination. Pour water in, 1 tbsp at a time, while pulsing, until your dough comes together. Wrap in plastic wrap and chill for at least 1 hour. Once chilled, heat oven to 400 degrees and roll out pie dough so that you have a large circle. I usually try to go for a circle with a 12 inch diameter. Then, place pie dough into a 9 inch pie pan and form crust to your liking. Place in preheated oven and cook for 10-12 minutes or until dough starts to brown. Cool
2. To make the filling, melt the dark chocolate in a heat proof bowl. Once melted, whip with the cream cheese and heavy cream until you have a light and fluffy filling.
3. To assemble the pie: spread hot fudge into your cooked pie crust so that it covers the bottom. Then, spread the chocolate mixture on top. Next, drizzle caramel sauce over the chocolate filling. Finally, top with the whipped topping and sprinkle extra hot fudge/caramel/other toppings on top. Place in fridge to chill until you are ready to serve.
Enjoy :)
Labels:
Candy,
Caramel,
Chocolate,
Dark Chocolate,
Dessert,
Fudge,
Math,
Peanut Butter,
Pi,
Pie,
Whipped Cream
Monday, April 8, 2013
French Silk Pie
How have I not shared this pie?!?!
I made this for Pi Day way back when and I haven't gotten around to telling you about it. This makes me sad because this was an amazingly good pie. Plus, I tried a new technique with my pie crust and it was amazing!
But, first, today is half marathon Monday and I am excited to announce that I am 48 days away from race day! I am two weeks into training and things are going great. Plus, the weather is getting nicer out and I get to run outside again! This week I am going to run 4 miles today and Wednesday, 6 miles Thursday, 3 miles Friday, and 8 miles Saturday! Along with this, I am still doing my Jillian Michaels on Sundays.
Also, I have applied to even more schools and now I am just waiting to hear back! I will keep you all posted!
So anyways, back to pie. For the crust, I made my usual all butter crust, but I added a tsp of Apple Cider Vinegar. This made it easier to roll the pie dough out and I ended up with an amazing flaky crust. The pie filling was adapted from Taste of Home and it was delicious! Plus, after you bake the crust, all you have to do is pour the filling in and chill it. That's right, you don't have to actually bake the pie! And, it was amazing!
French Silk Pie
Ingredients:
For the Crust:
1 1/4 cups flour
1/2 tbsp sugar
1/4 tsp salt
1/2 cup cold, unsalted butter, cut into cubes
1 tsp apple cider vinegar
2-3 tbsp ice water
For the Filling:
2/3 cup sugar
2 eggs
2 oz unsweetened chocolate, chopped
1 tsp vanilla
1/3 cup unsalted butter, softened
2/3 heavy whipping cream
2 tsp powdered sugar
whipped cream for topping, optional
Directions:
1. Make the crust. In a food processor, place flour, sugar and salt. Process to mix. Keep processing and add cubes of butter until you have a mixture that resembles wet sand. Add in the vinegar and 1 tbsp of water at a time until dough forms into a ball. Wrap in plastic wrap and refrigerate for 1 hour.
2. Preheat oven to 450. Once dough is chilled, lightly flour a surface and roll dough out until you have a circle about 12 inches in diameter. Place in 9 inch pie pan and trim edges. Cover with foil Place in oven and bake for 5 minutes, remove foil and bake for another 5 minutes or until dough is lightly browned. Remove and let cool.
3. Make the filling. In a small saucepan, combine eggs and sugar. Cook over low heat until mixture thickens and coats the back of a wooden spoon, about 10 minutes. Remove from heat and stir in vanilla and chocolate until chocolate completely melts and is well combined.
4. In a medium bowl, beat butter until light and fluffy. Beat in chocolate mixture and beat on high for 5 minutes. Mixture should be light and fluffy.
5. In a separate bowl, beat whipping cream with powdered sugar until it forms a stiff peak. Fold the whipped cream into the chocolate mixture. Pour into pie crust and let chill for 6 hours or overnight.
6. Once chilled, top with whipped cream if you want and serve!
Enjoy :)
I made this for Pi Day way back when and I haven't gotten around to telling you about it. This makes me sad because this was an amazingly good pie. Plus, I tried a new technique with my pie crust and it was amazing!
But, first, today is half marathon Monday and I am excited to announce that I am 48 days away from race day! I am two weeks into training and things are going great. Plus, the weather is getting nicer out and I get to run outside again! This week I am going to run 4 miles today and Wednesday, 6 miles Thursday, 3 miles Friday, and 8 miles Saturday! Along with this, I am still doing my Jillian Michaels on Sundays.
Also, I have applied to even more schools and now I am just waiting to hear back! I will keep you all posted!
So anyways, back to pie. For the crust, I made my usual all butter crust, but I added a tsp of Apple Cider Vinegar. This made it easier to roll the pie dough out and I ended up with an amazing flaky crust. The pie filling was adapted from Taste of Home and it was delicious! Plus, after you bake the crust, all you have to do is pour the filling in and chill it. That's right, you don't have to actually bake the pie! And, it was amazing!
French Silk Pie
Ingredients:
For the Crust:
1 1/4 cups flour
1/2 tbsp sugar
1/4 tsp salt
1/2 cup cold, unsalted butter, cut into cubes
1 tsp apple cider vinegar
2-3 tbsp ice water
For the Filling:
2/3 cup sugar
2 eggs
2 oz unsweetened chocolate, chopped
1 tsp vanilla
1/3 cup unsalted butter, softened
2/3 heavy whipping cream
2 tsp powdered sugar
whipped cream for topping, optional
Directions:
1. Make the crust. In a food processor, place flour, sugar and salt. Process to mix. Keep processing and add cubes of butter until you have a mixture that resembles wet sand. Add in the vinegar and 1 tbsp of water at a time until dough forms into a ball. Wrap in plastic wrap and refrigerate for 1 hour.
2. Preheat oven to 450. Once dough is chilled, lightly flour a surface and roll dough out until you have a circle about 12 inches in diameter. Place in 9 inch pie pan and trim edges. Cover with foil Place in oven and bake for 5 minutes, remove foil and bake for another 5 minutes or until dough is lightly browned. Remove and let cool.
3. Make the filling. In a small saucepan, combine eggs and sugar. Cook over low heat until mixture thickens and coats the back of a wooden spoon, about 10 minutes. Remove from heat and stir in vanilla and chocolate until chocolate completely melts and is well combined.
4. In a medium bowl, beat butter until light and fluffy. Beat in chocolate mixture and beat on high for 5 minutes. Mixture should be light and fluffy.
5. In a separate bowl, beat whipping cream with powdered sugar until it forms a stiff peak. Fold the whipped cream into the chocolate mixture. Pour into pie crust and let chill for 6 hours or overnight.
6. Once chilled, top with whipped cream if you want and serve!
Enjoy :)
Thursday, March 21, 2013
Oreo Pie
Today was exhausting. I felt like I ran a marathon. I taught all day, tutored after school, ran 5 miles, met up with Max for dinner at Roast and now I am, finally, sitting down and relaxing for a bit.
School was pretty great. I set up 7 stations for the students to rotate through. These stations had context problems to help the students apply new information, a few review problems on old information, and two mini quizzes to formatively assess the students on a variety of information. One of my students even thanked me for the fun activity. It was pretty great. I wouldn't want to do this too much, but this was a nice way to get students up and moving around. Plus, it allowed me to work with a bunch of students on problems that were more of a struggle.
After tutoring and my run, it was great to see Max for dinner and I had an awesome sandwich. Now, I am chilling, watching Grey's Anatomy, waiting for a cake to get out of the oven, and getting ready to sleep! Tomorrow is a test day, so I am excited to relax a little and get caught up on some grading. And then...SPRING BREAK...well, after Friday, but still, I'm so close!
I have yet another pie to share today. This one was a huge hit and all the kids were asking for the recipe. Well, here you go! Cookies and Cream Pie. It's a no-bake pie that requires FOUR ingredients. Yep, thats all.
Cookies and Cream Pie
Ingredients:
1 oreo pie crust
8 oz cream cheese
2 cups cool whip
1/3 cup sugar
8-10 oreos, crushed
Directions:
1. Beat cream cheese and cool whip until well combined. Beat in sugar until creamy. Stir in cookie crumbs. Pour into pie crust and let chill for at least 2 hours.
Enjoy :)
School was pretty great. I set up 7 stations for the students to rotate through. These stations had context problems to help the students apply new information, a few review problems on old information, and two mini quizzes to formatively assess the students on a variety of information. One of my students even thanked me for the fun activity. It was pretty great. I wouldn't want to do this too much, but this was a nice way to get students up and moving around. Plus, it allowed me to work with a bunch of students on problems that were more of a struggle.
After tutoring and my run, it was great to see Max for dinner and I had an awesome sandwich. Now, I am chilling, watching Grey's Anatomy, waiting for a cake to get out of the oven, and getting ready to sleep! Tomorrow is a test day, so I am excited to relax a little and get caught up on some grading. And then...SPRING BREAK...well, after Friday, but still, I'm so close!
I have yet another pie to share today. This one was a huge hit and all the kids were asking for the recipe. Well, here you go! Cookies and Cream Pie. It's a no-bake pie that requires FOUR ingredients. Yep, thats all.
Cookies and Cream Pie
Ingredients:
1 oreo pie crust
8 oz cream cheese
2 cups cool whip
1/3 cup sugar
8-10 oreos, crushed
Directions:
1. Beat cream cheese and cool whip until well combined. Beat in sugar until creamy. Stir in cookie crumbs. Pour into pie crust and let chill for at least 2 hours.
Enjoy :)
Wednesday, March 20, 2013
Chocolate Chip Cookie Pie
Today was such a good day of teaching and I have such a good recipe to share!
Math today was all about inverse trig functions and reciprocal trig functions. To ensure that every student had a sketch of the graphs of these functions, we did various jigsaw activities. This was great because students were able to investigate one inverse trig function and one reciprocal trig function in depth. That is, they worked in new groups to graph these functions without calculators. They had to analyze domain and range for each and use the original trig function to help them to graph the new functions. After their in depth analysis, they returned to their original teams and shared their findings while also learning about their team-mates findings. Every student ended up with a sketch of all six graphs. This way, they all had the information and the process, but did not need to repeat the process over an over. This would have been tedious and unsupportive of the learning goals. Instead, the majority of the time was spent investigating what these functions are, what they represent, and how we can use them. We learned a ton of information and it was really great to see the students up and moving around. Plus, we had time for a nice game of Flinch as a small break in the middle of class. I felt really great about today!
Now, it was Pi Day last week and I brought in FOUR Chocolate Chip Cookie Pies since I was helping host FOUR Pi Day celebrations. This meant that I needed a recipe that was not complicated and would not take a ton of time to make. I found the perfect one. This Cookie Pie, adapted from Nestle Tollhouse, was simply amazing. I bought pie crust, multiplied the recipe by 4, and put all the pies in at once. I spent 15 minutes making the filling and then had 60 minutes to plan for school and clean up while the pies baked. There you go, simple and delicious.
Chocolate Chip Cookie Pie
for one pie
Ingredients:
1 9-inch pie crust
2 eggs
1/2 cup flour
1/2 cup sugar
1/2 cup brown sugar
3/4 cup unsalted butter, softened
1 tsp vanilla
1/2 tsp cinnamon
2 cups semi-sweet chocolate chips (or 2 cups of whatever mix-ins you want)
Directions:
1. Preheat oven to 325 and place your unbaked pie crust in a pie pan.
2. Beat eggs until pale yellow. Beat in both sugars until well combined. Beat in flour, cinnamon, and vanilla. Beat in the butter until well combined. Stir in chocolate chips.
3. Pour filling into the pie crust and bake for 55-60 minutes. Pie will be lightly browned. Let cool for at least 20 minutes.
Enjoy :)
Math today was all about inverse trig functions and reciprocal trig functions. To ensure that every student had a sketch of the graphs of these functions, we did various jigsaw activities. This was great because students were able to investigate one inverse trig function and one reciprocal trig function in depth. That is, they worked in new groups to graph these functions without calculators. They had to analyze domain and range for each and use the original trig function to help them to graph the new functions. After their in depth analysis, they returned to their original teams and shared their findings while also learning about their team-mates findings. Every student ended up with a sketch of all six graphs. This way, they all had the information and the process, but did not need to repeat the process over an over. This would have been tedious and unsupportive of the learning goals. Instead, the majority of the time was spent investigating what these functions are, what they represent, and how we can use them. We learned a ton of information and it was really great to see the students up and moving around. Plus, we had time for a nice game of Flinch as a small break in the middle of class. I felt really great about today!
Now, it was Pi Day last week and I brought in FOUR Chocolate Chip Cookie Pies since I was helping host FOUR Pi Day celebrations. This meant that I needed a recipe that was not complicated and would not take a ton of time to make. I found the perfect one. This Cookie Pie, adapted from Nestle Tollhouse, was simply amazing. I bought pie crust, multiplied the recipe by 4, and put all the pies in at once. I spent 15 minutes making the filling and then had 60 minutes to plan for school and clean up while the pies baked. There you go, simple and delicious.
Chocolate Chip Cookie Pie
for one pie
Ingredients:
1 9-inch pie crust
2 eggs
1/2 cup flour
1/2 cup sugar
1/2 cup brown sugar
3/4 cup unsalted butter, softened
1 tsp vanilla
1/2 tsp cinnamon
2 cups semi-sweet chocolate chips (or 2 cups of whatever mix-ins you want)
Directions:
1. Preheat oven to 325 and place your unbaked pie crust in a pie pan.
2. Beat eggs until pale yellow. Beat in both sugars until well combined. Beat in flour, cinnamon, and vanilla. Beat in the butter until well combined. Stir in chocolate chips.
3. Pour filling into the pie crust and bake for 55-60 minutes. Pie will be lightly browned. Let cool for at least 20 minutes.
Enjoy :)
Thursday, March 14, 2013
Chicago-Style Deep Dish Pizza
What better way to celebrate Pi Day than with a Deep Dish Pizza Pie!
I was feeling a tad homesick and so I decided to make myself a Chicago-Style Deep Dish Pizza. I found a great recipe over at Girl Versus Dough and then went to town adding my own flair and customizing the recipe to include my favorite pizza toppings. I went with a whole wheat crust, yummy tomato sauce, a mix of low-fat provolone and low-fat mozzarella cheese, and spinach, mushrooms, and onions as my toppings. Holy cow this was a good looking pie and it was even better to eat! I had tons of leftovers that I continued to enjoy throughout the week. I love that this recipe had a healthy whole wheat crust, ensured that I got enough veggies, and left me feeling full all through the school day! It wasn't too difficult to make and it was a fun project. Plus, I just love using my cast iron skillet, its a great pan.
Pi day is pretty much the second most exciting day for me, after my birthday. It brings together food and math! That is what I am all about! Today at school, we have a Pi Day party planned where students can bring in any kind of circular treat. We are going to do a little warm up where we find the ratio of diameter to circumference of a few different circles Guess what? They all equal Pi! So cool! Then, I have a great Pi Day Math Rap to listen to as we chow down on our circular desserts. I, of course, baked for my classes. I made EIGHT pies. Two for each of my classes. There are four chocolate chip cookie pies and four oreo cream pies. Don't worry, recipes will all show up here.
Without further ado, here is the recipe for my Chicago-Style Deep Dish Pizza Pi. Happy Pi Day!
Chicago-Style Deep Dish Pizza
Ingredients:
For the crust:
4 cups white whole wheat flour
3 tbsp corn meal
3 1/2 tsp active dried yeast
1 3/4 tsp salt
2 tbsp olive oil
4 tbsp unsalted butter, melted
2 tbsp canola oil
1 cup plus 4 tbsp lukewarm water
For the pizza:
28 oz can diced tomates, drained
2 tbsp sugar
1 tsp italian seasoning
salt and pepper to taste
4 cloves garlic, minced
3 cups sautéed vegetables (I used spinach, mushrooms, and sliced onions)
8 oz sliced low-fat provolone cheese
6 oz sliced low-fat mozzarella cheese
1 cup grated parmesan
olive oil
Directions:
1. Make the dough, mix together the dry ingredients and then stir in the rest of the ingredients. Knead dough for 8-10 minutes, roll into a ball, and let rest for 1 - 1 1/2 hours.
2. Preheat oven to 425. Coat 12 inch cast iron pan with olive oil. Once dough has rested, punch down dough and place in pan. Press dough into the bottom and up the sides of the pan. Bake for 10 minutes.
3. Prepare the filling: in a large bowl, mix tomatoes with sugar, italian seasoning, salt and pepper. In a separate pan, heat about a tbsp of olive oil with the garlic. Saute vegetables in the garlic and olive oil until cooked.
4. Place sliced cheese on the bottom of your slightly cooked crust. Spread tomato mixture over the cheese. Place vegetables on top of the tomato layer. Sprinkle parmesan cheese over the top and drizzle with olive oil.
5. Bake for 25 minutes. Let rest for 5 minutes. Slice!
Enjoy :)
I was feeling a tad homesick and so I decided to make myself a Chicago-Style Deep Dish Pizza. I found a great recipe over at Girl Versus Dough and then went to town adding my own flair and customizing the recipe to include my favorite pizza toppings. I went with a whole wheat crust, yummy tomato sauce, a mix of low-fat provolone and low-fat mozzarella cheese, and spinach, mushrooms, and onions as my toppings. Holy cow this was a good looking pie and it was even better to eat! I had tons of leftovers that I continued to enjoy throughout the week. I love that this recipe had a healthy whole wheat crust, ensured that I got enough veggies, and left me feeling full all through the school day! It wasn't too difficult to make and it was a fun project. Plus, I just love using my cast iron skillet, its a great pan.
Pi day is pretty much the second most exciting day for me, after my birthday. It brings together food and math! That is what I am all about! Today at school, we have a Pi Day party planned where students can bring in any kind of circular treat. We are going to do a little warm up where we find the ratio of diameter to circumference of a few different circles Guess what? They all equal Pi! So cool! Then, I have a great Pi Day Math Rap to listen to as we chow down on our circular desserts. I, of course, baked for my classes. I made EIGHT pies. Two for each of my classes. There are four chocolate chip cookie pies and four oreo cream pies. Don't worry, recipes will all show up here.
Without further ado, here is the recipe for my Chicago-Style Deep Dish Pizza Pi. Happy Pi Day!
Chicago-Style Deep Dish Pizza
Ingredients:
For the crust:
4 cups white whole wheat flour
3 tbsp corn meal
3 1/2 tsp active dried yeast
1 3/4 tsp salt
2 tbsp olive oil
4 tbsp unsalted butter, melted
2 tbsp canola oil
1 cup plus 4 tbsp lukewarm water
For the pizza:
28 oz can diced tomates, drained
2 tbsp sugar
1 tsp italian seasoning
salt and pepper to taste
4 cloves garlic, minced
3 cups sautéed vegetables (I used spinach, mushrooms, and sliced onions)
8 oz sliced low-fat provolone cheese
6 oz sliced low-fat mozzarella cheese
1 cup grated parmesan
olive oil
Directions:
1. Make the dough, mix together the dry ingredients and then stir in the rest of the ingredients. Knead dough for 8-10 minutes, roll into a ball, and let rest for 1 - 1 1/2 hours.
2. Preheat oven to 425. Coat 12 inch cast iron pan with olive oil. Once dough has rested, punch down dough and place in pan. Press dough into the bottom and up the sides of the pan. Bake for 10 minutes.
3. Prepare the filling: in a large bowl, mix tomatoes with sugar, italian seasoning, salt and pepper. In a separate pan, heat about a tbsp of olive oil with the garlic. Saute vegetables in the garlic and olive oil until cooked.
4. Place sliced cheese on the bottom of your slightly cooked crust. Spread tomato mixture over the cheese. Place vegetables on top of the tomato layer. Sprinkle parmesan cheese over the top and drizzle with olive oil.
5. Bake for 25 minutes. Let rest for 5 minutes. Slice!
Enjoy :)
Thursday, January 10, 2013
Chocolate Peanut Butter Pie
Once again I am at work after a long day of school. However, today was a great day, followed by a yummy lunch of homemade Sonoma Chicken Salad with a Chobani Bite for dessert, and then it was off to work. Bri is visiting me and he is currently hard at work working on his thesis/making creme brulee. We are having a little dinner/date night tonight. I am going to cook up a delicious dinner after work and we both wanted to try making creme brulee for dessert. However, since creme brulee takes so long to set and chill, Bri is making that now and I will do dinner later! I can't wait!
Today's post is quite the treat. Over winter break, my dad requested that we bake something together. I was a tad nervous about this experience. I mean, my dad is awesome and I love spending time with him, but we are so similar that we tend to argue quite a bit since we are both so sassy! I decided that the perfect thing to "bake" together, would be a "no-bake" chocolate peanut butter pie. This way, there was no stress about it turning out okay and we wouldn't get into any arguments! It turned out to be super yummy. I am going to have to remember this one for Pi Day!
Dad did a great job mixing everything up and sticking the pie in the fridge. Truly, it was impressive. He also did dishes which was fantastic! I ended up assembling the pie and decorating and it turned out fantastic. I guess we made a pretty good team. Maybe next time we will be able to handle something you actually need to bake!
No Bake Chocolate Peanut Butter Pie
Ingredients:
1 9-inch Oreo crust
1 8 oz container of light frozen whipped topping
4 oz light cream cheese
3/4 cup powdered sugar
1/2 cup natural, creamy peanut butter
1/4 cup semi-sweet chocolate chips
2 tbsp skim milk
1/4 tsp espresso powder (optional...but it's delicious)
whipped cream
Directions:
1. In a large bowl, beat the whipped topping, cream cheese, and peanut butter. Slowly beat in the powdered sugar. Pour the filling into the prepared pie crust.
2. Place the chocolate chips and milk in a small saucepan and double boil over medium heat, stirring often, until chocolate is melted and smooth. Stir in the espresso powder.
3. Drop spoonfuls of the chocolate mixture over the peanut butter filling and, using a toothpick or knife, swirl the chocolate into the top. Place the pie in the fridge for at least 2 hours or until set.
4. Decorate with whipped cream and mini peanut butter cups.
Enjoy :)
Friday, November 23, 2012
Sweet Potato Pie
So, I know that everyone is probably suffering from some sort of food coma today, but I just had to share this fun recipe that is perfect for Thanksgiving or the Holidays.
Also, I am not suffering from a food coma. Don't get me wrong, I went to a great Thanksgiving dinner. First, Bri and I stopped over at his families thanksgiving dinners for a few hours and then we made our way over to my sister's house for my family's thanksgiving dinner. It was so nice to see everyone. I haven't been home with family since the summer and this was just amazing to be around everyone once again. Plus, I got to meet my new baby nephew who is just the cutest thing ever! The food was delicious and the company was even better.
I ate a ton, however, after dinner, Bri, me and my brother Zack went home around 8 and then I took a "nap" from about 9:30 to 11:30. Then, we got in the car with my mom and drove over to the mall for Black Friday shopping that started at midnight. The entire mall was opened and we got some great deals at a bunch of stores. I made a killing at the Limited and seriously stocked up on some much needed teacher clothes. I am totally ready for interviews and high school. I also was able to get a bunch of presents as well as a new pair of cute shoes! I just love Black Friday. The mall was busier than I have ever seen before and they were playing music throughout the stores. It was so much fun. We got home a little after 3 and went back to sleep.
Now, I am writing this after sleeping in later than I have in ages (9...woah) and deciding whether or not I should go shopping again. I do need a bunch of groceries so Super Target is currently calling my name. I am also planning on a great lunch at Portillos and then an evening out with my friends. I can't wait for another lovely day of break!
Sweet Potato Pie (adapted from All Recipes)
Ingredients:
1 pound sweet potatoes
1/2 cup unsalted butter
1/2 cup sugar
1/2 cup brown sugar
1/2 cup half and half
2 eggs
1 tsp cinnamon
1/2 tsp nutmeg
1/2 tsp ground cloves
1 tsp vanilla
1 9-inch pie crust (recipe-I left out the lemon juice for this pie and added a dash of cinnamon)
Directions:
1. If you are making the pie crust, you can follow the recipe link and do this a day or two in advance. Then, just leave the dough out to soften a bit and then roll out into a circle, 12 inches in diameter and place in your pie dish. Fold dough over the side a bit and then take off any excess dough. Place in fridge until ready to use.
2. Preheat oven to 350 degrees.
3. Microwave the sweet potato until it can be easily pierced with a fork, about 5-6 minutes. Remove the skins and then mash the sweet potato.
4. In a large bowl, beat the mashed sweet potato with the butter until well combined. Beat in the sugar and brown sugar until well combined and then the half and half and eggs. Mix in the cinnamon, nutmeg, cloves, and vanilla. Pour the filling into your prepared pie dish.
5. Bake the pie for 60 minutes or until sides and middle are firm. Let cool and top with whipped cream.
Enjoy :)
I ate a ton, however, after dinner, Bri, me and my brother Zack went home around 8 and then I took a "nap" from about 9:30 to 11:30. Then, we got in the car with my mom and drove over to the mall for Black Friday shopping that started at midnight. The entire mall was opened and we got some great deals at a bunch of stores. I made a killing at the Limited and seriously stocked up on some much needed teacher clothes. I am totally ready for interviews and high school. I also was able to get a bunch of presents as well as a new pair of cute shoes! I just love Black Friday. The mall was busier than I have ever seen before and they were playing music throughout the stores. It was so much fun. We got home a little after 3 and went back to sleep.
Now, I am writing this after sleeping in later than I have in ages (9...woah) and deciding whether or not I should go shopping again. I do need a bunch of groceries so Super Target is currently calling my name. I am also planning on a great lunch at Portillos and then an evening out with my friends. I can't wait for another lovely day of break!
Sweet Potato Pie (adapted from All Recipes)
Ingredients:
1 pound sweet potatoes
1/2 cup unsalted butter
1/2 cup sugar
1/2 cup brown sugar
1/2 cup half and half
2 eggs
1 tsp cinnamon
1/2 tsp nutmeg
1/2 tsp ground cloves
1 tsp vanilla
1 9-inch pie crust (recipe-I left out the lemon juice for this pie and added a dash of cinnamon)
Directions:
1. If you are making the pie crust, you can follow the recipe link and do this a day or two in advance. Then, just leave the dough out to soften a bit and then roll out into a circle, 12 inches in diameter and place in your pie dish. Fold dough over the side a bit and then take off any excess dough. Place in fridge until ready to use.
2. Preheat oven to 350 degrees.
3. Microwave the sweet potato until it can be easily pierced with a fork, about 5-6 minutes. Remove the skins and then mash the sweet potato.
4. In a large bowl, beat the mashed sweet potato with the butter until well combined. Beat in the sugar and brown sugar until well combined and then the half and half and eggs. Mix in the cinnamon, nutmeg, cloves, and vanilla. Pour the filling into your prepared pie dish.
5. Bake the pie for 60 minutes or until sides and middle are firm. Let cool and top with whipped cream.
Enjoy :)
Labels:
Dessert,
Holiday,
Pi,
Pie,
Sweet Potato,
Thanksgiving
Saturday, March 17, 2012
Tipsy Dark Chocolate Pecan Pie
Happy St. Patrick's Day! This recipe was for Pi Day last week, but here is the post (finally!). Also, what better way to celebrate St. Patty's Day than with a boozy pie recipe? I can't think of anything! This pie was insanely good and after seeing what went into it, I wasn't surprised. Everyone was a big fan. Top it off with a healthy dose of whipped cream and you are all set! Enjoy!
My St. Patrick's Day is going to be decently low-key. However, it will be celebrated! My parents are coming to visit me and see me in my OPTIMA Dance Show. OPTIMA is a dance organization at the university where great dancers and great choreographers come together and put on a fantastic show. If you are in the Madison area, I highly recommend coming to the show tonight! It is at the Memorial Union and it is FREE! Yep, totally free. So, if you are looking to enhance your St. Patrick's Day plans with some dance, come see the show! Also, the show is full of food bloggers! How crazy is that? Me, Megan at A Dash of Megnut, and Melanie at Melanie's Mixtures are all in the show! It is going to be amazing!
Tipsy Dark Chocolate Pecan Pie (inspired by Une Gamine dans la Cuisine)
Ingredients:
For the crust:
1 1/4 cups flour
1/2 tbsp sugar
1/4 tsp salt
1/2 cup cold, unsalted butter, cut into 1 inch cubes
1 tsp lemon juice
3 tbsp ice water
For the filling:
1 1/2 cups chopped pecans
3/4 cup bittersweet chocolate chips, melted
1 cup dark corn syrup
1/2 cup sugar
1/2 cup dark brown sugar
1/4 cup dark rum
4 eggs
1/4 cup unsalted butter, melted
2 tsp cornmeal
1/2 tsp salt
Directions:
1. Make the crust: Whisk flour, sugar, and salt in a large bowl. Whisk in butter until mixture starts to resemble crumbly, wet sand. Add lemon juice and water and mix until dough comes together. Add a little water if dough is too dry. Form into a round disk and wrap in plastic wrap. Refrigerate for at least 2 hours or up to a day.
2. On a lightly floured surface, roll out dough into a 13 inch round. Place in a 9 inch pie pan and trim the overhanging dough. Preheat oven to 325 degrees.
3. Sprinkle the pecans evenly in the bottom of the crust. Pour the melted chocolate over the pecans. (To melt the chocolate: microwave in 30 second intervals, stirring in between, until melted. Let cool slightly before pouring into crust).
4. In a large saucepan, combine corn syrup, sugars, and rum. Bring to a boil over medium heat and cook, stirring constantly, for about 3 minutes. Remove from heat.
5. In a large bowl, mix the eggs, melted butter, cornmeal, and salt. Whisking constantly, slowly add the hot rum mixture. Add about 1/4, combine, and then repeat. Once fully combined, pour over the chocolate and pecans.
6. Bake the pie for 55 minutes or until center is set. If the crust browns too quickly, cover with foil or a pie shield. Let cool completely.
Enjoy :)
![]() |
| Shane demonstrating how much whipped cream is appropriate |
| Super fun dance clump :) |
Ingredients:
For the crust:
1 1/4 cups flour
1/2 tbsp sugar
1/4 tsp salt
1/2 cup cold, unsalted butter, cut into 1 inch cubes
1 tsp lemon juice
3 tbsp ice water
For the filling:
1 1/2 cups chopped pecans
3/4 cup bittersweet chocolate chips, melted
1 cup dark corn syrup
1/2 cup sugar
1/2 cup dark brown sugar
1/4 cup dark rum
4 eggs
1/4 cup unsalted butter, melted
2 tsp cornmeal
1/2 tsp salt
Directions:
1. Make the crust: Whisk flour, sugar, and salt in a large bowl. Whisk in butter until mixture starts to resemble crumbly, wet sand. Add lemon juice and water and mix until dough comes together. Add a little water if dough is too dry. Form into a round disk and wrap in plastic wrap. Refrigerate for at least 2 hours or up to a day.
2. On a lightly floured surface, roll out dough into a 13 inch round. Place in a 9 inch pie pan and trim the overhanging dough. Preheat oven to 325 degrees.
3. Sprinkle the pecans evenly in the bottom of the crust. Pour the melted chocolate over the pecans. (To melt the chocolate: microwave in 30 second intervals, stirring in between, until melted. Let cool slightly before pouring into crust).
4. In a large saucepan, combine corn syrup, sugars, and rum. Bring to a boil over medium heat and cook, stirring constantly, for about 3 minutes. Remove from heat.
5. In a large bowl, mix the eggs, melted butter, cornmeal, and salt. Whisking constantly, slowly add the hot rum mixture. Add about 1/4, combine, and then repeat. Once fully combined, pour over the chocolate and pecans.
6. Bake the pie for 55 minutes or until center is set. If the crust browns too quickly, cover with foil or a pie shield. Let cool completely.
Enjoy :)
Friday, March 16, 2012
Dark Chocolate Pecan Pie Cookie Cups
Today was such a lovely day! Brian is visiting me because he is on spring break (lucky!) and we are having a great time enjoying the fantastic Wisconsin weather. Today we woke up and went for a four mile run! We ran to the Henry Vilas Zoo. If you are ever in Madison I highly recommend it! It is completely free and so fun! After walking around the zoo, we came back home and had a great lunch at Med Cafe. It was cheap and fantastic. Best falafel I have ever had! Then, I, unfortunately, had to work. Now, it's time to get ready for my dance show! I just love Madison in the springtime and I am so glad that I get to share it with Brian!
This post would not be completely without one of my Pi Day recipes. Here it goes: the third pie that I made for the School of Ed was not really a pie...It was a cookie cup pie! The recipe sounded amazing and did not take nearly as long to make as a traditional pie. They were super yummy too!
Dark Chocolate Pecan Pie Cooke Cups (inspired by Easybaked)
Ingredients:
1 16.5 oz tube of refrigerated sugar cookie dough
2 cups pecan halves
2/3 cup bittersweet chocolate chips, melted
1 tbsp dark corn syrup
1/4 cup heavy whipping cream
Directions:
1. Preheat oven to 350 degrees.
2. Spoon 1 tbsp of cookie dough into mini muffin pan wells. Press cookie into each well and up the sides. Place 1 pecan half in each cup.
3. Chop 1 cup of pecan halves into small pieces. In a large bowl, mix chopped pecans, melted chocolate, corn syrup and whipped cream. Using a plastic bag with 1 corner cut off, pipe the filling into the cookie cups. Top with another pecan half.
4. Bake for 16-18 minutes. Cookie dough should be golden. Let cool completely before gently twisting the cookie cups out of the pan.
Enjoy :)
Also, check out this hilarious photo:
This post would not be completely without one of my Pi Day recipes. Here it goes: the third pie that I made for the School of Ed was not really a pie...It was a cookie cup pie! The recipe sounded amazing and did not take nearly as long to make as a traditional pie. They were super yummy too!
Dark Chocolate Pecan Pie Cooke Cups (inspired by Easybaked)
Ingredients:
1 16.5 oz tube of refrigerated sugar cookie dough
2 cups pecan halves
2/3 cup bittersweet chocolate chips, melted
1 tbsp dark corn syrup
1/4 cup heavy whipping cream
Directions:1. Preheat oven to 350 degrees.
2. Spoon 1 tbsp of cookie dough into mini muffin pan wells. Press cookie into each well and up the sides. Place 1 pecan half in each cup.
3. Chop 1 cup of pecan halves into small pieces. In a large bowl, mix chopped pecans, melted chocolate, corn syrup and whipped cream. Using a plastic bag with 1 corner cut off, pipe the filling into the cookie cups. Top with another pecan half.
4. Bake for 16-18 minutes. Cookie dough should be golden. Let cool completely before gently twisting the cookie cups out of the pan.
Enjoy :)
Also, check out this hilarious photo:
![]() |
| You just never know what you are going to see at the zoo... ;) |
Wednesday, March 14, 2012
Mini Dutch Apple Pie
Today was Pi Day and for at Future Math Teacher, this is a big deal. Plus, as we all know, I love to bake. Basically today is one of the best days of the year in my eyes. I wanted to bring in a treat for my students in my math classes at practicum. At first, I was going to make a few pies, but then I found this recipe!
My students loved them! It was the perfect way to celebrate this wonderful math holiday and show my students how much I appreciate having them around to work with. No one teaches you how to be a teacher better than the students.
Mini Dutch Apple Pie (Inspired by Some the Wiser)
Ingredients:
For the crust:
2 2/3 cups flour
1 cup cold, unsalted butter, cut into 1 inch cubes
6 oz low-fat cream cheese
2 egg yolks
For the filling:
7-8 medium, Granny Smith Apples
1 cup sugar
4 tbsp flour
1/2 tsp cinnamon
1/4 tsp nutmeg
1 tsp lemon juice
For the topping:
1/2 cup flour
4 tbsp brown sugar
1/2 cup unsalted butter, softened
1 tsp cinnamon
Directions:
Preheat the oven to 375 degrees.
1. Make the crust: Whisk flour, butter, and cream cheese until mixture resembles clumpy, wet sand. Add egg yolk and whisk until dough comes together. Add a little cold water if dough is too dry.
2. Pull off clumps of dough and press evenly into the wells of a mini muffin pan (you should have enough for 48 mini pies). Place prepared pans in fridge to cool. Also place extra dough in fridge to cool if you are like me and only have 1 mini muffin pan.
3. Peel, core, quarter, and thinly slice apples. Mix all ingredients together in a large bowl.
4. Using a mixer, mix all the topping ingredients together until well combined.
5. Prepare mini pies by filling each muffin well with apple filling and then placing some of the topping on top. Bake for 25 minutes, or until topping and crust is golden. Refrigerate the apple filling if you need to wait for the first batch to finish.
Enjoy :)
My students loved them! It was the perfect way to celebrate this wonderful math holiday and show my students how much I appreciate having them around to work with. No one teaches you how to be a teacher better than the students.
Mini Dutch Apple Pie (Inspired by Some the Wiser)
Ingredients:
For the crust:
2 2/3 cups flour
1 cup cold, unsalted butter, cut into 1 inch cubes
6 oz low-fat cream cheese
2 egg yolks
For the filling:
7-8 medium, Granny Smith Apples
1 cup sugar
4 tbsp flour
1/2 tsp cinnamon
1/4 tsp nutmeg
1 tsp lemon juice
For the topping:
1/2 cup flour
4 tbsp brown sugar
1/2 cup unsalted butter, softened
1 tsp cinnamon
Directions:
Preheat the oven to 375 degrees.
1. Make the crust: Whisk flour, butter, and cream cheese until mixture resembles clumpy, wet sand. Add egg yolk and whisk until dough comes together. Add a little cold water if dough is too dry.
2. Pull off clumps of dough and press evenly into the wells of a mini muffin pan (you should have enough for 48 mini pies). Place prepared pans in fridge to cool. Also place extra dough in fridge to cool if you are like me and only have 1 mini muffin pan.
3. Peel, core, quarter, and thinly slice apples. Mix all ingredients together in a large bowl.
4. Using a mixer, mix all the topping ingredients together until well combined.
5. Prepare mini pies by filling each muffin well with apple filling and then placing some of the topping on top. Bake for 25 minutes, or until topping and crust is golden. Refrigerate the apple filling if you need to wait for the first batch to finish.
Enjoy :)
Cheddar Apple Pie
Here is the second pie for PI Day (also known as National CollegeCulinista Day). This one is really exciting. I'm not saying that Red Velvet Pudding Pie isn't exciting, but it already sounds amazing. Cheddar apple pie sounds a little scary. However, the magic is that the cheddar is in the crust! Genius! I love cheese and apples and this combo sounds great! This one is also going to the school of education for snack time.
BIG shout-out to Shane and Margo for helping me with this one. They cut apples like pros and we had a lot of fun listening to music and hanging out. I also made this pie slightly ahead of time as it had to cool for a day.
Cheddar Apple Pie (inspired by Gastronome Tart)
Ingredients:
For the crust:
2 1/2 cups flour
1 tsp salt
1 tbsp sugar
3/4 cup unsalted butter, very cold, cut into 1 inch cubes
1 1/2 cups shredded, light, cheddar cheese
1/4-1/2 cup ice water
For the filling:
1/4 cup flour, plus more for dusting
2 tbsp lemon juice
4 lbs. Granny Smith Apples (about 7 large ones)
3/4 cup sugar
1 tsp cinnamon
1/2 tsp nutmeg
1/2 tsp salt
Directions:
1. Make the crust: whisk the flour, salt, and sugar. Add in the butter and beat until it looks like clumpy, wet sand. Whisk in the cheese. Whisk in 1/4 cup water so that dough comes together. If it is too dry continue to add water 1 tbsp at a time. Divide the dough in half, form into two disks, wrap in plastic wrap, and refrigerate for at least 1 hour or up to a day.
2. Make the pie: Preheat oven to 425 degrees. On a lightly floured surface, roll out the dough disks into 13 inch rounds. Place one on a baking sheet lined with parchment paper and place back in fridge. Place other in a 9 inch pie pan and fit to the pan. Cut off overhanging dough.
3. Place lemon juice in a large bowl. Peel, core, and quarter the apples, thinly slice. Place apples in the lemon juice and toss to combine. Add flour, sugar, cinnamon, nutmeg, and salt. Toss to combine.
4. Fill bottom crust with apple mixture. Pile up the apples in the center. Get the top crust out of the fridge. Lightly brush the edge of the bottom crust with water and then place the top crust over the pie. Trim the edges to a 1 inch overhang and fold over the dough. Press down on the edge with a fork and work your way around the pie to seal it. Cut about 5 small slits in the top of the pie to allow steam to escape.
5. Bake at 425 for 20 minutes with pie on the lowest oven rack. You may want to place the pie on a baking sheet as well to prevent any oven mess. After 20 minutes, reduce heat to 375 and continue to bake for 60-70 minutes. The crust should be golden and the juices will be bubbling. If the crust browns too fast, you can cover it in foil or use a "pie shield."
Note: I just got a pie shield! It's fantastic. It's so much easier to use than foil, which can fall off or not cover the pie well. It was also super cheap...just an idea if you plan on making a bunch of pies :)
When the pie is done, let it cool completely for at least 4 hours. I made this guy way ahead of time, let it cool for day, and then refrigerated it for a day before leaving it out the night before serving it.
Enjoy :)
BIG shout-out to Shane and Margo for helping me with this one. They cut apples like pros and we had a lot of fun listening to music and hanging out. I also made this pie slightly ahead of time as it had to cool for a day.
Cheddar Apple Pie (inspired by Gastronome Tart)
![]() |
| Oven-ready! |
![]() |
| Pie shield! So cute! |
Ingredients:
For the crust:
2 1/2 cups flour
1 tsp salt
1 tbsp sugar
3/4 cup unsalted butter, very cold, cut into 1 inch cubes
1 1/2 cups shredded, light, cheddar cheese
1/4-1/2 cup ice water
For the filling:
1/4 cup flour, plus more for dusting
2 tbsp lemon juice
4 lbs. Granny Smith Apples (about 7 large ones)
3/4 cup sugar
1 tsp cinnamon
1/2 tsp nutmeg
1/2 tsp salt
Directions:
1. Make the crust: whisk the flour, salt, and sugar. Add in the butter and beat until it looks like clumpy, wet sand. Whisk in the cheese. Whisk in 1/4 cup water so that dough comes together. If it is too dry continue to add water 1 tbsp at a time. Divide the dough in half, form into two disks, wrap in plastic wrap, and refrigerate for at least 1 hour or up to a day.
2. Make the pie: Preheat oven to 425 degrees. On a lightly floured surface, roll out the dough disks into 13 inch rounds. Place one on a baking sheet lined with parchment paper and place back in fridge. Place other in a 9 inch pie pan and fit to the pan. Cut off overhanging dough.
3. Place lemon juice in a large bowl. Peel, core, and quarter the apples, thinly slice. Place apples in the lemon juice and toss to combine. Add flour, sugar, cinnamon, nutmeg, and salt. Toss to combine.
4. Fill bottom crust with apple mixture. Pile up the apples in the center. Get the top crust out of the fridge. Lightly brush the edge of the bottom crust with water and then place the top crust over the pie. Trim the edges to a 1 inch overhang and fold over the dough. Press down on the edge with a fork and work your way around the pie to seal it. Cut about 5 small slits in the top of the pie to allow steam to escape.
5. Bake at 425 for 20 minutes with pie on the lowest oven rack. You may want to place the pie on a baking sheet as well to prevent any oven mess. After 20 minutes, reduce heat to 375 and continue to bake for 60-70 minutes. The crust should be golden and the juices will be bubbling. If the crust browns too fast, you can cover it in foil or use a "pie shield."
Note: I just got a pie shield! It's fantastic. It's so much easier to use than foil, which can fall off or not cover the pie well. It was also super cheap...just an idea if you plan on making a bunch of pies :)
When the pie is done, let it cool completely for at least 4 hours. I made this guy way ahead of time, let it cool for day, and then refrigerated it for a day before leaving it out the night before serving it.
Enjoy :)
Tuesday, March 13, 2012
Red Velvet Pudding Pie
Pi day is tomorrow and I have decided that it is basically National CollegeCulinista Day. This day combines my two favorites: baking and math. Of course I am excited.
And here begins my pie marathon. I am making FIVE pies (or variations on pie). This first one was perfect because it was so simple. It is easy to make and you can make it ahead of time! I am bringing this one in for my school of education class to enjoy as a snack. Enjoy the first of many pies that are about to be hitting up this blog!
Red Velvet Pudding Pie (inspired by And Now For Something Completely Delicious)
Ingredients:
1 prepared Oreo crust (9-inch) (or you can make your own!)
For the filling:
1 1/2 cup 2% milk
1 cup heavy whipping cream
1/2 cup sugar
1/3 cup cocoa powder
4 eggs
1 cup buttermilk (I made my own: 1 cup milk with 1 tbsp white vinegar)
4 tbsp cornstarch
3 tbsp unsalted butter
1 tbsp red food coloring
2 tsp vanilla
For the topping:
1 cup heavy whipping cream
3 tbsp sugar
1 tsp vanilla
Directions:
1. In a medium saucepan, combine milk, cream, sugar, and cocoa powder. Stir to dissolve the sugar and cocoa and heat until bubbles start to appear on the sides of the mixture.
2. In a large bowl, whisk eggs, buttermilk, and cornstarch. Slowly add the heated mixture, stirring constantly. When fully combined, return to the saucepan and heat over medium-high heat. Stir constantly, with a spatula, until mixture thickens, about 5 minutes. Do not let this boil! Reduce the heat if necessary.
3. After five minutes, add butter, food coloring, and vanilla. Stir until there are no more lumps. Pour into prepared crust.
4. Make the topping: Whip the cream until a soft peak forms. Add the sugar and vanilla and whip until a medium peak forms. Spread over the pie and refrigerate for at least 2 hours. You can store this pie in the fridge for up to 3 days.
Enjoy :)
And here begins my pie marathon. I am making FIVE pies (or variations on pie). This first one was perfect because it was so simple. It is easy to make and you can make it ahead of time! I am bringing this one in for my school of education class to enjoy as a snack. Enjoy the first of many pies that are about to be hitting up this blog!
Red Velvet Pudding Pie (inspired by And Now For Something Completely Delicious)
Ingredients:
1 prepared Oreo crust (9-inch) (or you can make your own!)
For the filling:
1 1/2 cup 2% milk
1 cup heavy whipping cream
1/2 cup sugar
1/3 cup cocoa powder
4 eggs
1 cup buttermilk (I made my own: 1 cup milk with 1 tbsp white vinegar)
4 tbsp cornstarch
3 tbsp unsalted butter
1 tbsp red food coloring
2 tsp vanilla
For the topping:
1 cup heavy whipping cream
3 tbsp sugar
1 tsp vanilla
Directions:
1. In a medium saucepan, combine milk, cream, sugar, and cocoa powder. Stir to dissolve the sugar and cocoa and heat until bubbles start to appear on the sides of the mixture.
2. In a large bowl, whisk eggs, buttermilk, and cornstarch. Slowly add the heated mixture, stirring constantly. When fully combined, return to the saucepan and heat over medium-high heat. Stir constantly, with a spatula, until mixture thickens, about 5 minutes. Do not let this boil! Reduce the heat if necessary.
3. After five minutes, add butter, food coloring, and vanilla. Stir until there are no more lumps. Pour into prepared crust.
4. Make the topping: Whip the cream until a soft peak forms. Add the sugar and vanilla and whip until a medium peak forms. Spread over the pie and refrigerate for at least 2 hours. You can store this pie in the fridge for up to 3 days.
Enjoy :)
Subscribe to:
Posts (Atom)


.jpg)

.jpg)
.jpg)
