Wednesday, March 28, 2012

Nutella Stuffed Sugar Cookies

A very sweet cookie and a very sweet cause!

My "sisters" from DTS and I are participating in Relay for Life through the university.  We are the Little Sisters of DTS team and we are very excited to be participating in such a great cause.  Relay for Life supports the American Caner Society.  This is a cause that is very dear to my heart as I have personally experienced the fear and loss that is associated with a friend or family member suffering from cancer.  I think that this event is an amazing experience.  I have participated in it before and I cannot wait to celebrate the success of so many cancer survivors while providing hope for those who are still suffering.

If you want, I am raising money as a member of my team and by following the link below you can check out my page and help me out.  Any amount is greatly appreciated and all the money goes to the American Cancer Society.

http://main.acsevents.org/site/TR/RelayForLife/RFLFY12National?px=14680526&pg=personal&fr_id=41939

Thank you for your support and feel free to check back to see my progress! Together we can help create a world with less cancer and more birthdays!

I know I love birthdays...birthdays mean cake :)

Or, cookies!

I found this cookie recipe over at Cookin' Canuck, which is a fantastic blog so head over there to see the step by step pictures.

My cookies did not come out nearly as attractive as hers, but I can attest that they are super duper delicious.  Enjoy these very sweet cookies and head on over to my Team's Page to help a very sweet cause!

Nutella and Sea Salt Stuffed Sugar Cookies (slightly adapted from Cookin' Canuck)


Ingredients:
1/2 cup nutella
2 3/4 cups flour
1/2 tsp baking powder
1/2 tsp salt
1 1/2 cups plus 1/3 cup sugar, divided
14 tbsp unsalted butter, softened
2 eggs
2 tsp vanilla
sea salt

Directions:
1. Preheat oven to 350 degrees.  Line a cookie sheet with parchment paper and drop teaspoons of nutella on the cookie sheet (about 24). Place in freezer for 15 minutes.  Line another large cookie sheet with parchment paper and set aside.
2.  While the nutella is freezing, in a large bowl, beat butter and 1 1/2 cups sugar until light and fluffy. Mix in eggs one at a time and then mix in the vanilla.
3. In a medium bowl, whisk flour, baking powder, and salt.  Slowly add to the butter mixture until just combined.
4. Form the cookies: get the nutella out of the freezer.  Place some cookie dough on the prepared cookie sheet, sprinkle some sea salt on top, place a piece of nutella on top, and finally more dough.  Seal the cookie dough around the nutella.  Finally, roll the cookie in the remaining sugar to coat it.  Repeat for the rest of the cookies.  You will make about 24.  Bake for 10-12 minutes.

Enjoy :)

Tuesday, March 27, 2012

LC2 Ladies Night

It's Ladies Night! Tonight all the beautiful women of learning community two are getting together for a good ol' pajama party.  There are about fifteen of us and we are all future secondary education teachers.  Each subject area was assigned a different dish to bring.  English is dessert, Science is appetizers, and Social Studies/Math is Main Course/Salad.

I am Math so I had to come up with some sort of main dish or salad.  I'm thinking about making a dessert as well just for kicks.  This event reminded me of Progressive Dinner with my coworkers at VIP.  I thought about what people brought for the main course for that and remembered the amazing quiche that Leigh put together.  I decided that I would make a similar one because it is a great dish and pretty healthy!

Cheesy Spinach and Tomato Quiche


Ingredients:
1 russet potato, peeled and thinly sliced
8 eggs
1/4 cup milk
1 tsp italian seasoning
1 tsp salt
1/2 tsp pepper
3 cups packed baby spinach
2 large roma tomatoes, sliced
1/2 cup crumbled feta cheese
1/2 cup low-fat, mozzarella cheese

Directions:
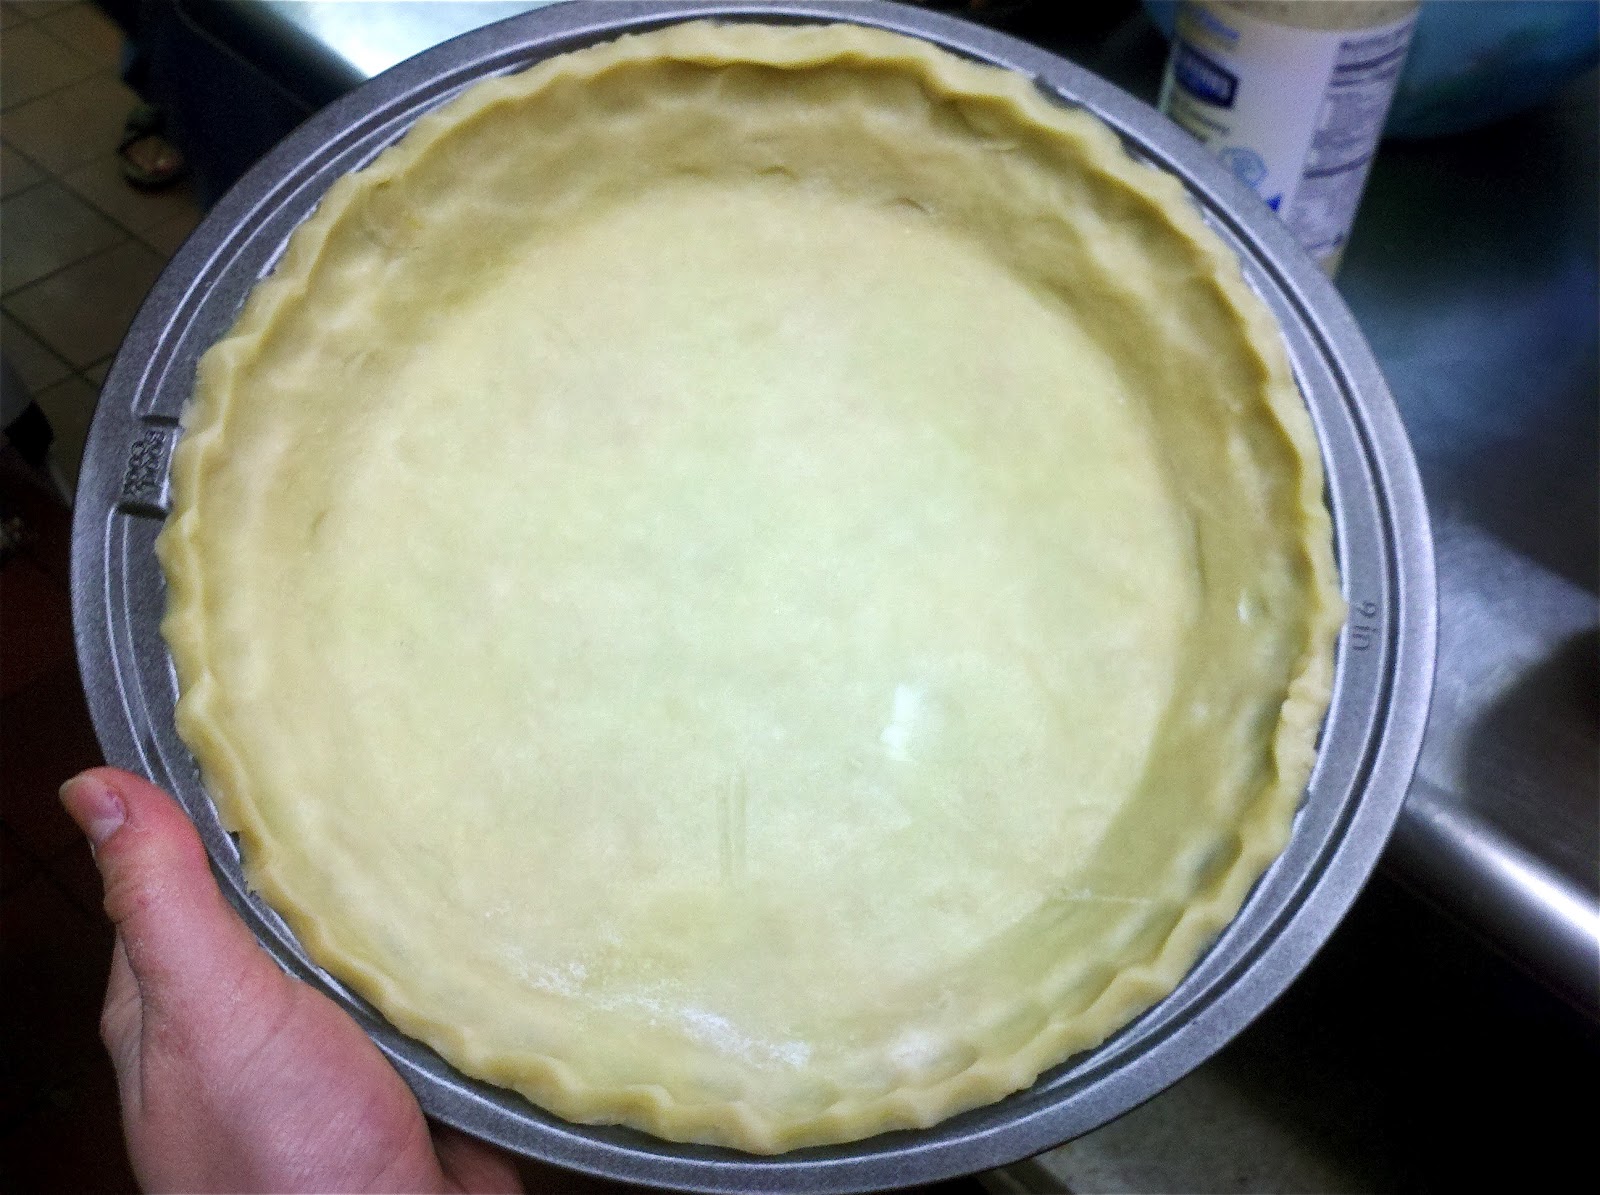
1. Preheat oven to 375 degrees and grease a 9 inch pie pan.
2. Peel, wash and slice the potato into slices about 1/4 inch thick.  Place potatoes on the bottom and sides of the pie pan. Bake for about 10 minutes or until potatoes are translucent. Set aside.
3. Beat eggs and milk until well combined.  Mix in seasonings.
4. Place the spinach on top of the potato crust and sprinkle the feta cheese on top of the spinach.  Pour the egg mixture over everything.  Finally, place the tomatoes on the top.
5. Bake quiche for 30-40 minutes or until it is no longer jiggly.  During the last 10 minutes or so, sprinkle the mozzarella on top of the quiche and let it continue to bake.
Enjoy :)

This event is super cute and I can't wait for tonight.  Of course, I am also going to share everyone else's dishes! I think that all teachers should have opportunities to have events such as this one.  It requires very little work to put together as everyone brings a dish and it helps everyone get to know each other and get closer to each other.  I am so excited to spend tonight with these ladies.  

Learning Community 2 has become a huge part of my life.  We take almost all of our classes together in the School of Education and we get to share our teaching experiences with each other.  You can learn a lot from hearing other's experiences and we have gotten very close through this process.

I hope you enjoy everyone's recipes!

Appetizers:

Meat and Cheese Tray
By: Kristin

Ingredients:
Cheddar Cheese Squares
Crackers
Pepperoni

I also brought cole slaw...all from Target (great store)

Caprese Salad Sticks


By: Courtney

1. Cut your own ke-bob sticks or use tooth picks
2. Place 1 cherry tomato, 1 basil leaf, and a slice of mozzarella cheese (I used string cheese!) on each stick.
Enjoy :)

Chips and Salsa
By: Shannon

I got Donkey chips and Frontera Salsa
Enjoy :)


Main Course:

Cheesy Spinach and Tomato Quiche (See above)

Baked Mostaccioli
By: Lauren

Ingredients:
2 cups spaghetti sauce
Ground beef, cooked
3 cups mostaccioli noodles, cooked according to box
1 cup mozzarella cheese, grated, plus more for the topping
Parmesan cheese, grated

Directions:
1. Preheat oven to 350 degrees and grease a 13 x 9 inch pan.
2.  Mix in the cooked ground beef to the spaghetti sauce. Mix sauce/meat with the mostaccioli and 1 cup of mozzarella.  Pour into the prepared pan.  Top with more mozzarella and parmesan (as much as you would like)
3. Bake for 20 minutes or until cheese is brown and sauce is bubbling.
Enjoy :)

Emily's Pasta Salad


Ingredients:
1 red pepper, diced
1 ball of mozzarella, cubed
1 summer sausage, cut into small pieces
1 box of Bowtie Pasta
Your favorite Balsamic Vinaigrette, to taste

Directions:
1. Make pasta according to the directions on the box.  Drain and let cool.
2. Place pasta in a large bowl and toss with the rest of the ingredients.  Top with your favorite balsamic dressing.
Enjoy :)

Tamara's Pasta Salad (adapted from Multiply Delicious)

Ingredients:
1 20 oz package of cheese tortellini
1/2 cup (or so) of your favorite Balsamic Vinaigrette Salad Dressing
1 tsp Dijon mustard
salt and pepper
2 cups firmly packed baby spinach, chopped
1/2 cup fresh basil, chopped
1 1/2 cups cherry tomatoes, halved
1/2 cup red bell pepper, diced

Directions:
1. In a small bowl, whisk the dressing and mustard together. Set aside
2.  Cook pasta according to directions, drain, and place in a large bowl.  Drizzle with a little olive oil and let cool for about 10 minutes.
3. Toss the pasta with the spinach, basil, tomatoes, and peppers.  Toss with the dressing.  Serve immediately or let chill in the fridge before serving.
Enjoy :)


Jenny's Salad with Raspberry Poppyseed Dressing (also known as: Northern Light Garden Salad)

Ingredients:
For the salad:
8-12 oz fresh baby spinach, washed and dried
2 cups strawberries, halved
8 oz Brie, cut into small pieces
For the dressing:
1/2 cup sugar
1/4 cup raspberry vinegar
1/2 cup canola oil
2 tbsp poppyseeds
1 tbsp sesame seeds
1 tsp paprika
1 tbsp worcestershire sauce
1 tsp minced onion

Directions: 
1. Prepare the dressing: in a small saucepan, whisk the sugar and vinegar over low heat until the sugar dissolves.  Remove from heat and whisk in the oil.  Whisk in the remaining dressing ingredients. Place in fridge until ready to use.
2. Toss salad ingredients in a large bowl and drizzle dressing over everything.
Enjoy :)

Dessert:

Cake Batter Cookies (adapted from Six Sisters' Stuff)
By: Tamara

Ingredients:
1 18.25 oz box yellow cake mix
1 tsp baking powder
2 eggs
1/2 cup vegetable oil
1 cup semisweet chocolate chips
sprinkles

Directions:
1. Preheat oven to 350 degrees and grease a few baking sheets.
2. In a medium bowl, stir the cake mix and baking powder.  Add eggs and oil and mix until blended.
3. Stir in chocolate chips and sprinkles. Drop by spoonfuls on the cookie sheets. Top with more sprinkles if desired.
4. Bake for 10 minutes.  Allow cookies to cool completely.
Enjoy :)

Peanut Butter Cookies
By: Natalie

Ingredients:
1 cup peanut butter
1 cup sugar
1 egg

Directions:
1. Preheat oven to 350 degrees.
2. Blend all ingredients together in a medium bowl.
3. Drop tablespoons of dough onto a cookie sheet and bake for 10 minutes. (Makes about 15 cookies).
Enjoy :)

Oatmeal Cranberry White Chocolate Cookies


By: Hillary

Ingredients:
2/3 cup butter, softened
2/3 cup brown sugar
2 eggs
1 1/2 cups old-fashioned oats
1 1/2 cups flour
1 tsp baking soda
1/2 tsp salt
1 1/4 cups dried cranberries
2/3 cup white chocolate chips

Directions:
1. Preheat oven to 375.
2. Using an electric mixer, beat butter and sugar until light and fluffy.  Add in eggs, mixing well.
3. In a medium bowl combine oats, flour, baking soda, and salt.  Add to the butter mixture in several additions, mixing until just combined.  Stir in dried cranberries and white chocolate chips.
4.  Drop by rounded tablespoons onto an ungreased cookie sheet.  Bake for 10-12 minutes. Makes about 2 1/2 dozen cookies.
Enjoy :)

Puppy Chow


By: Heather

Ingredients:
9 cups chex cereal
1/4 cup butter
1/2 cup peanut butter
1 1/2ish cups milk chocolate chips
2 tsp vanilla
2 ish cups powdered sugar


Directions:
1. Microwave butter, peanut butter, and chocolate chips in a microwave safe bowl for about a minute.  Stir to melt completely and add in vanilla.
2. Place chex in a large bowl and pour in chocolate mixture.  Stir with a wooden spoon.
3. Once the cereal is coated completely (you might want to add in more chocolate/peanut butter mixture), place it in a plastic bag with the powdered sugar and shake the bag to coat the cereal with the sugar.  Again, you might want to add in more sugar.
Enjoy :) ...and try your best not to eat it all at once (like I did...)


Sunday, March 25, 2012

Sunday Brunch

DTS is throwing a Sunday Brunch and I am on the committee to help out.  I wanted to find a good recipe that everyone would love and that would feed 30 to 40 people.  We decided to make scrambled eggs, bacon, have fresh fruit, and some sort of potato or hash-browns.  I decided that a french toast casserole would be the perfect addition to this meal.  It screams Sunday Brunch and it can be made a head of time.  It's perfect.  I put it together on Saturday and then Sunday morning, all I had to do was pop it in the oven.

I found the recipe over at the The Pioneer Woman.  I had heard about her site and one day I decided to seriously check it out.  I am officially obsessed.  I need to get my hands on one of her cookbooks as I love all of her recipes.  I modified the recipe a tad to make it a little lighter/use ingredients that I had on hand. Also, I had to feed a ton of people so I doubled the original recipe.  Now it's time to go feast! I just love brunch :)

Cinnamon Baked French Toast (inspired by The Pioneer Woman)

Ingredients:
For the french toast:
2 loaves french bread
16 eggs
4 cups milk (I used 1%)
1 cup half and half cream
1 1/2 cups sugar
2 tsp cinnamon
1 tsp nutmeg
1 tsp cloves
4 tbsp vanilla
For the topping:
1 cup flour
1 cup brown sugar
2 tsp cinnamon
1 tsp nutmeg
1 tsp cloves
1/2 tsp salt
1 cup cold, unsalted butter, cut into cubes

Directions:
1. Grease a LARGE pan.  The original recipe uses a 9 by 13 inch pan and I just found a big pan in my kitchen.  Tear the loaves into chunks and place in the pan.
2. In a large bowl, mix eggs, milk, cream, sugar, spices, and vanilla.  Mix well and pour over the bread.  Cover tightly and store in fridge for a least a few hours, or overnight.
3. Mix flour, brown sugar, cinnamon, nutmeg, cloves, and salt in a medium sized bowl.  Cut in butter until you have a coarse mixture.  It will look a little like wet sand.  Store in a sealed container in the fridge.
4. When you are ready to make the french toast, preheat oven to 350 degrees.  Sprinkle topping over the bread and place in oven for 45 minutes-1 hour.  The shorter time will give you a softer, more bread-pudding like consistency and the longer will give you a more crisp french toast.
Serve with fresh fruit, butter, and/or syrup!

Enjoy :)


Wednesday, March 21, 2012

I Heard Lightbulbs

I heard lightbulbs go off.

After today, I am pretty sure there are few greater sounds.  Today, was day 2 of adding and subtracting rational expressions.  Yesterday was a bit of a scare as most students were very lost and I was unsure of how to deal with the situation.  The full story can be found here, but in short: I decided to assign the full homework assignment even though I had not adequately addressed all the topics in the assignment.  This was something that I stressed over for the rest of the day.  Was this a good decision? How am I going to answer all of their questions tomorrow? 

I decided that the best way to address class for day 2 would be to start with questions only on the stuff that I covered and then go on to better teach the new information.  I figured there would be a ton of homework questions.  When I asked who had questions, nearly everyone raised their hand.  When I asked who had questions on the LCM section from the homework, all the hands went down except for one.   I went over that problem on the overhead.  Next, I put the class into learning teams of 4 and had them sit in their groups.  I explicitly went through the steps for solving an addition problem and then had them work in teams on some example problems.  I randomly picked students to come up to the overhead with their team and teach the class the problem.  After this, I told them to work together in their teams to answer any other homework problems. After about five minutes, I asked the class if they still had questions.  No one did! 

At this point, I knew that I had made some good decisions.  I walked around the room while they worked with their teams and I heard a ton of math related conversations.  They were truly engaged and they were doing a great job of supporting each other.  This is what I mean by, "I heard lightbulbs."  I heard a ton of, "Oh!" "I get it" "Oh, so that's where I went wrong." "Wait, I can do this." It was awesome.  Also, the fact that no one had questions by the end spoke to the productivity that occurred in the groups.  True, a few students worked individually and some did ask me questions as I walked around, but in general they worked really well and I was grateful to have chosen this collaborative approach.

Following the group work, I asked the class to tell me the steps for subtraction problems.  They were confident in answering my questions, they worked well on the example problem, and then I gave them their homework assignment.  The assignment included addition and subtraction problems and I added a few LCM problems to keep them sharp.  This time, I was fully confident that the class was in a good place.  I was so excited that my lesson plan was a success. 

Originally, I intended to include a worksheet activity where rational expressions and geometry are combined.  This did not work out as we did not have time.  I feel as though this "running out of time" phenomenon is going to be a common theme as my teaching career progresses.  However, I showed the substitute my activity, she loved it, and she told me she is going to assign it for homework over the weekend so that I can collect it on Monday and see how the students do.  Check it out: 
Students use these dimensions to answer questions
about the perimeter, area, or circumference of different shapes on the house
Students receive this worksheet (mine were black and white and they got to color if they wanted)

Oh, and by the way, the cookie bars were a huge hit :)


Tuesday, March 20, 2012

Lunch Lady Cookie Bars

Another future teacher rant: This entire week, my cooperating teacher is out because of foot surgery.  This means that I have the opportunity to lead-teach for the week.  This is incredibly exciting as it means that I get to plan for the week and really learn about what works and what doesn't.  We are working on rational expressions and this week is all about adding and subtracting rational expressions.  We worked through the idea of adding and subtracting with like denominators just fine.  Then came the tricky stuff.  Adding and subtracting with UNLIKE denominators.  This means you have to first find a common denominator, then add or subtract, and then factor/simplify.  It's a lot.  That is why, according to my experienced cooperating teacher, we spend two days on it.  Today was the first day with unlike denominators and I can certainly see how two days will be helpful.

Today was really tough.  I started out with a warm-up that included adding and subtracting fractions with unlike denominators.  This is old news for these guys and they did just fine.  They also noticed that this is probably what we are going to be doing, but with rational expressions (aka polynomials for everyone out there who is completely lost on what this is).  Next, I introduced the idea of "LCM (least common multiple)."  Finding the LCM is a fancy way of saying, "Find the most simple common denominator."  This, conceptually, was just fine. Then, I handed out a worksheet that had practice problems for finding the LCM of two polynomials.  They were allowed to work with people around them.  Some students were getting it, but most of them struggled.  A ton of kids had questions, and I, being one person, was just unable to reach them all.  Also, as I walked around and helped students, I realized that a few of the problems on the worksheet incorporated concepts that the students had clearly not covered.  I did not realize they did not know how to factor cubic polynomials as I was not around when they were covering that type of material.  Oops! I did not bother correcting them on not factoring and focused on getting the idea of the LCM across.  After allowing them to work for a while and realizing that they were still pretty lost, I decided to tell them to hold onto the sheet for tomorrow and I would make a good, clear answer key that we would use in class to go over the ideas.  I then had to decide whether to introduce the idea of adding these rational expressions with unlike denominators, as that was the plan, or just focus on LCM.  The planned homework was on LCM and some basic addition.  I decided to quickly introduce the idea, but I stressed that they would have to read the section in the book to do the homework.  Then, the day was over and I was left wondering if anything I did was right.

I know that tomorrow is going to be a little rough.  I will probably have 30 teenagers stressing out over not knowing how to add rational expressions and probably a little peeved with me for making them do it.  I am already trying to figure out how to go over probably all the homework and get to the idea of subtracting rational expressions.  I also know that I am going to have to continue to teach LCM and let them know that it was my mistake for giving them a few problems that they were not prepared for.  However, I am so grateful that the schedule already accounted for the fact that this section is just plain tough.  We were already planning on spending more than one day on this section.  This is perfect because although they are currently confused, after another day, they should be in a much better place.  I am also grateful that I, as a student-teacher, have the opportunity to learn how to account for these types of struggles and work on fixing them on the second day.

In the school of education, your first year is spent as a "practicum" student.  You spend one semester observing in a high school and one semester observing in a middle school.  Today, I realized that, while observation is important, action is far better.  I have learned more in these past few days about myself and teaching than I have all year.  I have seen a lot of good teaching, but I don't know who I am as an educator.  This week is allowing me to experiment with that identity and figure out who I am.

Tonight, besides planning for tomorrow and trying to predict every possible scenario that might come my way, I am also baking for study night.  I am feeling fairly stressed out and so I was looking for a good/healthy/easy/comforting recipe.  I found it.  I have had these guys bookmarked for quite some time, and tonight seems to be the perfect time to make them.  Not only are they named after Lunch Ladies, which reminds me of school, but they look fantastic and use oil instead of butter.  I was also craving trail-mix and so I decided to mix that in instead of the chocolate chips. However, I was nervous that people who aren't craving trail-mix wouldn't be a fan and I made another batch with white chocolate and semi sweet chocolate chips...it was one of those nights.


I can't wait to munch on these guys while trying to figure out how to teach my students a fairly difficult concept without scaring them too much.  Any suggestions?

Lunch Lady Cookie Bars (adapted from Taste and Tell)


Ingredients:
2 1/2 cups flour
1 tsp baking soda
3/4 tsp salt
1/2 tsp cinnamon
1 cup canola oil
1 cup brown sugar
1/2 cup sugar
2 eggs
1 tsp vanilla
1 cup trail-mix or other mix-in (I used Black and White Mix for one batch and white chocolate/semi-sweet chocolate for the other)


Directions:
1. Preheat oven to 350 degrees and grease a 9x13 inch baking pan.
2. In a medium bowl, combine flour, baking soda, salt, and cinnamon.
3. In a large bowl, combine oil, brown sugar and sugar.  Mix well.  Mix in eggs, one at a time, until incorporated. Stir in vanilla.  Slowly stir in the dry ingredients.  Mix in 3/4 cup of the trail-mix.
4. Spread the mixture evenly in the pan and sprinkle the rest of the trail-mix on top.  Bake for 18-22 minutes.
Enjoy :)


Saturday, March 17, 2012

Tipsy Dark Chocolate Pecan Pie

Happy St. Patrick's Day! This recipe was for Pi Day last week, but here is the post (finally!).  Also, what better way to celebrate St. Patty's Day than with a boozy pie recipe?  I can't think of anything! This pie was insanely good and after seeing what went into it, I wasn't surprised.  Everyone was a big fan.  Top it off with a healthy dose of whipped cream and you are all set!  Enjoy!

Shane demonstrating how much whipped cream is appropriate 
My St. Patrick's Day is going to be decently low-key.  However, it will be celebrated! My parents are coming to visit me and see me in my OPTIMA Dance Show.  OPTIMA is a dance organization at the university where great dancers and great choreographers come together and put on a fantastic show.  If you are in the Madison area, I highly recommend coming to the show tonight! It is at the Memorial Union and it is FREE! Yep, totally free.  So, if you are looking to enhance your St. Patrick's Day plans with some dance, come see the show! Also, the show is full of food bloggers! How crazy is that? Me, Megan at A Dash of Megnut, and Melanie at Melanie's Mixtures are all in the show! It is going to be amazing!

Super fun dance clump :)
Tipsy Dark Chocolate Pecan Pie (inspired by Une Gamine dans la Cuisine)


Ingredients:
For the crust:
1 1/4 cups flour
1/2 tbsp sugar
1/4 tsp salt
1/2 cup cold, unsalted butter, cut into 1 inch cubes
1 tsp lemon juice
3 tbsp ice water
For the filling:
1 1/2 cups chopped pecans
3/4 cup bittersweet chocolate chips, melted
1 cup dark corn syrup
1/2 cup sugar
1/2 cup dark brown sugar
1/4 cup dark rum
4 eggs
1/4 cup unsalted butter, melted
2 tsp cornmeal
1/2 tsp salt

Directions:
1. Make the crust: Whisk flour, sugar, and salt in a large bowl.  Whisk in butter until mixture starts to resemble crumbly, wet sand. Add lemon juice and water and mix until dough comes together. Add a little water if dough is too dry.  Form into a round disk and wrap in plastic wrap.  Refrigerate for at least 2 hours or up to a day.
2.  On a lightly floured surface, roll out dough into a 13 inch round.  Place in a 9 inch pie pan and trim the overhanging dough.  Preheat oven to 325 degrees.
3. Sprinkle the pecans evenly in the bottom of the crust.  Pour the melted chocolate over the pecans.  (To melt the chocolate: microwave in 30 second intervals, stirring in between, until melted.  Let cool slightly before pouring into crust).
4. In a large saucepan, combine corn syrup, sugars, and rum.  Bring to a boil over medium heat and cook, stirring constantly, for about 3 minutes.  Remove from heat.
5. In a large bowl, mix the eggs, melted butter, cornmeal, and salt.  Whisking constantly, slowly add the hot rum mixture.  Add about 1/4, combine, and then repeat.  Once fully combined, pour over the chocolate and pecans.
6. Bake the pie for 55 minutes or until center is set.  If the crust browns too quickly, cover with foil or a pie shield.  Let cool completely.
Enjoy :)

Friday, March 16, 2012

Dark Chocolate Pecan Pie Cookie Cups

Today was such a lovely day! Brian is visiting me because he is on spring break (lucky!) and we are having a great time enjoying the fantastic Wisconsin weather.  Today we woke up and went for a four mile run!  We ran to the Henry Vilas Zoo.  If you are ever in Madison I highly recommend it! It is completely free and so fun! After walking around the zoo, we came back home and had a great lunch at Med Cafe.  It was cheap and fantastic.  Best falafel I have ever had! Then, I, unfortunately, had to work.  Now, it's time to get ready for my dance show! I just love Madison in the springtime and I am so glad that I get to share it with Brian!

This post would not be completely without one of my Pi Day recipes.  Here it goes: the third pie that I made for the School of Ed was not really a pie...It was a cookie cup pie! The recipe sounded amazing and did not take nearly as long to make as a traditional pie.  They were super yummy too!

Dark Chocolate Pecan Pie Cooke Cups (inspired by Easybaked)


Ingredients:
1 16.5 oz tube of refrigerated sugar cookie dough
2 cups pecan halves
2/3 cup bittersweet chocolate chips, melted
1 tbsp dark corn syrup
1/4 cup heavy whipping cream

Directions:
1. Preheat oven to 350 degrees.
2. Spoon 1 tbsp of cookie dough into mini muffin pan wells.  Press cookie into each well and up the sides. Place 1 pecan half in each cup.
3. Chop 1 cup of pecan halves into small pieces.  In a large bowl, mix chopped pecans, melted chocolate, corn syrup and whipped cream.  Using a plastic bag with 1 corner cut off, pipe the filling into the cookie cups. Top with another pecan half.
4. Bake for 16-18 minutes.  Cookie dough should be golden.  Let cool completely before gently twisting the cookie cups out of the pan.
Enjoy :)

Also, check out this hilarious photo:

You just never know what you are going to see at the zoo...

;)

Wednesday, March 14, 2012

Mini Dutch Apple Pie

Today was Pi Day and for at Future Math Teacher, this is a big deal.  Plus, as we all know, I love to bake.  Basically today is one of the best days of the year in my eyes.  I wanted to bring in a treat for my students in my math classes at practicum.  At first, I was going to make a few pies, but then I found this recipe!

My students loved them! It was the perfect way to celebrate this wonderful math holiday and show my students how much I appreciate having them around to work with.  No one teaches you how to be a teacher better than the students.

Mini Dutch Apple Pie (Inspired by Some the Wiser)


Ingredients:
For the crust:
2 2/3 cups flour
1 cup cold, unsalted butter, cut into 1 inch cubes
6 oz low-fat cream cheese
2 egg yolks
For the filling:
7-8 medium, Granny Smith Apples
1 cup sugar
4 tbsp flour
1/2 tsp cinnamon
1/4 tsp nutmeg
1 tsp lemon juice
For the topping:
1/2 cup flour
4 tbsp brown sugar
1/2 cup unsalted butter, softened
1 tsp cinnamon

Directions:
Preheat the oven to 375 degrees.
1. Make the crust: Whisk flour, butter, and cream cheese until mixture resembles clumpy, wet sand.  Add egg yolk and whisk until dough comes together.  Add a little cold water if dough is too dry.
2. Pull off clumps of dough and press evenly into the wells of a mini muffin pan (you should have enough for 48 mini pies).  Place prepared pans in fridge to cool.  Also place extra dough in fridge to cool if you are like me and only have 1 mini muffin pan.
3. Peel, core, quarter, and thinly slice apples.  Mix all ingredients together in a large bowl.
4. Using a mixer, mix all the topping ingredients together until well combined.
5. Prepare mini pies by filling each muffin well with apple filling and then placing some of the topping on top.  Bake for 25 minutes, or until topping and crust is golden.  Refrigerate the apple filling if you need to wait for the first batch to finish.
Enjoy :)


Cheddar Apple Pie

Here is the second pie for PI Day (also known as National CollegeCulinista Day).  This one is really exciting.  I'm not saying that Red Velvet Pudding Pie isn't exciting, but it already sounds amazing.  Cheddar apple pie sounds a little scary.  However, the magic is that the cheddar is in the crust! Genius! I love cheese and apples and this combo sounds great! This one is also going to the school of education for snack time.

BIG shout-out to Shane and Margo for helping me with this one.  They cut apples like pros and we had a lot of fun listening to music and hanging out.  I also made this pie slightly ahead of time as it had to cool for a day.


Cheddar Apple Pie (inspired by Gastronome Tart)
Oven-ready! 
Pie shield! So cute!


Ingredients:
For the crust:
2 1/2 cups flour
1 tsp salt
1 tbsp sugar
3/4 cup unsalted butter, very cold, cut into 1 inch cubes
1 1/2 cups shredded, light, cheddar cheese
1/4-1/2 cup ice water
For the filling:
1/4 cup flour, plus more for dusting
2 tbsp lemon juice
4 lbs. Granny Smith Apples (about 7 large ones)
3/4 cup sugar
1 tsp cinnamon
1/2 tsp nutmeg
1/2 tsp salt

Directions:
1. Make the crust: whisk the flour, salt, and sugar.  Add in the butter and beat until it looks like clumpy, wet sand.  Whisk in the cheese. Whisk in 1/4 cup water so that dough comes together.  If it is too dry continue to add water 1 tbsp at a time.  Divide the dough in half, form into two disks, wrap in plastic wrap, and refrigerate for at least 1 hour or up to a day.
2. Make the pie: Preheat oven to 425 degrees. On a lightly floured surface, roll out the dough disks into 13 inch rounds.  Place one on a baking sheet lined with parchment paper and place back in fridge.  Place other in a 9 inch pie pan and fit to the pan.  Cut off overhanging dough.
3. Place lemon juice in a large bowl.  Peel, core, and quarter the apples, thinly slice. Place apples in the lemon juice and toss to combine.  Add flour, sugar, cinnamon, nutmeg, and salt.  Toss to combine.
4. Fill bottom crust with apple mixture.  Pile up the apples in the center.  Get the top crust out of the fridge.  Lightly brush the edge of the bottom crust with water and then place the top crust over the pie.  Trim the edges to a 1 inch overhang and fold over the dough.  Press down on the edge with a fork and work your way around the pie to seal it. Cut about 5 small slits in the top of the pie to allow steam to escape.
5. Bake at 425 for 20 minutes with pie on the lowest oven rack.  You may want to place the pie on a baking sheet as well to prevent any oven mess. After 20 minutes, reduce heat to 375 and continue to bake for 60-70 minutes.  The crust should be golden and the juices will be bubbling.  If the crust browns too fast, you can cover it in foil or use a "pie shield."

Note: I just got a pie shield! It's fantastic.  It's so much easier to use than foil, which can fall off or not cover the pie well.  It was also super cheap...just an idea if you plan on making a bunch of pies :)

When the pie is done, let it cool completely for at least 4 hours.  I made this guy way ahead of time, let it cool for day, and then refrigerated it for a day before leaving it out the night before serving it.

Enjoy :)