Showing posts with label homemade. Show all posts

Thursday, April 28, 2016

Whole Wheat Buttermilk Biscuits

I just finished my last training run for my marathon.  This week was sort of silly, but it was the final week of taper so really it was just about staying loose and feeling comfortable.  At this point in training, you are totally ready for the marathon so this week I just ran 3, 3, and then 2.  I don't want to tire myself out and I want to stay ready.  I just finished my 2 miles and I feel great! I am nervous, but so excited.

In honor of traveling to Nashville for the weekend, I decided to share a recipe for some good-old biscuits.  I saw the recipe on Cook's Illustrated and then I adapted it to use my favorite whole wheat flour.  They came out AMAZING! I ate these with everything! Chilli, butter and jelly, some peanut butter, anything!  They were flaky and super tasty and I was in love.

Whole Wheat Buttermilk Biscuits

Ingredients:
3 cups King Arthur White Whole Wheat Flour
2 tbsp sugar
4 tsp baking powder
1/2 tsp baking soda
1 1/2 tsp kosher salt
16 tbsp unsalted butter, frozen for about 20 minutes
1 1/4 cups light buttermilk, cold

Directions:
1. Preheat oven to 400 and line a baking sheet with parchment paper.
2. In a large bowl, toss the flour, sugar, baking powder, baking soda, and salt.  Coat the butter with some of the flour mixture and then using a cheese grater, grate 14 tbsp of butter into the flour mixture.  Toss to combine.
3. Pour in the buttermilk and using a spatula, fold until it is combine.
4. Dump mixture out onto a well-floured surface and use your hands to shape the mixture into a rough square.  Roll the mixture out using a rolling pin (or if you're me, a wine bottle!).  You want to create about a 12 by 9 inch rectangle.  Then, fold this into thirds like a business letter about to go into an envelope.  Then, roll it out the perpendicular (see? math!) direction from where you rolled before into a 12 by 9 inch rectangle and then fold into thirds again.  Continue to do this for a total of 5 folds.

5. Roll the dough out into a square so that the dough is about 1 inch thick.  Cut into squares using a sharp knife.  Place the biscuits on the prepared baking sheet.
6. Melt the last 2 tbsp of butter and brush the tops of each biscuit with butter.

7. Place on the upper-middle rack of your oven and bake for 25-30 minutes.   Biscuits should be golden.

Enjoy :)

Saturday, November 17, 2012

Golden Snitch Cake Pops

The grand finale of the Thanksgiving Feast-Harry Potter Style had to be one epic dessert.  I mean, I was in charge of dessert, and I was truly concerned with coming up with something good.

I knew about cake pops, I had seen cake pops, and I had eaten cake pops, but I had never made my own.  I saw pictures on Pintrest of Golden Snitch Cake Pops and I just knew that I had to make them.  They would be the perfect dessert for this meal, plus I could make enough for 30-40 people easily.  I investigated many designs and after long consideration, I came up with a great combination of cake, frosting, and design.  Check it out!

Golden Snitch Cake Pops
 Ingredients:
1 batch of Homemade Yellow Cake (recipe follows)
1 batch of Buttercream Frosting (recipe follows)
3 bags of Wilton Yellow Chocolates
16-20 oz Marzipan
Popsicle sticks

Homemade Yellow Cake:
2 cups flour
1 1/2 cups sugar
1/2 cup powdered milk
1 tbsp baking powder
3/4 cup water
1 tsp vanilla
1/2 cup butter, softened
3 eggs

Directions:
1. Whisk dry ingredients together.  Beat in wet ingredients.  Pour into a 13 by 9 inch pan and bake at 350 for 35-40 minutes.

Vanilla Buttercream Frosting

Ingredients:
1 cup butter, softened
3 cups powdered sugar
2 tsp vanilla
2 tbsp half and half

Directions:
1. Beat butter until light and fluffy.  Slowly beat in the powdered sugar.  Beat in vanilla and half and half.  Continue to beat for a few minutes until fluffy.

Snitch Directions:
1. Make the cake, let cool.
2.  In a bowl, crumble the cake and mix in the frosting.  Cover and let sit in the fridge overnight.  This will make the cake balls much easier to work with.
3.  Melt the chocolates in a microwave safe bowl.  Simply microwave for 30 second intervals, stirring in between, until melted.
4.  Form the cake balls into round balls that fit in the the center of your palm.  Stick a popsicle in the chocolate so that you get a little on the end and then stick into the cake.  The chocolate will help the popsicle stick stay.
5.  Dip the cake balls into the chocolate so that they are evenly covered and place on wax paper to harden.
6.  Roll out the marzipan with powdered sugar.  Cut out your wings.  I made tear-drop shaped wings.  7.  Use a toothpick to create holes in both sides of the cake pops.
8.  To stick the wings in, dip the end you are going to place in the cake into the chocolate and then stick into the hole you created with the toothpick.  Hold for a few seconds to make sure it sticks.  Then place back on the wax paper.  Now they are ready to serve!

Enjoy :)

Saturday, November 10, 2012

Caramel Apples

The Little Sisters of Delta Theta Sigma are some of my favorite people on this campus.  I love this organization and I love all the great ladies I have met in this group.  This is my last semester being "active" with the group because of my student teaching in the Spring.  I am sad to be almost done with these girls, but I have decided to go out with a bang.


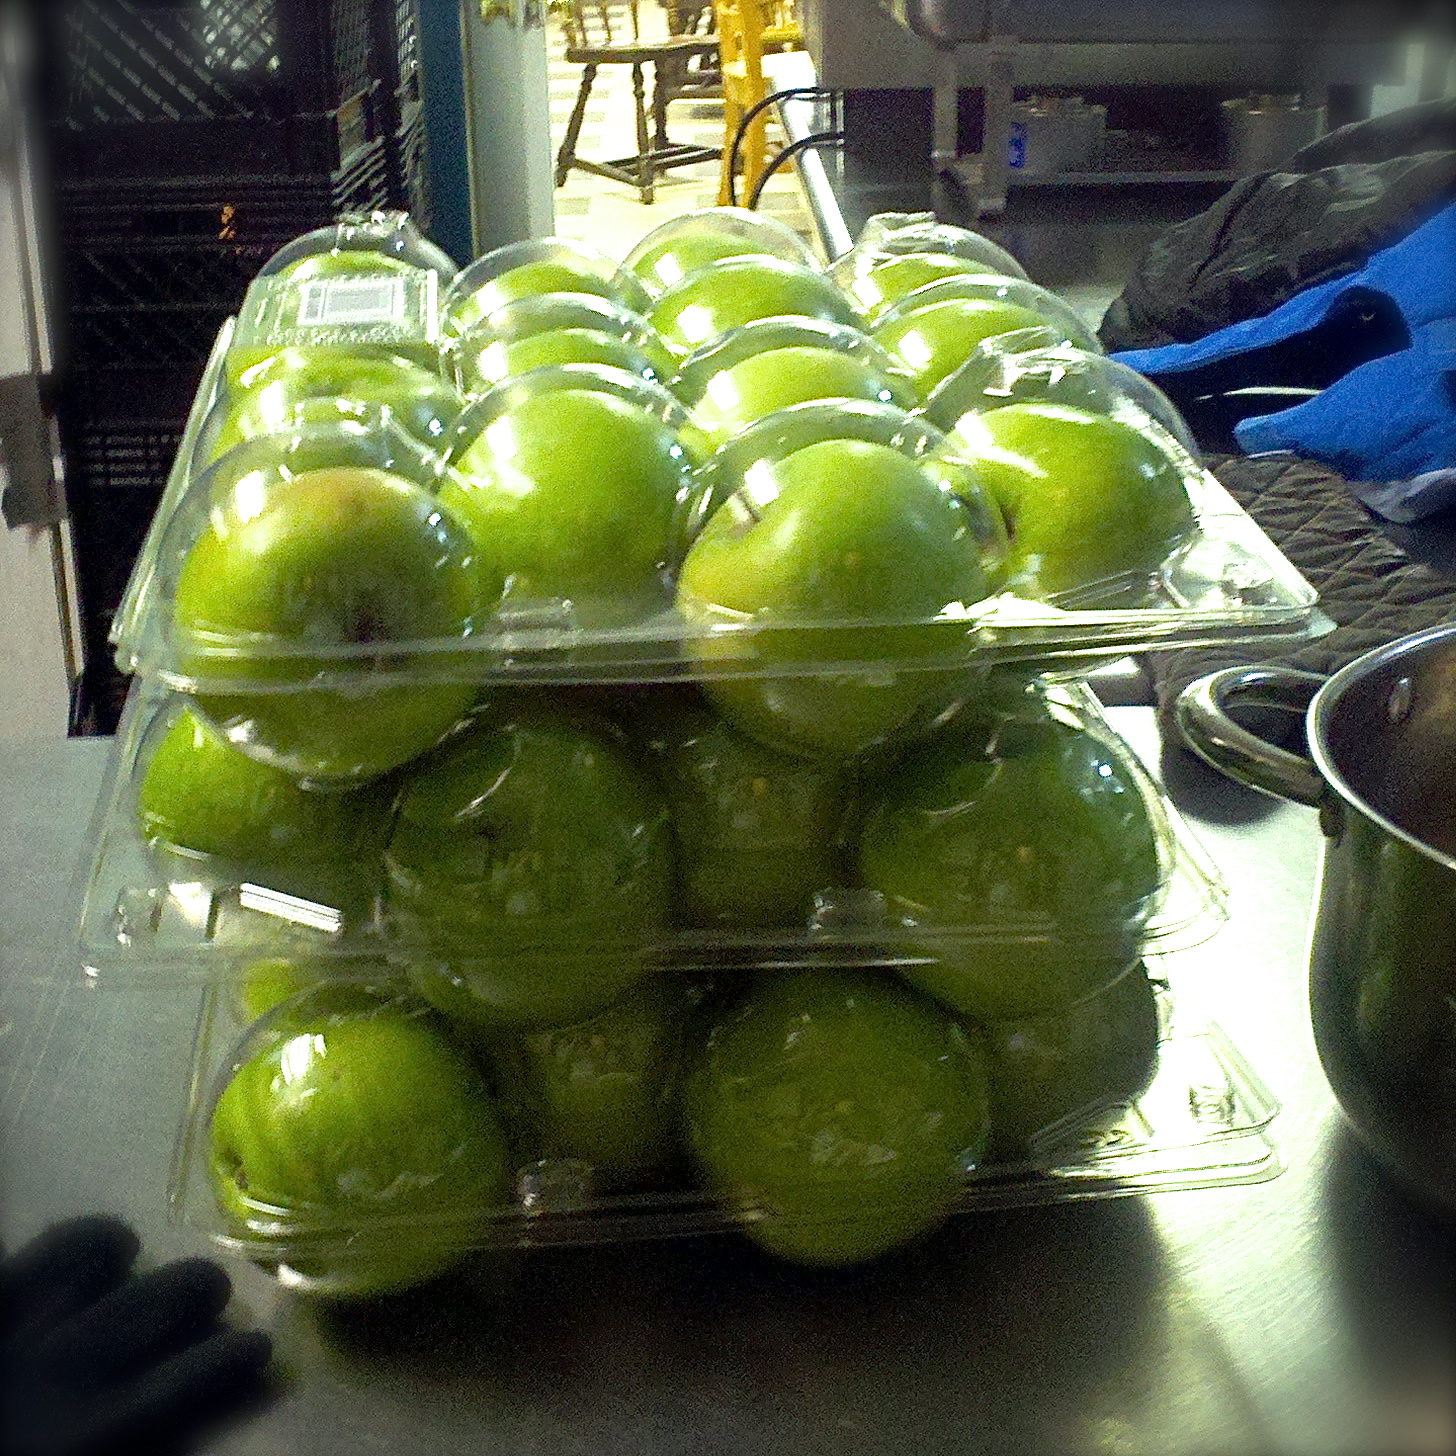
 This semester, I am Sister RA (where I make sure that people are feeling okay and helping out anyone who is going through any sort of hard times), I am Academic Chair (I reserve study rooms once a week and make sure that there are plenty of yummy baked goods for people to snack on as they study), and for the first time, I ran for Fundraising Chair.  I was really nervous about Fundraising Chair because it was something new and something I was not so sure I would be good at.  However, I have done my best to be creative and get us involved in various fundraisers to help support our group.  First we had a Cup Night, at a local bar/restaurant.  This helped to get us over $300!  I was so surprised at how successful it was and it gave me a lot of confidence that I could do a good job as Fundraising Chair.  Then, I wanted to do something that really reflected some of my strengths   So, we did a bake sale! And, not just any bake sale, but we made and decorated caramel apples and then sold them! It was great.  People loved the caramel apples and many people even gave us extra donations! Making and selling the apples was also a really fun way to bring the girls together!

Caramel Apples

Ingredients:
8 bags caramels
40 medium granny smith apples
peanuts, chopped
pecans, chopped
mini M&Ms
oreos, crumbled
reeses, chopped
sticks
sandwich bags


Directions:
1. Melt the caramels and 6-8 tbsb of water in a crockpot on medium until melted.
2.  Stick the sticks into the apples.  Dip them in the crockpot and then let the caramel drip off for a few seconds.  Then, take a knife and scrape off the bottom of the apple.  Then place on wax paper if leaving plain, or dip in your toppings.  This allows the caramel to form an even layer and not pool at the bottom.
3.  If using toppings, roll the dipped apple in the toppings of your choice and then place in the plastic bags to wrap up.

Enjoy :)
 

Sunday, November 4, 2012

Puff Pastry Apple Pie

I can't believe it is already November! Time is flying by.   This semester is going to be over before I know it and I will be done with middle school, off to high school, and into the last semester of my college experience.  I really can't believe it!

While it is overwhelming to me that I can't slow things down a bit, I am very excited for Thanksgiving and then Winter Break.  I have not been home with my family since the summer and I miss them.  I can't wait to take a break with them because time does seem to slow down a bit during breaks.  Instead of middle school, classes, DTS, homework, (some sleep in there), and seeing friends, I can just focus on hanging out with my family and relaxing a little.


Today I have a recipe that I think is just perfect for the upcoming holidays.  It is an apple pie, but it is baked in the shape of a wreath!  It's a beautiful dessert that would look amazing on any holiday table.  Plus, it is baked in a puff pastry so it is light and flaky.  I made homemade puff pastry and then adapted a recipe from Create with Mom for the Apple Pie Wreath.  Bri helped me make this awesome dessert and it was amazing!

Puff Pastry Apple Pie 


Ingredients:
puff pastry
3 apples
3 tbsp brown sugar
2 tbsp flour
1 tbsp cinnamon
dash of nutmeg
3 squirts of lemon juice
1 egg

Directions:
1.  Preheat oven to 375 and line a glass baking dish with parchment paper.
2.  Peel and core the apples and then slice into 1/4-1/2 inch thick slices.  Place in a bowl with the brown sugar, flour, cinnamon, nutmeg, and lemon juice.  Toss to combine.
3.  Roll out your puff pastry on a lightly floured surface so that you have a long rectangle, about 2 feet long and 5 inches wide.  Place the apple mixture along the middle of the puff pastry and then fold up the sides of the pastry to cover the apples  Pinch the pastry together so that you have a log of apples.  Take both ends of the log and bring together to form the wreath.  Pinch the ends together.  Place the wreath in the prepared pan.
4.  Lightly beat the egg and then brush it over the entire pastry.  Then, take a knife and cut slits in the pastry to allow steam to escape while baking.
5.  Bake for 30-35 minutes or until pastry is lightly browned.


modeling with my dessert :)

Enjoy :)

Thursday, October 4, 2012

Crazy Cookie Cupcakes

It's time for yet another Foodie Friends Friday! That means its the end of one crazy week.

My student teaching experience is fairly difficult.  I am in a rather rough classroom and I have never experienced anything like this before.  I am grateful for the experience, but I am learning first hand how hard it is to focus on good teaching when you are so preoccupied with bad behavior.  Typically, I just don't know where to draw the line.  When do I redirect? When does the behavior become so bad that they need to be sent out of the room?  It's really tricky especially when you have no prior experience!  Monday was just plain nuts, Tuesday was a tad better, Wednesday I got observed so I was a nervous wreck, and by Thursday, I was just excited for Friday!  Thursday was a review day and today is a test!

Assessments are interesting because I finally get to see where the students are in terms of understanding.  Sometimes with all the craziness that can happen in that classroom, I find it hard to gage how quieter students are feeling.  Also, many times I have been pleasantly surprised by the tests! We use standards based grading and I like it because then I can truly assess student understanding instead of simply right or wrong answers.  This type of grading system requires me to really think about what I want the students to understand.  What are the essential concepts and what should be the enduring understanding?  I find this to be really great practice.

So, after a crazy week, I can't wait for another Foodie Friends Friday and this Friday I am sharing a crazy recipe: Crazy Cookie Cupcakes.  There are oreos on the bottom, cookie dough in the middle, and cooking dough frosting slathered on top.  This is one crazy cupcake!  I got the idea from Cookies & Cups and then I adapted the frosting and made my own homemade yellow cake mix from a recipe at Chickens in the Road.  I made mini cupcakes and I was able to make about 72 mini cupcakes.  If you make big cupcakes, you will probably make around 24-30.


Crazy Cookie Cupcakes


Ingredients:
24-30 oreos (whole for big cupcakes or crumbled for mini)
Homemade Cake Mix:
2 cups flour
1 1/2 cups sugar
1 tbsp baking powder
1/2 cup non-fat dry milk
3/4 cup water
1 tsp vanilla
1/2 cup unsalted butter, softened
3 eggs
Cookie Dough Filling:
1 cup unsalted butter, softened
1 cup brown sugar
1/2 cup sugar
1/4 cup skim milk
2 tsp vanilla
2 1/2 cups flour
1 tsp salt
1 cup mini chocolate chips
Cookie Dough Frosting:
1/2 cup unsalted butter, softened
1/2 cup brown sugar
1/2 cup sugar
1 tsp vanilla
1 cup flour
1/2 tsp salt
2-4 tbsp milk

Directions:
1. Make the cookie dough filling: beat the butter, brown sugar, and sugar together until creamy.  Beat in the milk and vanilla until well combined.  Beat in the flour and salt until just combined.  Stir in the chocolate chips.  Form tbsp sized balls of cookie dough and place on a pan lined with parchment paper.  Freeze for at least 1 hour.
2. Preheat oven to 350 and line your cupcake pans with liners.  For mini cupcakes, sprinkle a layer of crumbed oreos into each cupcake.  For large cupcakes, simply place an oreo into each cupcake.

3. Make the cake batter: In a medium bowl, whisk the flour, sugar, baking powder, and dry milk together.  Beat in the water, butter, vanilla, and eggs until well combined. Set aside.
4. Fill each cupcake well with batter until 1/2 full.  Place a frozen cookie dough ball into each cupcake well.
5.  Bake for about 18-20 minutes.  Let cool completely.

6. Make the frosting: beat the butter and both sugars together until light and fluffy.  Beat in the vanilla and then the flour/salt.  Start with 2 tbsp of milk and add more as needed until you have the desired consistency.  Frost the cooled cupcakes and sprinkle the tops with chocolate chips!

Enjoy :)


Onto the business/fun stuff! Last week these three lucky winners won canister labels from A Mustard Seed Dream:
1. Marlys F.
2. Danielle
3. Marsha J.

And here are the winner's from last week's party!

Most Votes:


Most Clicked:


This week is sponsored by The Lovebug Collection and three randomly picked, lucky winners will win a Foodie Headband!

But first, here are this week's co-hosts:

Foodie Friends Friday http://www.foodiefriendsfriday.com
Tracy at Busy Vegetarian Mom http://www.busyvegetarianmom.com
Marlys at This and That  http://marlys-thisandthat.blogspot.com/
Lois at  Walking on Sunshine http://wifeofthecolonel.blogspot.com/
Lindsey at Family Food Finds  http://www.familyfoodfinds.com
Cindy at Cindys Recipes and Writings  http://www.cindysrecipesandwritings.com
Michelle at  From Calculus to Cupcakes http://www.fromcalculustocupcakes.blogspot.com
Cynthia at Feeding Big  http://www.feedingbig.blogspot.com
Jodie at Binomial Baker http://www.binomialbaker.blogspot.com
R Dawn at Spatulas on Parade http://www.spatulasonparade.blogspot.com
Angie at A lil Country Sugar http://www.alilcountrysugar.blogspot.com
Erika at Chef Picky Kid http://www.chefpickykid.com
Amber at Mamas Blissful Bites http://www.mamasblissfulbites.com
a Rafflecopter giveaway

Monday, February 6, 2012

Homemade Lemon Gnocchi with a Spinach and Peas Sauce


I am in St. Louis for the weekend.  St. Louis is a great city and since Brian goes to school here I have gotten to see a lot of it.  Last night we went to this great restaurant called Bailey’s Chocolate Bar.  This place was fantastic.  Quite appropriately, the menu starts off with the dessert section and then moves to appetizers and entrees.  How could I not love this place? Instead of putting bread out on the table, they have cookies and they have a HUGE drink menu full of alcoholic and non-alcoholic sweet drinks.  Dinner and (not surprisingly) dessert were fantastic. 


Seriously great chocolatini
For tonight, we are making our own dinner.  Brian and I love to cook together and find new and exciting recipes to try out.  Isn’t that just adorable?  Anyways, I spent some time browsing epicurious and came across this fun little Valentine’s Day Menu Quiz.  You take this quiz and it tells you what the perfect menu is for you and your significant other.  I thought it was pretty silly, but the menu that it came up with actually sounded great.  I did not really feel like making the dessert, plus I had those mine heart shaped cheesecake pans, and so we decided to just make the entrée portion: Lemon Spinach Gnocchi.  We also decided to try making our own gnocchi.  Don’t worry though; we bought some gnocchi just in case the homemade stuff didn’t go according to plan J.

Homemade Lemon Gnocchi with Spinach and Peas (adapted from BLOG and Epicurious)

Make the Gnocchi:

Ingredients:
2 pounds Russet Potatoes (about 4)
1 egg, beaten
3/4 cup plus 1 tbsp flour, plus more for dusting
1 tsp salt, plus more for cooking


Directions:
1. Preheat the oven to 450 degrees.  Microwave the potatoes on high for 5 minutes.  Then, turn them over and microwave for another 5 minutes or until the ends start to soften.
2. Place potatoes directly on oven rack and bake 18-20 minutes or until you can easily slide a fork in and out of them.
3. Once potatoes are done, immediately peel them and place unpeeled potatoes in a bowl.  We found that the skins just sort of fell off and we ended up scooping potato out of the skin. Once in a bowl, use an electric mixer or potato masher and mash the potatoes. Spread mashed potatoes out on a baking sheet (we lined ours with parchment paper) and allow to cool for about 5 minute
4.  Scoop 2 cups of potatoes into a bowl.  You may have leftover potato, we didn’t, but don’t add it to the bowl.  Top warm potatoes with the beaten egg and using a fork mix until just combined.  Next, top with the flour and salt, and mix until no plain pockets of flour exist.  Don’t over mix.  The batter will not come together and will look crumbly.
5.  Lightly flour a clean surface and knead the dough until it comes together and appears smooth, about a minute.  Form into a ball and slice into 8 pieces.  Generously flour a baking sheet and, using one piece of dough at a time, roll the dough out into a long rope about ½ inch thick. Repeat with all 8 pieces.  Then, cut the rope into about ½ to 1 inch pieces.  You can leave the gnocchi like this, or using a fork, you can form the ridges as follows:
6.  Using a fork, place a piece of gnocchi between the back of the fork and your thumb and then roll the gnocchi along the fork.  You may need to use a fairly large fork.  This will create the traditional ridges!

Now, you can make the gnocchi right away, or place gnocchi on a baking sheet so that they are not touching and freeze them.  Once frozen you can transfer them to a sealed bag for future use.

We made ours right away:

Lemon with Spinach and Peas Sauce

Ingredients:
1 cup frozen baby peas (not thawed)
½ cup heavy cream
¼ tsp dried hot red pepper flakes
1 garlic clove, smashed
¼ tsp salt
3 cups packed baby spinach
Zest of one lemon
Juice of one lemon
1 pound of gnocchi (the homemade stuff or store bought if all the above stuff is too much for you)
¼ cup of fresh, shredded parmesan


Directions:
1. Bring a large pot of salted water to a boil.  Meanwhile, in a large skillet, simmer peas, cream, red pepper flakes, garlic and salt covered for about 5 minutes.
2. Add spinach and cook over medium heat, uncovered, stirring until the spinach is wilted. Remove from heat and stir in the lemon juice and lemon zest
3.  Cook gnocchi in the pot of boiling water: if using the homemade stuff, cook about half a batch at a time.  Gnocchi is done once all the pieces float to the top.  Using a strainer, scoop the gnocchi out of the pot and place into a large bowl.  Then, make the other half the same way.  Reserve ½ cup of cooking water.
4. Pour the sauce over the gnocchi and toss to coat.  Add about ½ cup of pasta cooking water to thin out the sauce.  Add more if you like. Top with the cheese.
Enjoy J


Note: the red pepper in this recipe causes the sauce to have quite the kick.  We loved this, but if this is not to your taste, use less or leave it out.  Also, we added a little more lemon than what the original recipe called for and it was great!  
Success!