Pages

Thursday, April 30, 2015

Mexican Red Head Mules

It's time for another "Thirsty Thursday!"  A few weeks ago, I shared a post written by my little brother, Zack. He is the guy who was the bartender at our engagement party, and he has been coming up with some really great drinks.  This one is perfect to pair with a Tex-Mex meal, but I also feel like it should be sipped while on the beach.  

I traveled with my family to Arizona for Spring Break this year and this location is what inspired my brother to come up with this fun drink! Moscow Mules are a really trendy drink right now and this is just a spin on that! 

Mexican Red Head Mules


Ingredients:
(for one drink)
8 oz Ginger Beer
1 shot Silver Tequila
1 tsp lime juice
1/2 tsp grenadine

Directions:
Mix all ingredients together and serve over ice.  

Enjoy :) 

Wednesday, April 29, 2015

Wedding Planning Wednesday Part 3

Well, I'm a little bummed out today.  I didn't get selected for the lottery for the Chicago Marathon.  Now, I have to decide if I should just run a different marathon or if I want to raise $1000 for a charity and get a guaranteed entry into the Chicago Marathon.  What should I do????

On the other side of things, I have this really cool DIY project to share!  Wedding planning is going pretty well.  Last week, I shared our engagement party and how fantastic that all was.  This week, I am sharing a cool project that I made for our engagement party: Instagram Coasters!  There are tons of great sites that have instructions for this, but here is what I did and it worked out great!  This is such a cool project and I am totally not an artsy person, but I was able to do this!  These coasters take some time to dry, but otherwise the process is really quick and easy.  Plus, you get adorable coasters when you are done!  This was a great addition to the engagement party and people got to look at cute photos while enjoying their drinks! 

DIY Instagram Coasters

What you will need:
4 by 4 inch tiles (I found mine at Lowe's)
3.5 by 3.5 inch pictures printed out on regular paper
Delta Creative Gloss Ceramcoat Varnish
Acrylic spray
Wide paint brushes
Small, circular foam pads (4 per coaster)

Directions:
1. Clean your tiles and make sure they are completely dry.  
2. Brush a layer of Delta Creative Gloss Ceramcoat Varnish on the back of a picture and place in the middle of the tile.  
3.  Use a credit card or something similar to slide along the picture and make sure that the picture is completely flat and sticking to the tile.  This will get all the bubbles out and make sure that your picture stays put.  
4. Brush a thin layer of Delta Creative Gloss Ceramcoat Varnish over the picture so that it covers the picture and the edges of the tile.  At this point, let your tiles dry for about an hour.  Then, repeat this process with another layer of modge podge over the picture and tile.  You can repeat this step 2-3 times more to ensure your pictures stay stuck to the tile.
5.  Spray acrylic spray over the tiles.  This will give them a little shine.  You can repeat this as many times as you like to get the desired effect.  
6.  Once the coasters are totally dry, place the foam sticky circles on the backs so that your coasters won't scratch anything!


Enjoy :)

Tuesday, April 28, 2015

Whole Wheat Pretzel Bites

I'm gonna get a little math teacher-y today.  I decided to do a project with my students in my Geometry classes.  So far, it has been going pretty well and I am excited to see what the students do with their groups today!  Here is the project: Students are working on their own or in groups to design a container for a product.  They have picked a product and picked out a container design.  Now, they have to make sure the volume of the container is between 100 and 150 cubic inches and they have to calculate the surface area to figure out how much it will cost to put their container together.  Students also have to write a short paragraph explaining their product and they will physically build the container out of card-stock by Friday.  It is really neat to see them problem solving using the concepts of surface area and volume.  With the new Common Core standards, I wanted to include something in this curriculum at the end of the year to really get students using their math skills to problem solve.  I want them to feel like they have become mathematicians.  I can't wait to see what they come up with! 

I also have a delicious snack/appetizer recipe for today.  I am a little obsessed with pretzels.  I am also obsessed with brussel sprouts and anything buffalo, but that is another story.  Today is about pretzels.  I love snacking on pretzel thins, eating a sandwich on a pretzel roll, and at UW-Madison football games the soft pretzels are crazy good.  I believe that sometimes there is nothing better than a good soft pretzel.  So, I made some.  

Pretzel Bites
(adapted from Epicurious)


Ingredients:
1 cup warm water
1 envelope active dry yeast
3 cups flour (I used 2 cups of all-purpose and 1 cup of whole wheat)
1 tbsp kosher salt
2 tbsp light brown sugar
4 tbsp unsalted butter, softened
8 cups water
1/2 cup baking soda
kosher salt

Directions:
1. Measure out 1 cup of water and microwave until it is warm, but not hot.  Add in the yeast and let sit for 10 minutes.
2. In a large bowl, mix the flour, salt, and brown sugar.  Add in the butter and the yeast mixture and stir with a wooden spoon until the dough comes together.  
3. Knead for about 8 to 10 minutes or until you dough is elastic and bounces back when you poke it.  Place the dough in a lightly greased bowl and let sit for 2-3 hours.  I turn my oven on to 100 and place the dough inside with the door open.  The heat helps it rise.  Once it is doubled in size you are ready for the next step.
4.  Cut the dough into 4 equal pieces and roll each one out so that you have a long, thin rope.  Cut the rope into 1 inch pieces.  
5. Preheat oven to 450 degrees and grease 2 baking sheets.  
6. Pour the 8 cups of water into a pot with the baking soda and heat on high on the stove until it boils.  Drop your pretzel bites in the baking soda mixture (about 8 at a time) for 30 seconds - 1 minute and then place on the well greased baking sheets.  Sprinkle with kosher salt.
7. Bake for about 10 minutes or until the pretzels have started to brown.  Let cool and serve with whatever toppings you like! 

Enjoy :)


Monday, April 27, 2015

Crock Pot Vegetable Pot Pie

Happy Marathon Monday! For the past few weeks, I have shared some of my fun running experiences.  Today, I don't really have much to share.  I did realize that I am officially a crazy person as I ran 9 miles in the rain on Saturday.  Now, I know I could have waited for it to stop raining, but I really wanted to get my run in before 9 in the morning, so I just decided at 7 am that a 9 mile run in the rain wouldn't be that bad.  As I was running, it hit me: I am a little crazy.  And you know what, I am okay with that!  In other running news, I find out TOMORROW about the 2015 Chicago Marathon, so I'm gonna get back to you with that when I find out....

I just love Sundays.  I know it's Monday now, but Monday's are typically not my favorite so I'm gonna focus on Sunday for a little bit longer.  Here is a list of why Sundays are great:

1. I can sleep in
2. I go to a kickboxing class that absolutely kicks my butt
3. I have time to cook
4. GOT (aka Game of Thrones!!!!! yes, I am a total geek)

Those four reasons make Sundays absolutely fabulous.  Plus, there is a fifth reason, but it only happens one Sunday a month and that is: Book Club.  I am in a wonderful book club with a bunch of 20-something girls from the Chicago area.  We take turns hosting and we chat about a book that we read.  Every meeting, we pick a new book and a new place/date.  It is always a really nice time and I look forward to these meetings when they come around.  This book club was about Cutting for Stone, which I highly recommend.  And, our next book is The Rosie Project.  This last book club was also extra special since it was one of our members birthdays! I, of course, baked her a Monster Cake! Yum!

Besides book club, game of thrones, and sleep.  Cooking is one of the activities that make the weekend special.  Bri and I try to find a recipe to make over the weekend that will lend us leftovers during the week.  Today's recipe is perfect for that!  I was inspired by a recipe on My Recipes and then I adapted it from there.

Crock Pot Vegetable Pot Pie

Ingredients:
2 tbsp extra-virgin olive oil
2 potatoes, peeled and cut into 1 inch cubes
1 1/4 cups carrots, chopped
1/2 onion, chopped
3/4 cup celery, chopped
16 oz mushrooms, sliced
salt and pepper
4 garlic cloves, minced
5 tbsp whole wheat flour
3 cups skim milk
1 1/2 cups vegetable broth
2 cups frozen peas
1 1/2 tbsp chopped fresh thyme
16 oz package of frozen cauliflower
Topping:
1 2/3 cups whole wheat flour
1 1/2 tsp baking powder
3/4 tsp baking soda
1/8 tsp salt
1 tsp fresh black pepper
4 1/2 tsp unsalted butter, cubed
1/2 cup grated parmesan cheese
3 tsp chopped fresh chives
1 cup low-fat buttermilk

Directions:
1. Heat about 1 tsp of olive oil in a skillet over medium heat.  Add in the potatoes, carrots, onion, celery, and mushrooms.  Season with salt and pepper.  Cook for about 5 minutes.  Then, add in the garlic and cook for an additional few minutes.  Pour vegetables into your crock pot.
2. Put 1 1/2 tbsp of olive oil into your skillet and heat over medium heat.  Add in the flour and whisk until it starts to brown.  Pour in the milk and vegetable broth and cook for about 5 minutes while whisking.  Pour sauce into the slow cooker and add in the frozen peas, cauliflower, and thyme.  Cover and cook on low for 4 hours.
3. To make the topping, whisk the flour, baking soda, baking powder, salt, and pepper in a large bowl.  Cut in the butter until your mixture looks like coarse sand.  Stir in the cheese and chives.  Finally, stir in the buttermilk until your mixture just starts to look damp.
4. Once the veggies are done cooking, drop spoonfuls of the biscuit mixture over the top.  Turn up the heat on your crock pot to high and cook for an additional 1 and a half hours or until you biscuits are done.

Enjoy :)

Saturday, April 25, 2015

White Bean Verde Enchiladas

Today is one of my bestie's birthday!!! Happy birthday, Caryn!  To celebrate, we are going to dinner at this fun BYOB Mexican restaurant and then were probably gonna end up doing Karaoke after! I am so excited to celebrate with her and I even made a special birthday dessert!  I can't tell you about that because it is a surprise, but here's what I had going on in the kitchen last night:
Friday night cake baking :)
Last night was pretty chill and it was amazing! I baked, had a glass of wine, and whipped this yummy concoction up for dinner!  I mashed up an avocado with a few squirts of lime juice and some salt and pepper.  Then, I cooked a couple eggs to perfection and put everything on top of some toasted whole wheat toast.  Finally, a few dashes of Frank's Hot Sauce and I was ready for one amazing meal.  It was super simple and I know everyone really into this "toasts" craze.  This is a great recipe to try! 

Avocado Toast with an Over-Easy Egg
Finally, in honor of my excursion to a BYOP Mexican place, I am sharing with you a yummy Enchilada recipe! I am a huge fan of Enchiladas. We make them all the time over here.  This recipe was really easy, totally vegetarian, and super yummy.  Since I am in the mood for some Mexican food, I figured this was the perfect thing to share! 


White Bean Verde Enchiladas

Ingredients:8 large corn or flour tortillas
1 can verde enchilada sauce
2 cans cannellini beans, drained and rinsed
1 cup of your favorite guacamole
1 red pepper, sliced
1 cup shredded, light Mexican blend cheese
1 cup non-fat, greek yogurt (I love Chobani :))
2 tsp lime juice 

Directions:
1. Preheat oven to 350 and pour some verde enchilada sauce in the bottom of a 9 by 13 inch pan.
2. Dip each tortilla in the sauce so that it is mostly covered, then spread some beans, guacamole, a few pepper slices, and a sprinkle of cheese down the middle of the tortilla.  Wrap the tortilla and place seam down in the pan.  Repeat with all of your tortillas and filling ingredients.
3. Pour the rest of the verde enchilada sauce over the finished enchiladas and sprinkle with the rest of the cheese. 
4. Cover with foil and bake for 20 minutes.  Serve with a little greek yogurt and lime juice.

Enjoy :)


Friday, April 24, 2015

Vegetable Fajitas

Well, I just enjoyed some good ol' TGIT time with Grey's and Scandal.  I don't want to give anything away, but I am a little bit in shock...which is basically how I feel at the end of every Thursday after watching these shows.  I am also pretty pumped that tomorrow is FRIDAY.  And I can finally sleep in and enjoy some relaxation after a LONG week of school.

I am so excited to tell you about another great weeknight meal I have cooked up!  This recipe is so simple and you can make it with whatever you have in the kitchen.  It is a great recipe when you don't have a ton of time, but you want something delicious and healthy.

One of our favorite places to go to is Garcia's in the Lincoln Square area.  It is super yummy, they have great margaritas, and it is super reasonable.  Plus, you end up with leftovers for days.  One of my favorite dishes there is there Vegetarian Fajitas.  They throw in a ton of different vegetables and it is unpredictable every time!

Today, I was at school all day, took an hour train home, ran 4.5 miles and then just about crashed into the couch because I was tired, and I had to watch Grey's Anatomy and Scandal (of course).  Homemade Vegetable Fajitas were easy, quick, and absolutely perfect for dinner!

Vegetable Fajitas

Ingredients:
About 3 cups of vegetables
Here is what I used:
Squash, Zucchini, Mushrooms, Onions, Whole Kernel Corn and Red Peppers
4 cloves minced garlic
2 tsp cumin
pinch cayenne
olive oil
salt and pepper
corn or flour tortillas
Toppings:
Guacamole
Sour Cream/Greek Yogurt
Salsa
Shredded Cheese

Directions:
1. Chop vegetables and heat 2 tbsp of olive oil in a skillet over medium heat.
2. Add in the onions and garlic first and cook until the onions become translucent.  Add in the rest of the veggies and the seasonings and cook until they also become soft and translucent.
3. Create your fajitas with your tortillas and any toppings you want.

Enjoy :)

Ingredients:


Thursday, April 23, 2015

Apricot and Brie Stuffed Sweet Potato with an Egg

Every day, I take the train to school, then I take the train home, then I work out.  After all of this, the last thing I want to do is spend a ton of time cooking.  In fact, I'm usually so hungry that I just want to eat the first edible thing in sight.  I decided to buy some sweet potatoes after seeing some examples of stuffed potatoes on other blogs and making up some easy dinner recipe!  Here it is!

This stuffed sweet potato was absolute delish!  It has brie, apricot preserves, an over-easy egg, and a bit of hot sauce drizzled on top.  It was so freakin amazing that I couldn't wait to share!

Apricot and Brie Stuffed Sweet Potato with an Egg

Ingredients:
1 sweet potato
1 egg
2 tbsp apricot preserves
2 tbsp sliced brie cheese
2 tsp Frank's Hot Sauce
pepper

Directions:
1. Microwave your sweet potato for 5 minutes or until it can easily be pierced with a fork.  Cut the sweet potato down the middle.
2. Spread the apricot preserves on the inside of the sweet potato and place the cheese along the middle.  This will allow it to melt a little while you cook the egg.
3. In a pan, cook your egg to perfection and then place in the middle of the sweet potato.  
4. Top everything with a few drizzles of hot sauce and some fresh black pepper.
Enjoy :)

Wednesday, April 22, 2015

Wedding Planning Wednesday Part 2

The next big step in our wedding planning adventure was an Engagement Party!

Adorable Homemade Sign by my Mommy :)

My parents planned a lovely party for us that we had at their house.  There was great food ordered in from Salerno's di Lucca and Portillo's and desserts from Gotta Sweet Tooth.  There was also this AH-mazing red velvet (my favorite) cake from Bent Fork Bakery.  My mom and I also picked out some appetizers from local grocery stores and we were ready to go! 


Apples from Gotta Sweet Tooth
My little brother, the host of Thirsty Thursdays, was, of course, our bartender.  He came up with a great menu and provided the night with a lot of great drinks and fun!

Zack's Drink Menu
I had to wear a white dress and Bri and I even coordinated with him in a blue tie and me in my new blue shoes.  It was an amazing night with our friends and family and it made us so happy to see how much support and love we have behind us as we embark on our marriage! 
Our Bent Fork Bakery Cake


Tuesday, April 21, 2015

Mini Brown Sugar Cupcakes with Brown Sugar Peanut Butter Frosting

I have some pretty exciting news to share and it is not simply these gorgeous mini cupcakes!


Bri and I adopted a new kitty into our family!! Benny is now a big brother!  We found this amazing five-month old kitten through Hyde Park Cats and per a suggestion from our vet, we adopted him.  Benny has been a little hyperactive and crazy and we think its because he is young and we are not home very often.  So, we got a playmate for him!  Welcome to the family, Nigel!


And now, onto those cupcakes.  Mini cupcakes are pretty amazing plus they are a great way to celebrate our new little guy.  In fact, I have decided to eat healthy by only eating desserts that are mini or homemade.  Not sure this is considered a "diet," but at least it helps me focus on portion control without feeling like I'm really giving anything up.  And lets be honest, I don't think I can totally give up sweets.  I saw this recipe on How Sweet It Is and I simply adapted the cupcakes to include some slightly lighter ingredients and I made them mini which changes the baking time a bit.


Mini Brown Sugar Cupcakes with Brown Sugar Peanut Butter Frosting

Ingredients:
1 cup light brown sugar
1 egg
1 tbsp vanilla
3/4 cup skim milk
1/2 cup unsalted butter, at room temperature
1 cup flour
1/2 cup whole wheat flour
1 1/2 tsp baking soda
1/4 tsp baking powder
1/4 tsp sea salt
Frosting:
4 oz low-fat cream cheese
1/2 cup natural, creamy peanut butter (I love Skippy)
1 cup brown sugar
1 cup powdered sugar
2 tsp vanilla
skim milk, if needed

Directions:
1. Preheat oven to 350 and line 24 mini cupcake wells with cupcake liners.
2. In a large bowl, beat the brown sugar with unsalted butter.  Beat in the egg until well combined.
3. In a separate bowl, whisk the flours with the baking soda, baking powder, and salt.  Add 1/3 of this mixture to the wet ingredients and beat until just combined.  Add in about 1/2 of the milk and 1/2 tbsp of vanilla and beat to combine.  Repeat with the flour mixture, then the rest of the milk/vanilla and then end with the rest of the flour mixture.  Divide the batter into your cupcake pan so that each well is about 3/4 of the way full.
4. Bake at 350 for about 10-12 minutes.  Let cool completely.
5. To make the frosting, beat the cream cheese and peanut butter in a bowl until smooth.  Beat in the sugars and vanilla until creamy.  Add in a few tsp of milk if your mixture is too thick.  Frost those cupcakes!

Enjoy :)

Monday, April 20, 2015

Chicago Shamrock Shuffle 8K

I just got back from a 10.5 mile run.  I ran about 10 minute miles and it was beautiful out so I was a happy camper.  I did notice that my legs felt pretty stiff towards the end, but I think this is because it was my first double digit run in quite some time.  I have been so busy lately between Spring Break, parent conferences, and a weekend away that I haven't had a ton of time for running.  I was a little nervous about 10 miles after not running as much, but I did it!

My latest race was the Chicago Shamrock Shuffle.  This race is an 8K which means it is about 5 miles.  The Chicago race started and ended in Grant Park and was chilly, but still a really nice day.  I would recommend this race to anyone who has already run a 5K and is looking for a little challenge.  If you can do a 5K then you can totally do an 8K!  There are tons of good training schedules online so grab a friend or your headphones and get out there and jog!  Now that the weather is finally nice again there is no excuse not to try! There is the Cinco de Miler coming up that would be a great option! Starting in June, I will be training for the Rock and Roll Half Marathon.  So, if anyone out there is looking for a "training buddy" let me know! Here are some fun photos of my and my running buddy Alison after our Shamrock Shuffle!


great race! 

Saturday, April 18, 2015

Homemade Baked Onion Rings with Spicy Siracha Mayo

It's Saturday night in Chicago!  I love the weekends because Bri and I get to spend time together and try new restaurants/events around this awesome city.  This weekend we went to a new place near us called Gideon Welles.  It was pretty awesome!  They have a HUGE drink selection and their menu has a ton of diverse and yummy options.  We went with our friend Max and everyone thoroughly enjoyed their meal.  Bri said that he had the "best" mac and cheese of his life! (That is really saying something since he is a vegetarian and typically ends up with mac and cheese or something similar for his dinner option).  I loved my mediterranean wrap and Max had a great brisket sandwich.  We will definitely be heading back soon!

Today, I had to go to Springfield for a class that I am taking and present on a lesson that I will teach.  Springfield is about 3.5 hours away and this class lasted 3 hours.  So, this means I traveled for 7 hours just for a 3 hour class...This is not exactly how I would plan spending my Saturday.  However, Bri was a total trooper.  He decided to go with me because there is a sandwich shop in Springfield that he likes.  Yep, he drove 7 hours for a sandwich!  I had never been to this place, but I figured it must be excellent if he is willing to this out of his way for it.  The place is called Head West Sub Stop and instead of normal bread, they make all their subs on sweet bread.  If you're ever traveling through the great capitol of Illinois, you should def make this a stop! 

Along with all of our fun restaurant traveling, we have been cooking a lot as well.  Between Wisconsin going to the NCAA championship, baseball coming back, and the Blackhawks in the playoffs, we have been watching a lot of sports.  This means, that I have been craving a lot of sport related foods.  And, that is how these Baked Onion Rings with Spicy Siracha Mayo came about.  

Baked Onion Rings with Spicy Siracha Mayo

Ingredients:
1 onion, cut in half to pull the rings apart
2 cups low fat buttermilk
2 egg whites
pinch of cayenne pepper
1/2 cup whole wheat flour (or regular)
1/2 cup cornmeal
1 cup whole wheat breadcrumbs
1/2 tsp salt
1/4 tsp pepper
1/2 tsp paprika
Siracha Mayo (stir siracha into mayo)

Directions:
1. Place onion rings into a dish with edges.  Pour buttermilk over the rings and sprinkle the cayenne over the top.  Cover with saran wrap and let rest.  I was advised to let this sit for a long time, but I didn't have the time and they came out pretty good.  The longer you let the onions sit the better.  
2. Beat egg whites in a medium bowl.  
3. Mix the flour, cornmeal, and breadcrumbs in a separate bowl with the salt, pepper, and paprika.
4. Heat oven to 425 and line a baking sheet with parchment paper.  
5. Take the buttermilk soaked onion rings and dip them into the egg whites and then the breadcrumb mixture.  Place on baking sheet.
6. Bake for about 15 minutes before flipping the rings and baking for another 15 minutes.  
7.  Stir siracha into mayo for your dip.  Add more siracha for a spicier dip.

Enjoy :)

Monster Cookie Layer Bars

We just had parent-teacher conferences this past week and I can't believe that this means there are only 6 weeks until finals!!! My second year of teaching has just flown by!  Along with that, I have been having a great year with my co-teacher in Geometry and my Algebra Advance students are pretty awesome.  I can't believe they started off as freshmen and now they are like "grown up" sophomores!  This year has been so much smoother than my first one and I have been working hard to incorporate new lessons that are more investigative and model based.  I love that I feel confident enough to try new things and evaluate if they are successful.  I even brought in a GIANT gummy bear to show my students and talk about similarity ratios between the little gummy bears and the big guy.  Today, I am even presenting one of these lessons to a group of teachers!

Along with school ending, I am also getting ready for camp to begin! This is crazy!  I am so excited that summer is right around the corner.

To celebrate this excitement, I am going to share with you all a recipe for one yummy treat.  I love the idea of Monster Cookies because it means you can basically throw whatever you are craving into a cookie.  This recipe, which I adapted from The Girl Who Ate Everything, takes that idea to a whole new level.  Instead of all that work to drop cookies onto a cookie sheet, lets just dump it all into a pan and go with layers! I love combining salty with sweet so I went with some chocolatey things and pretzels and peanut butter.  You can use whatever toppings your little heart desires!

Monster Cookie Layer Bars

Ingredients:
1 1/2 cups graham cracker crumbs
1/2 cup unsalted butter
1 14 oz can of sweetened condensed milk (I used light)
3/4 cup old-fashioned oats
1 1/2 cups of the toppings you want

Directions:
1. Preheat oven to 350 and line a 9 by 13 inch pan with foil or parchment paper.  Spray the foil of parchment paper with nonstick cooking spray.
2. In a microwave safe bowl, melt the butter.  Mix the butter and graham cracker crumbs together and press evenly into the bottom of your pan.
3. Pour the sweetened condensed milk over the graham cracker crust and then sprinkle the oats and your toppings over the top.  Gently press this down into the sweetened condensed milk layer.
4. Bake for 20 minutes.  Let cool for 20 minutes and then use the foil to take the layers out of the pan to cool completely.

Enjoy :)

Thursday, April 16, 2015

Guest Blogger: Thirsty Thursdays by Zack

Today, I have a very special guest blogger!  I am pretty pumped about this.  It's my little brother!  When our spring breaks lined up this year, we spent some time hanging out.  I told him about how I really wanted to get my blog going again and he told me about how he wanted to be a bar tender.  I was like, hmmm....how can we combine both of these fun/fantastic ideas?  And here we are: Thirsty Thursdays by Zack!  The little bro is going to share with me drink ideas that he has and I am going to share them here! 

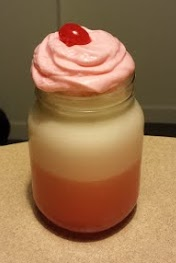
Z shared this recipe with me along with some cute photos.  He took this recipe from Cookin Bug, and jazzed it up into his own frozen version.  I give you: The Frozen Pineapple Almond Upside Down Cake! 

Frozen Pineapple Almond Upside Down Cake

Ingredients:
1 1/2 oz Cake Vodka
1 1/2 oz Amaretto
3 oz Pineapple Juice
1 Pineapple Slice
splash Grenadine
Strawberry Vodka Whipped Cream
1 Maraschino cherry

Directions:
1. Blend with ice: Cake Vodka, Amaretto, Pineapple Juice and Pineapple slice
2. Pour into glass
3. Add splash of grenadine
4. Stir gently to gradually combine grenadine with frozen drink
5. Top with whipped cream and a cherry

Enjoy :)

Wednesday, April 15, 2015

Wedding Planning Wednesdays Part 1

So, remember a while back when I had "big news"?  Well, Bri and I are so excited to be engaged and at the time it felt like we had forever to plan our wedding.  I know we still have tons of time, but we are slowing checking things off our wedding planning list in the hopes that we can be somewhat stress free about all of this and just have so much fun!

Today, I wanted to tell you about choosing a venue.  We live in Chicago so we basically have approximately a billion places to decide between.  Our ceremony and reception will take place at the same location and we set the date for August of 2016!  This means we have to go with a Sunday wedding because Jewish weddings can't take place until after sundown on a Saturday, which is pretty late for a starting time during August.  After our date was picked out, we got to work looking at venues.
Ceremony Room at Ravenswood Event Center
We traveled to six very different locations: The Women's Club of Evanston, The Metropolitan Club, The Ravenswood Event Center, The Renaissance Hotel, Salvage One, and The Bridgeport Art Center.  All of the venues were pretty amazing, but it became clear that we liked the places that were a little less traditional.  Women's Club had an amazing ballroom space with beautiful windows, but the only men's bathroom was in the basement.  The Metropolitan Club, in the Willis (it is still Sears to me) Tower, had phenomenal views, but parking was pretty pricy.  The Ravenswood Events Center had three really cool spaces on each floor with a gorgeous space for a ceremony, but they warned us it could get pretty warm in there during August.  The Renaissance Hotel had a huge ballroom and great deals on rooms, but was a little out of our budget.  Salvage One was the most funky as it is also an antiques store and we were unsure if it was too funky.   And finally, the Bridgeport Art Center had an amazing space with a great view of the Chicago Skyline.  Of these 6, Ravenswood Events Center, Salvage One, and Bridgeport became our top three.  And, after careful consideration, we decided on the Skyline Loft at the Bridgeport Art Center!

Skyline Loft - Our Venue! 
All of this venue shopping took place over two days.  This means I felt a little overwhelmed.  However, it was nice to compare such different spaces.  For example, I realized that I liked rooms with tall ceilings and windows.  This helped narrow down choices and start to figure out my wedding style.  Does anyone have any other suggestions for wedding planning in/around Chicago?

Tuesday, April 14, 2015

Buffalo Cauliflower Bites

I have been crazy into Buffalo flavor lately.  By lately, I mean pretty much for over a year.  This obsession has lead to some pretty fantastic food adventures.   For example, O'Shaughnessy's, a local Irish Pub, has a Buffalo Chicken sandwich that is amazing.  Also recently, I fell in love with the Buffalo Chicken Taco (yes, you read that right) at the Velvet Taco.  However, poor Bri is a vegetarian and so I usually try to cook mostly vegetarian at home.  I was intrigued by all those Buffalo "chicken" recipes out there and I was mostly skeptical that they would be any good.  But then, I decided to go for it.  I'll be honest, I like the chicken versions better, but this recipe was pretty good and it made Cauliflower taste phenomenal.  If you are a vegetarian, or if you are looking for a great side dish, or if you are like me and just wanna eat buffalo stuff all the time, you should probably make this immediately.

Buffalo Cauliflower Bites
(adapted from Sprinkled Side Up)


Ingredients:
1 whole head cauliflower
6 eggs
1 1/2 tsp garlic powder
1 tsp paprika
pinch cayenne powder
3/4 cup of your favorite hot sauce (I love Frank's traditional and Bri loves Frank's Siracha)
canola oil

Directions:
1. Cut off the cauliflower florets.  To do this, turn the whole thing upside down and trim off the leaves.  Then cut away florets (about 1 inch in size) and place into a bowl.
2. Heat a large pot of water until it boils.  Cook the cauliflower for about 10 minutes and then turn the heat off and cover for another 10 minutes.  Drain and set aside to cool for a bit.
3. Pour canola oil into a pan until it reaches about 1/4 inch up the side.  Heat over medium.
4. To make the egg wash, beat eggs in a large bowl and mix in the garlic powder, paprika, and cayenne.
5. Dip the cauliflower florets into the egg wash and then place in the oil.  Let fry for a few minutes and then flip for another few minutes.  Place finished florets on a plate with a paper towel to soak up the oil.  Continue with the rest of the cauliflower.
6. In a large bowl, pour the frank's hot sauce and mix in the florets so that they are coated. Serve with ranch or blue cheese dressing if you want!

Enjoy :)

Monday, April 13, 2015

Hot Chocolate Run

A while back, I did a series called "Half Marathon Mondays."  I was training for a half marathon and decided to log my progress as well as any other work out shenanigans I was up to.  Ever since running the Chicago Marathon back in October, I have continued to keep up my running and I want to share with you all my amazing experiences.  Reading running stories continues to motivate me to stay healthy and strong and I hope that people out there find that here!  The best way to keep up my running and stay motivated, has been signing up for other races with friends.  The Hot Chocolate Run was one of those races.


This race was incredible.  There were two options, the 5K or the 15K.  I don't think I've ever heard of any other 15K so I decided to do it.  Plus, after running 26.2 miles, 9.3 didn't seem so bad.  In fact, I barely trained.  This was not my brightest idea, but it ended up working out ok.  I ran the race with two other friends and we all finished with about a 10 minute mile pace.  Plus, along the way, the water stations also had treats like marshmallows, tootsie rolls, and pieces of chocolate!  At the finish, we got medals as well as a chocolate fondue goody bag with, of course, hot chocolate.  It was pretty darn adorable.

After the race, we celebrated with brunch at D4.  If you are ever in Chicago and staying in the downtown area, you should try this place for brunch.  It is a huge space and I have never had to wait very long and the food is just amazing!  We also had their signature bloody mary and it was fantastic. I can't think of a better way to celebrate a long run then an amazing meal!

Since that race, I have kept up a consistent running schedule.  During the week, I run three times.  I'll do two shorter runs (3 or 4 miles) and one longer run (5 or 6).  Then, on Saturdays, I always try to run at least 8 miles.  I am also going to a Zumba class once a week and trying to incorporate more strength training into my life.  This is where I am struggling because I just don't enjoy it as much while I'm doing it.  If anyone out there has any suggestions it would be much appreciated! After all, my wedding is on its way and I want to be in tip top shape :)

Sunday, April 12, 2015

Deconstructed Spring Lasagna

I have been promising big things for this blog for a while now, and now it is time to start following through on that! I miss blogging as much as I did in college and I am going to work on balancing my time better between school, working out, and cooking.  These are my favorite things and I want to make sure I give every single one attention! Any bloggers out there with tips on how to balance all of this?

Anyways, in Chicago, it is always exciting when those 60 degree temps finally roll around.  Everyone starts walking around in shorts and flip flops!  I know 60 isn't "hot," but after what feels like an eternity of winter, it is pretty exciting.  Yesterday, I went for an 8 mile run along the lakeshore path and it was just amazing to be outside and not feel sharp pains in my face as the wind hits me.  Plus, this weather means that summer is really right around the corner!

In honor of this amazing spring weather we are enjoying, I am sharing a delicious recipe for a Spring Lasagna.  I was inspired by How Sweet It Is and I was excited to try a lasagna without all the layering work.  This "lasagna" is actually deconstructed.  Your just throw everything into a pan all "willy nilly" and cook it just like that!  Also, I didn't use lasagna noodles, but you definitely can!  You can use whatever fillings your want.  I went with some vegetarian options so that Bri could enjoy, but meat lovers could do this as well!

Deconstructed Spring "Lasagna"


Ingredients:
12 oz whole wheat pasta
1 onion, sliced
4 cloves garlic, minced
1/2 cup asparagus, chopped
1/2 cup mushrooms, sliced
1/2 cup packed baby spinach
12 oz light fontina
1 cup shredded light mozzarella
1 cup pasta sauce (Your favorite)
salt and pepper
olive oil

Directions:
1. Preheat oven to 425 degrees.
2. Cook pasta noodles according to directions until al dente.  Drain and set aside.
3. In a large cast iron pan, heat a few tablespoons of olive oil over medium heat.  Add in the garlic and onion.  Cook until onion starts to become translucent and add in the mushrooms and asparagus.  Cook for about 5 minutes.  Add in the spinach and cook until spinach wilts.
4.  Pour in the pasta sauce and about half of the fontina cheese.  Stir to combine with the veggies.  Then, stir in the noodles.
5. Top everything with scoops of the rest of the fontina cheese and sprinkle with mozzarella.   Bake in the oven for about 15 minutes so that the cheese becomes all melty.

Enjoy :)

Saturday, April 4, 2015

Happy Passover!


Passover is here again and I just want to wish all my Jewish friends out there a nice pesach!  My favorite part of Passover, besides the seder with my family, is finding a good passover dessert.  Here are some of my favorite Passover recipes for sweets from past celebrations:

Flourless Chocolate Cake


Dark Chocolate Raspberry Macaroons

Gluten Free Nutella Brownies

What are some of your favorite Passover recipes?